 |
am2zzw00000629
REAR OUTER HANDLE REMOVAL/INSTALLATION [5HB]
id0914004326d4
1. Fully close the rear door glass.
2. Disconnect the negative battery cable.
3. Remove the sail inner garnish. (See SAIL INNER GARNISH REMOVAL/INSTALLATION.)
4. Remove the rear door trim. (See REAR DOOR TRIM REMOVAL/INSTALLATION.)
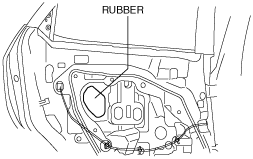
5. Remove the rubber.
am2zzw00000629
|
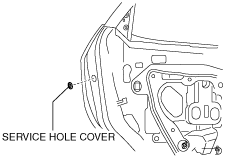
6. Remove the service hole cover.
am2zzw00000630
|
7. Remove the screw from the service hole.
am2zzw00000631
|
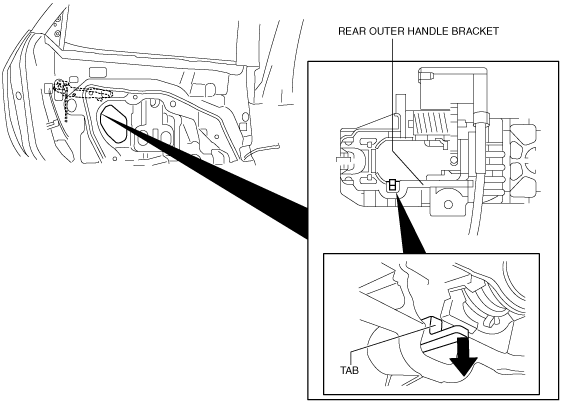
8. Press the tab on the rear outer handle bracket in the direction of the arrow.
am2zzw00000632
|
9. Maintaining the condition in procedure 8, remove the outer handle garnish.
am2zzw00000633
|
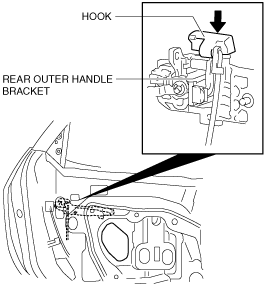
10. Press the hook on the rear outer handle bracket in the direction of the arrow.
am2zzw00000634
|
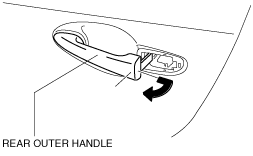
11. Maintaining the condition in procedure 10, remove the rear outer handle.
am2zzw00000635
|
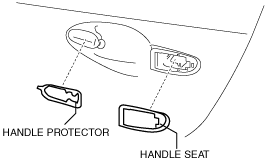
12. Remove the handle protector and handle seat.
am2zzw00000636
|
13. Remove the double-sided adhesive tape from both surfaces of the handle protector and the body. (See Handle Protector Installation Note.)
14. Loosen the screw.
am2zzw00000637
|
15. Press down the rod holder in the direction of arrow (1) and remove the rear outer handle bracket in the direction of arrow (2).(See Outer handle bracket Installation Note.)
am2zzw00000638
|
16. Install in the reverse order of removal.
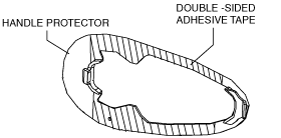
Handle Protector Installation Note
1. If the handle protector is reused, adhere double-adhesive tape to the both surfaces of the handle protector as shown in the figure.
am2zzw00000639
|
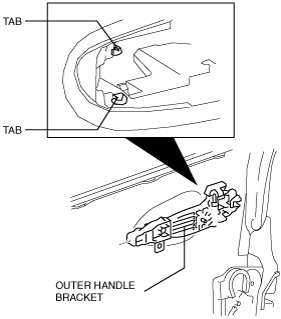
Outer handle bracket Installation Note
1. Hook the outer handle bracket tabs as shown in the figure.
am2zzw00002553
|