 |
bes3ze00000050
CYLINDER BLOCK ASSEMBLY (II)
id011000504100
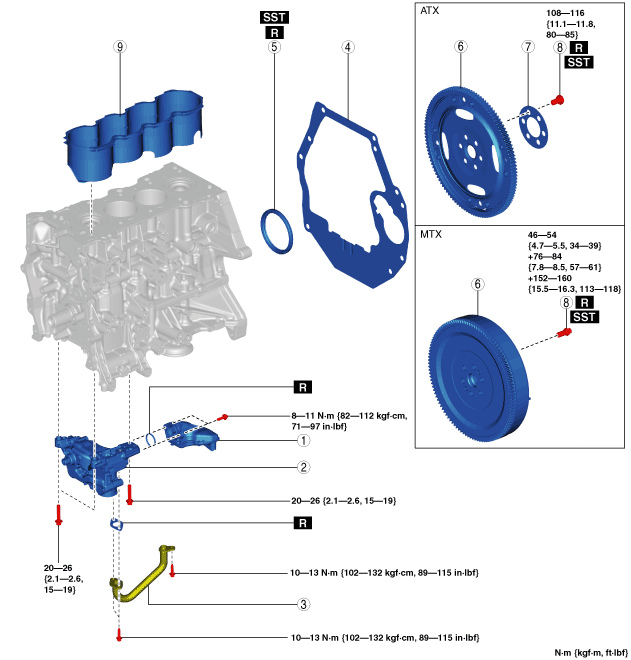
1. Assemble in the order indicated in the table.
bes3ze00000050
|
|
1
|
Oil strainer
|
|
2
|
Oil pump
|
|
3
|
Oil pipe
|
|
4
|
End plate
(See End Plate Assembly Note.)
|
|
5
|
Rear oil seal
(See Rear Oil Seal Assembly Note.)
|
|
6
|
Dual-mass flywheel (MTX)/drive plate (ATX)
|
|
7
|
Backing plate (ATX)
|
|
8
|
Dual-mass flywheel (MTX)/drive plate (ATX) installation bolt
|
|
9
|
Water jacket spacer
|
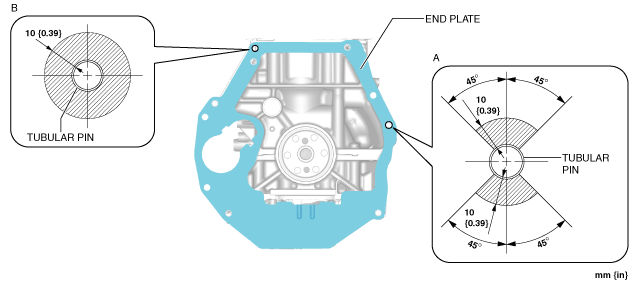
End Plate Assembly Note
1. After end plate assembly, crimp the parts A and B shown in the figure.
bes3ze00000051
|
2. After crimping, verify that there is no damage and removal of the end plate.
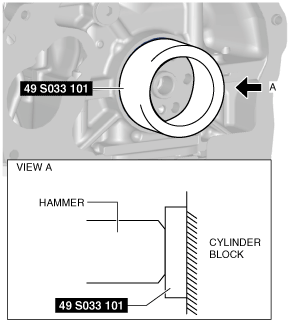
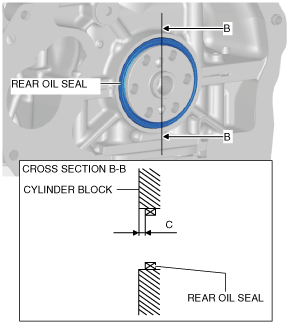
Rear Oil Seal Assembly Note
1. Apply clean engine oil to the inner surface of a new rear oil seal.
2. Insert the rear oil seal into the cylinder block by hand.
3. Tap the oil seal in evenly using the SST and a hammer.
bes3ze00000052
|
bes3ze00000053
|
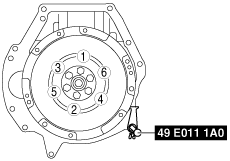
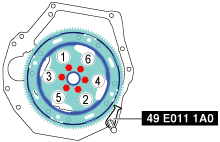
Dual-mass Flywheel (MTX)/Drive Plate (ATX) Installation Bolt Assembly Note
1. Clean the crankshaft thread holes.
2. Hold the crankshaft using the SST (49 E011 1A0).
MTX
adejjw00012147
|
ATX
adejjw00012417
|
3. Tighten the installation bolts.
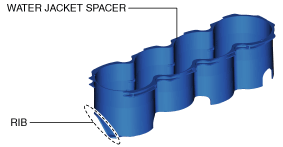
Water Jacket Spacer Assembly Note
1. Assemble so that the rib of the water jacket spacer is facing the engine front.
bes3ze00000054
|