|
Priority order of inspection |
Ignition switch position |
Check code |
|
1
|
ON
|
22
|
|
2
|
04, 08, 12, 13, 14, 16, 23, 25, 26
|
|
|
3
|
LOCK
|
31
|
|
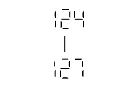
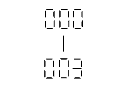
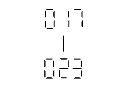
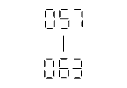
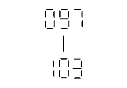
Check code 26
|
LCD display
|
||||
|---|---|---|---|---|---|
|
Inspection Condition
|
Display
|
Operation state
|
Action
|
||
|
Select check code 26.
|
|
All segments are on.
|
The LCD is normal.
|
||
|
Except above condition
|
Replace the instrument cluster.
|
||||