TRANSAXLE RANGE (TR) SWITCH REMOVAL/INSTALLATION [DJVA-EL]
id051901285700
1. Remove the TR switch.
- (1) Disconnect the negative battery cable.
- (2) Remove the clip, and then disconnect the selector cable end from the manual shaft lever.
- (3) Remove the manual shaft nut, washer and manual shaft lever.
- (4) Disconnect the TR switch connector.
-
-
Caution
-
• Do not damage the TR switch.
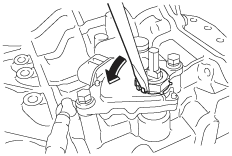
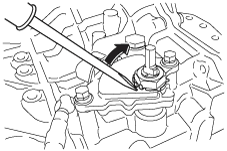
- (5) Un-crimp the nut stopper using a flathead screwdriver.
-
- (6) Remove the rock nut and nut stopper.
-
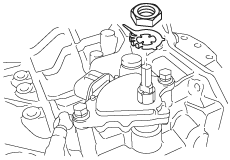
- (7) Remove the TR switch.
-
2. Install the TR switch.
- (1) Select the selector lever to N position.
- (2) Temporarily tighten the TR switch installation bolts.
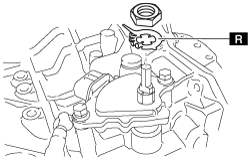
- (3) Install the new nut stopper and rock nut.
-
-
Tightening torque
-
6.9 N·m {70 kgf·cm, 61 in·lbf}
- (4) Loosen the TR switch installation bolts.
- (5) Rotate the manual shaft in the clockwise direction until it stops, and from that position, rotate it counterclockwise 2 notches to the N position.
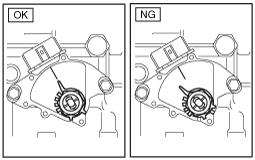
- (6) Rotate the TR switch and align the projection of the nut stopper with the neutral reference line.
-
- (7) Tighten the TR switch installation bolts.
-
-
Tightening torque
-
4.3—6.5 N·m {44—66 kgf·cm, 39—57 in·lbf}
- (8) Verify that the projection of the nut stopper is aligned with the neutral reference line.
- (9) Crimp the nut stopper using a flathead screwdriver.
-
-
Note
-
• Crimp a minimum of 2 locations.
- (10) Connect the TR switch connector.
3. Install the manual shaft lever, washer and manual shaft nut.
-
Tightening torque
-
10—14 N·m {102—142 kgf·cm, 89—123 in·lbf}
4. Install the clip, and then disconnect the selector cable end from the manual shaft lever.