|
am2zzw00000424
LIFTGATE REMOVAL/INSTALLATION
id091100412500
1. Disconnect the negative battery cable.
2. Remove the liftgate upper trim. (See LIFTGATE UPPER TRIM REMOVAL/INSTALLATION.)
3. Remove the liftgate lower trim. (See LIFTGATE LOWER TRIM REMOVAL/INSTALLATION.)
4. Disconnect the connectors.
am2zzw00000424
|
5. Remove the grommets from the liftgate.
6. Tie each string to connectors (1) and (2) shown in the figure.
am2zzw00000425
|
7. Pull out the liftgate wiring harness as shown in the figure while grasping the end of the string so that the end of the string does not enter the liftgate.
am2zzw00001917
|
8. Untie the strings from connectors (1) and (2).
9. Disconnect the joint pipe of the rear washer hose.
am2zzw00000427
|
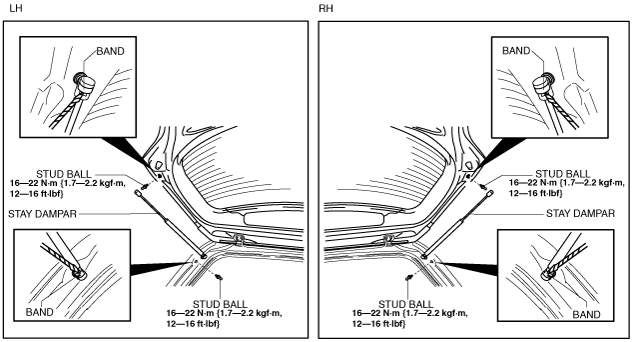
10. Remove the stay damper band using a tape-wrapped flathead screwdriver.
am2zzw00000428
|
11. Remove the stay damper.
12. Remove the ball stud.
13. Remove the bolts.
am2zzw00000429
|
14. Remove the liftgate.
15. Install in the reverse order of removal.
16. Adjust the liftgate. (See LIFTGATE ADJUSTMENT.)