|
am2zzb00000172
SIDE SILL PANEL INSTALLATION [PANEL REPLACEMENT]
id098008743800
Symbol Mark
am2zzb00000172
|
Installation Procedure (Front-side)
5HB
1. When installing new parts, measure and adjust the body as necessary to conform with standard dimensions.
2. Drill holes for the plug welding before installing the new parts.
3. After temporarily installing new parts, make sure the related parts fit properly.
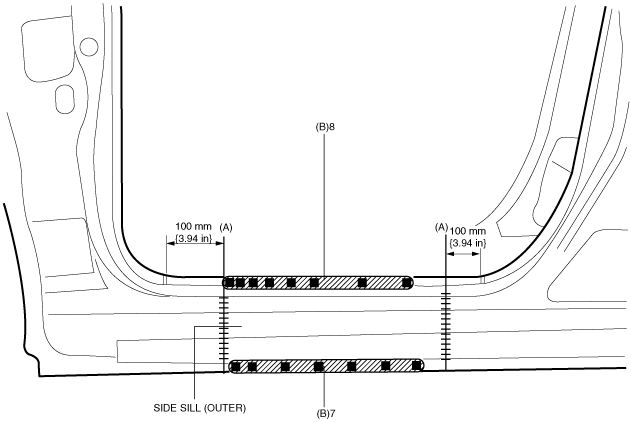
4. Cut-and-join area locations indicated by (A) then plug weld the 15 locations indicated by (B) shown in the figure.
am2zzb00000380
|
3HB
1. When installing new parts, measure and adjust the body as necessary to conform with standard dimensions.
2. Drill holes for the plug welding before installing the new parts.
3. After temporarily installing new parts, make sure the related parts fit properly.
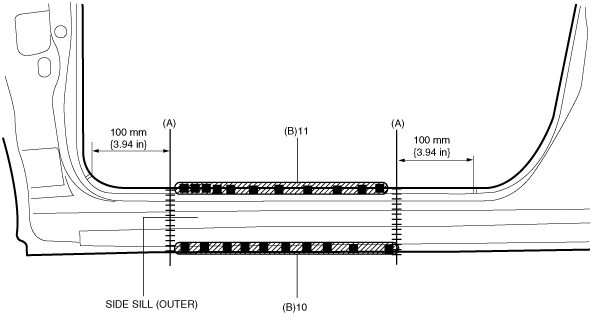
4. Cut-and-join area locations indicated by (A) then plug weld the 21 locations indicated by (B) shown in the figure.
am2zzb00000381
|
Installation Procedure (Component)
1. When installing new parts, measure and adjust the body as necessary to conform with standard dimensions.
2. Drill holes for the plug welding before installing the new parts.
3. After temporarily installing new parts, make sure the related parts fit properly.
4. Plug weld the 6 locations indicated by (A) shown in the figure.
am2zzb00000174
|
5. Plug weld the 10 locations indicated by (B) shown in the figure.
am2zzb00000175
|
6. Cut-and-join area locations indicated by (C) then plug weld the 102 locations indicated by (D) shown in the figure.
am2zzb00000382
|
Drill Hole Install for Side Step Molding
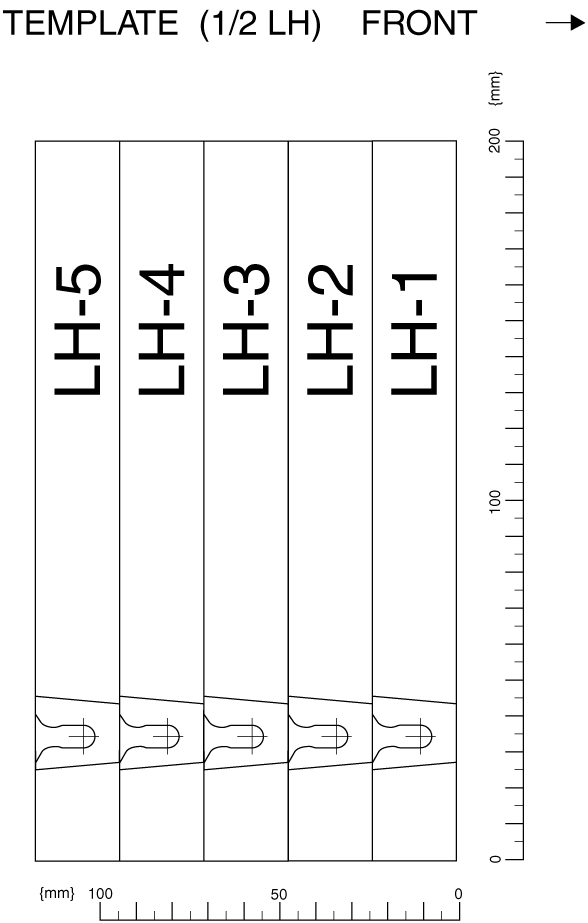
1. Cut out the templates along the cut lines.
2. Face the printed side of the templates to the side step molding, align two sides of the templates, and affix them to the side step molding using double-sided adhesive tape.
am2zzb00000177
|
3. Align the side step molding with the installation position with no clearance with the body, and temporarily fix using a rivet.
am2zzb00000101
|
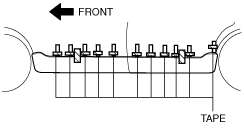
4. Align the side step molding bottom surface with the body, press it so that there is no clearance with the body, and temporarily install to the body using tape.
am2zzb00000102
|
5. Place the templates along the bodyline and affix them using tape.
am2zzb00000103
|
6. Remove the fastener and remove the side step molding with the templates affixed to the body.
7. Place the templates along the bodyline and punch holes through the center of the templates.
am2zzb00000104
|
8. Remove the templates.
9. Wrap packing tape around the drill bit.
am2zzb00000383
|
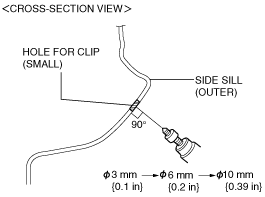
10. With the drill bit pointed perpendicular to the body, drill a hole gradually using a Φ3 mm {0.1in}, Φ6 mm {0.2in}, then Φ10mm {0.39in} drill bit.
am2zzb00000384
|
11. Grind the drilled hole to remove any metal burrs with a round file to finish the surface.
am2zzb00000105
|
12. Wipe off dirt from the side step molding installation surface on the body using a clean rag dampened with isopropyl alcohol.
am2zzb00000106
|
13. Apply sealant for rust protection.
14. Apply touch-up paint.
Template
am2zzb00000179
|
am2zzb00000180
|
am2zzb00000181
|
am2zzb00000182
|