WATER-COOLED CHARGE AIR COOLER COOLANT REPLACEMENT [SKYACTIV-X 2.0]
id0112hf702200
-
Warning
-
• A hot engine can cause severe burns. Turn off the engine and wait until it is cool before replacing the water-cooled charge air cooler coolant.
• Turn off the engine and wait until it is cool. Even then, be very careful when removing the cap. Wrap a thick cloth around it and slowly turn it counterclockwise to the first stop. Step back while the pressure escapes.
• When you are sure all the pressure is gone, press down on the cap using the cloth, turn it, and remove it.
-
Caution
-
• Use engine coolant at a concentration that meets the environmental conditions in which the vehicle is driven, otherwise engine damage could occur.
• The engine has aluminum parts and must be protected by an ethylene-glycol-based coolant to prevent corrosion and freezing.
• Do not use coolants containing Alcohol, Methanol, Borate or Silicate. These coolants could damage the cooling system.
• Use only soft (demineralized) water in the coolant mixture. Water that contains minerals will cut down on the coolant's effectiveness.
• Engine coolant damages paint. If engine coolant does get on a painted surface, rinse it off quickly.
-
Note
-
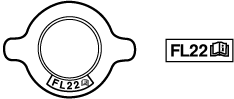
• For vehicles with an “FL22” mark on or near the water-cooled charge air cooler reserve tank cap, use genuine long-life coolant (golden).
• Because genuine long-life coolant (golden) is diluted, use it as it is when replacing the coolant. Also when adding, use it as it is.
-
Water-cooled charge air cooler coolant total amount (reference)
-
1.6 L {1.7 US qt, 1.4 Imp qt}
1. Open the engine cover. (See ENGINE COVER OPEN/CLOSE [SKYACTIV-X 2.0].)
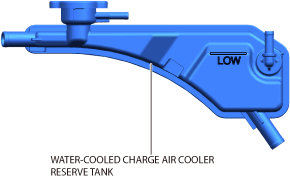
2. Remove the water-cooled charge air cooler reserve tank cap.
3. Remove front under cover No.1. (See FRONT UNDER COVER No.1 REMOVAL/INSTALLATION.)
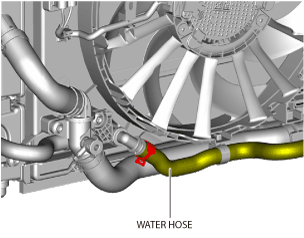
4. Disconnect the water hose and drain the water-cooled charge air cooler coolant.
5. After draining the water-cooled charge air cooler coolant completely, connect the water hose.
6. Add water-cooled charge air cooler coolant until it reaches above the LOW mark of the water-cooled charge air cooler reserve tank.
7. Install the water-cooled charge air cooler reserve tank cap.
8. Inspect each area for water leakage. (See WATER-COOLED CHARGE AIR COOLER COOLANT LEAKAGE INSPECTION [SKYACTIV-X 2.0].)
9. Install front under cover No.1. (See FRONT UNDER COVER No.1 REMOVAL/INSTALLATION.)
10. Close the engine cover. (See ENGINE COVER OPEN/CLOSE [SKYACTIV-X 2.0].)