 |
am3zzw00035714
MIDDLE PIPE REMOVAL/INSTALLATION [SKYACTIV-X 2.0]
id0115hf810000
Replacement part
|
Gasket
Quantity: 2
Location of use: Middle pipe
|
Nut
Quantity: 4
Location of use: Middle pipe
|
1. Disconnect the negative battery terminal. (See NEGATIVE BATTERY TERMINAL DISCONNECTION/CONNECTION [(E)].)
2. Remove floor under cover No.1. (See FLOOR UNDER COVER REMOVAL/INSTALLATION.)
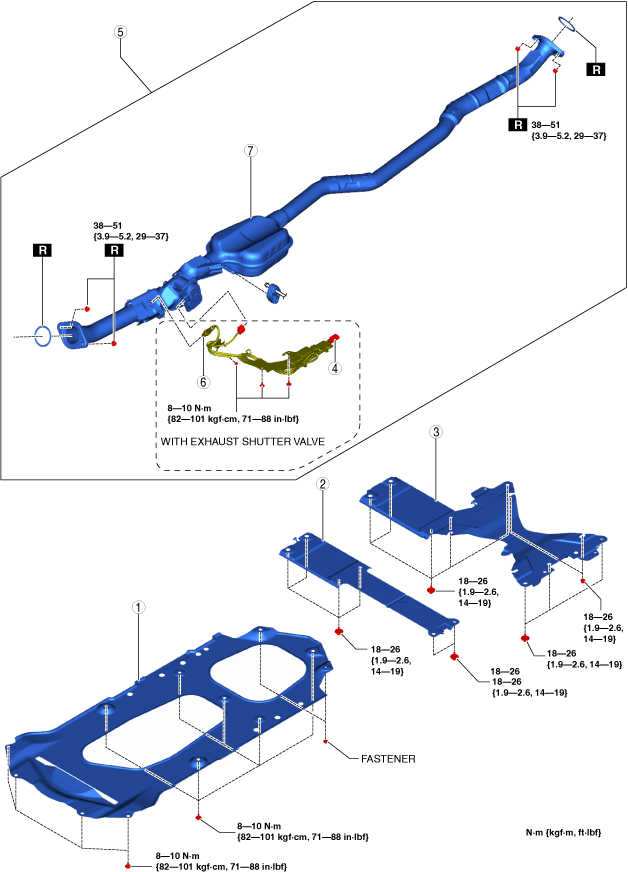
3. Remove using the procedure shown in the figure.
4. Install in the reverse order of removal.
2WD
am3zzw00035714
|
|
1
|
Tunnel cover
|
|
2
|
Brace bar
(See Brace Bar Installation Note.)
|
|
3
|
Tunnel member
|
|
4
|
Connector (With exhaust shutter valve)
|
|
5
|
Middle pipe component
|
|
6
|
NOx sensor (With exhaust shutter valve)
|
|
7
|
Middle pipe
|
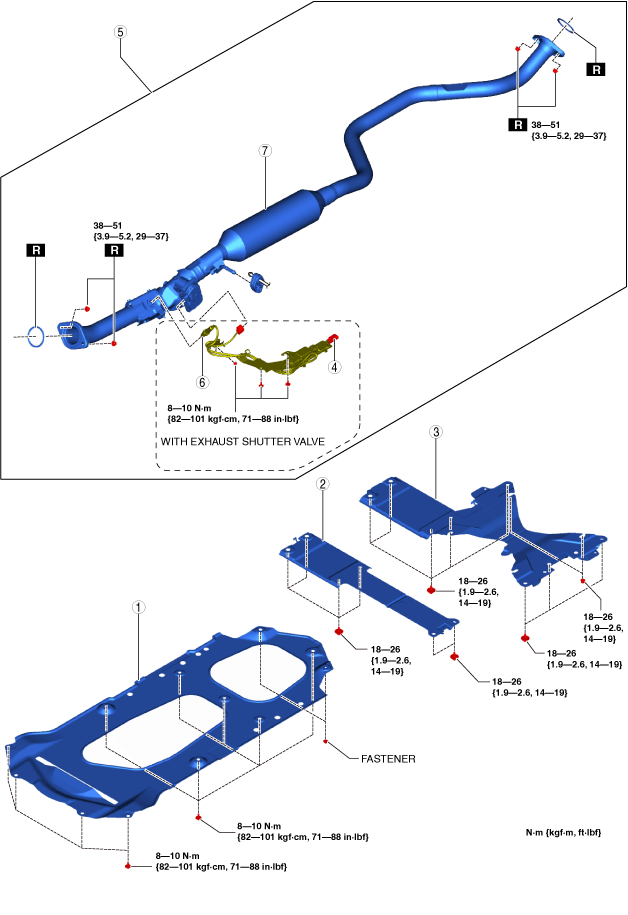
AWD
am3zzw00035715
|
|
1
|
Tunnel cover
|
|
2
|
Brace bar
(See Brace Bar Installation Note.)
|
|
3
|
Tunnel member
|
|
4
|
Connector (With exhaust shutter valve)
|
|
5
|
Middle pipe component
|
|
6
|
NOx sensor (With exhaust shutter valve)
|
|
7
|
Middle pipe
|
Tunnel Member Installation Note
1. Tighten bolt A shown in the figure to the specified torque.
am3zzw00035716
|
2. Tighten bolt B shown in the figure to the specified torque.
3. Tighten the remaining bolts and nuts to the specified torque.
Brace Bar Installation Note
1. Tighten bolt A shown in the figure to the specified torque.
am3zzw00035717
|
2. Tighten bolt B shown in the figure to the specified torque.
3. Tighten the remaining bolts to the specified torque.
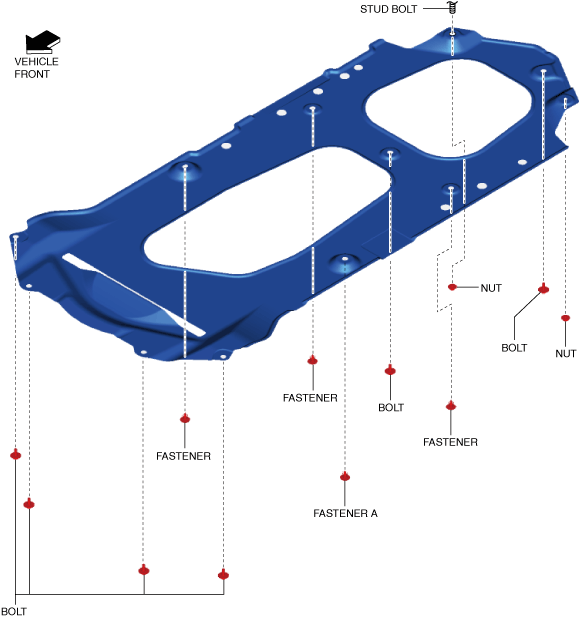
Tunnel Cover Installation Note
1. Align the stud bolt shown in the figure with the tunnel cover and install.
am3zzw00035718
|
2. Install fastener A shown in the figure.
3. Install the remaining fasteners.
4. Tighten the bolts shown in the figure to the specified torque.
5. Tighten the nuts shown in the figure to the specified torque.
Middle Pipe Replacement Procedure
1. Perform the exhaust shutter valve initialization. (See EXHAUST SHUTTER VALVE ACTUATOR REMOVAL/INSTALLATION [SKYACTIV-X 2.0].)