|
ac5wzb00000386
FRONT DOOR OUTER PANEL REMOVAL [(E)]
id0980085600x4
Symbol Mark
ac5wzb00000386
|
Removal Procedure
Using remover tool
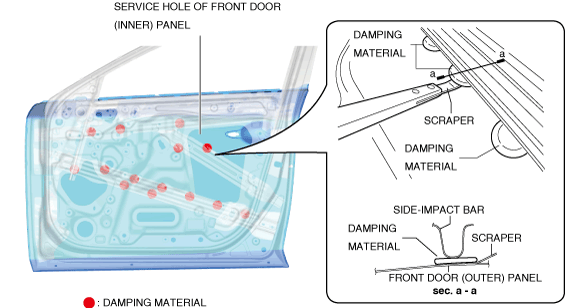
1. Insert a scraper from the service hole of the front door (inner) panel, and peel off the damping material shown in the figure from the front door (outer) panel.
4SD
am3zzb00000413
|
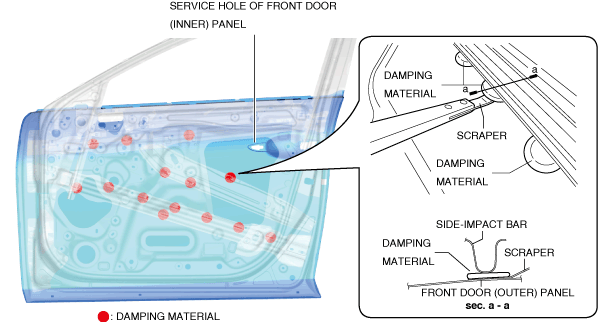
5HB
am3zzb00000414
|
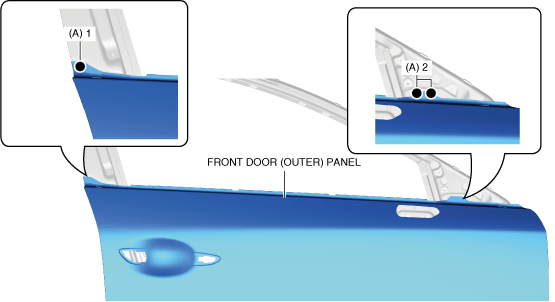
2. Drill the spot welds in the 3 locations in area A shown in the figure from the front door (outer) panel.
am3zzb00000638
|
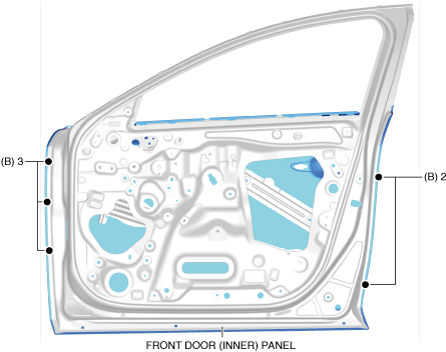
3. Drill the spot welds in the 5 locations in area B shown in the figure from the front door (inner) panel.
am3zzb00000640
|
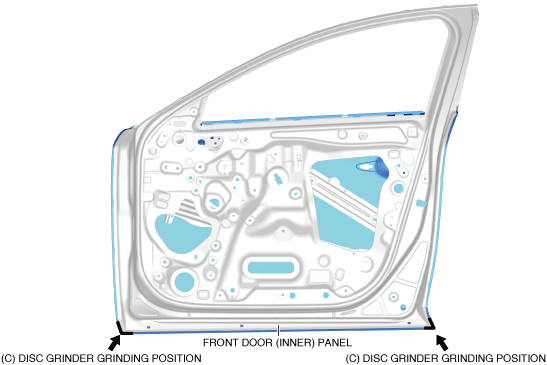
4. Using a disc grinder, grind the 2 locations in area C shown in the figure.
am3zzb00000422
|
5. Partially spread open the wider part of the flange for each front door (outer) panel using remover pliers.
6. Install the remover tool to the wider part of the flange partially spread open in Step 5.
7. Move the remover tool in the direction of the arrows in the order of (1), (2), and (3), and raise the flange in each area.
am3zzb00000642
|
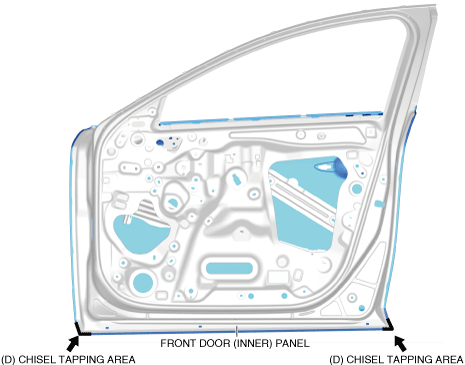
8. Tap a chisel in the 2 locations in area D shown in the figure and peel off the adhesive adhering to the front door (outer) panel and the front door (inner) panel.
am3zzb00000643
|
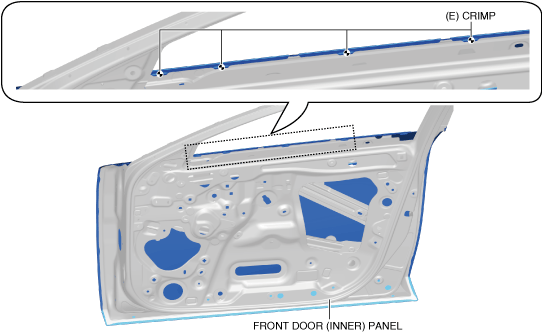
9. Using the remover pliers, remove the 4 crimps in area E shown in the figure.
am3zzb00000644
|
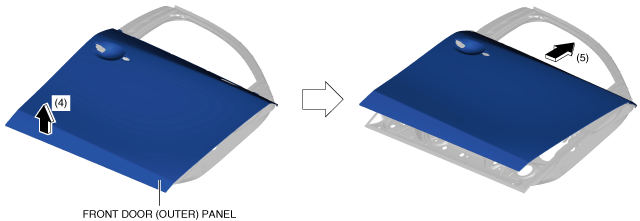
10. Move and remove the front door outer panel in the order of arrows (4) and (5) shown in the figure.
am3zzb00000645
|
Not using remover tool
1. Insert a scraper from the service hole of the front door (inner) panel, and peel off the damping material shown in the figure from the front door (outer) panel.
4SD
am3zzb00000413
|
5HB
am3zzb00000414
|
2. Drill the spot welds in the 3 locations in area A shown in the figure from the front door (outer) panel.
am3zzb00000638
|
3. Drill the spot welds in the 5 locations in area B shown in the figure from the front door (inner) panel.
am3zzb00000640
|
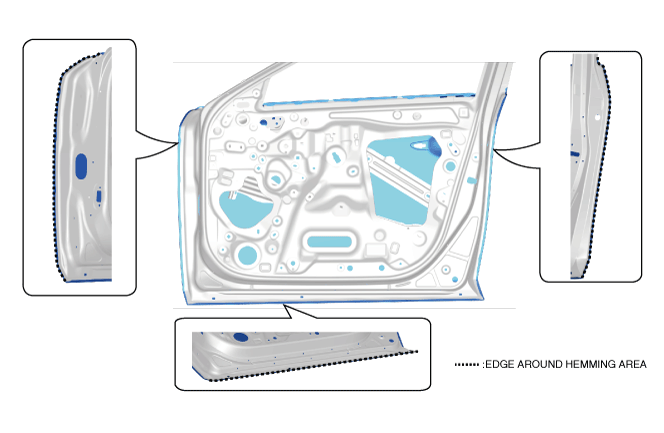
4. Using a disc grinder, grind the edge around the hemming part of the front door (outer) panel.
am3zzb00000646
|
5. Insert a chisel into the 2 locations in area C shown in the figure and peel off the adhesive adhering to the front door (outer) panel and the front door (inner) panel.
am3zzb00000647
|
6. Using the remover pliers, remove the 4 crimps in area D shown in the figure.
am3zzb00000648
|
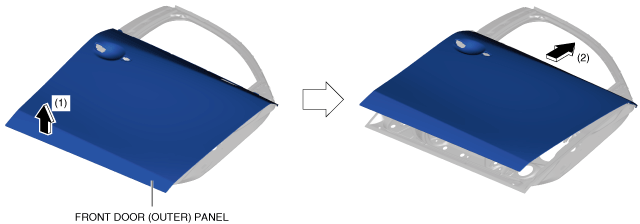
7. Move and remove the front door (outer) panel in the order of arrows (1) and (2) shown in the figure.
am3zzb00000649
|