|
am3zzw00010321
HEADLIGHT BULB REMOVAL/INSTALLATION
id091800800500
Halogen Type
Low-beam
1. Disconnect the negative battery cable.
2. Disconnect the connector.
am3zzw00010321
|
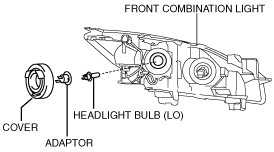
3. Remove the cover.
am3zzw00010322
|
4. Remove the adaptor.
5. Remove the headlight bulb (LO).
6. Install in the reverse order of removal.
High-beam
1. Disconnect the negative battery cable.
2. Disconnect the connector.
am3zzw00010323
|
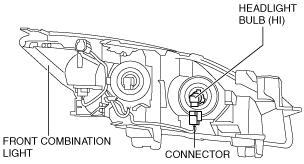
3. Rotate the headlight bulb (HI) in the direction of the arrow shown in the figure to remove it.
am3uuw00003089
|
4. Remove the headlight bulb (HI).
5. Install in the reverse order of removal.
Discharge Type
1. Disconnect the negative battery cable.
2. Remove the front bumper. (See FRONT BUMPER REMOVAL/INSTALLATION.)
3. Remove the front combination light. (See FRONT COMBINATION LIGHT REMOVAL/INSTALLATION.)
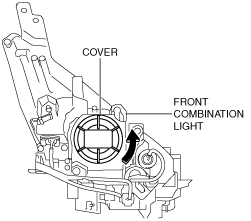
4. Rotate the cover in the direction of the arrow shown in the figure to remove it.
am3uuw00004415
|
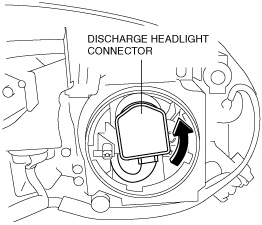
5. Rotate the discharge headlight connector in the direction of the arrow shown in the figure to remove it.
am3zzw00012434
|
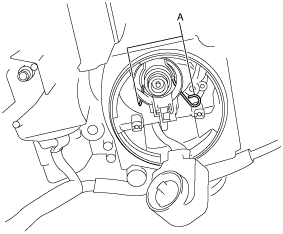
6. Press sections A to release the bulb retaining wire.
am3uuw00002704
|
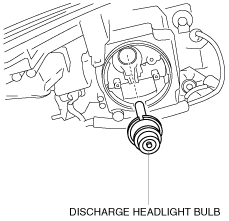
7. Remove the discharge headlight bulb.
am3uuw00007842
|
8. Install in the reverse order of removal.
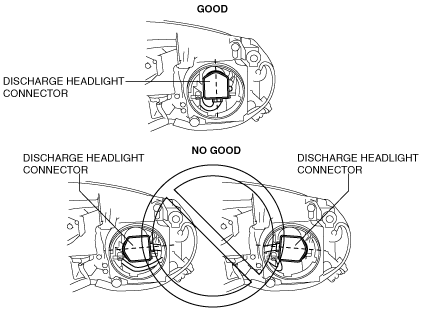
Discharge headlight connector installation note
am3zzw00012435
|