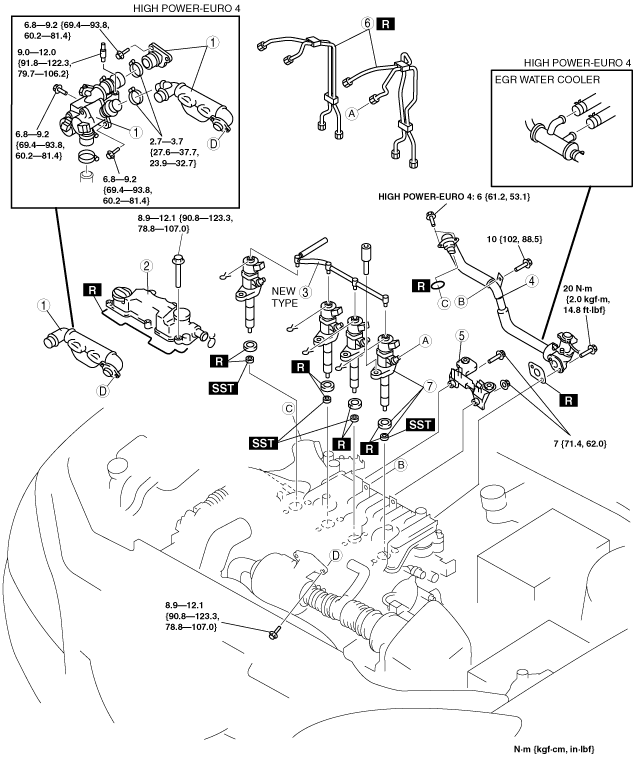
FUEL INJECTOR REMOVAL/INSTALLATION [MZ-CD 1.6 (Y6)]


id0114c3800600

Warning
•  Do not smoke or carry lighted tobacco or open flame of any type when working on or near any fuel related components. Highly flammable mixtures are always present and may ignite. Failure to follow these instructions may result in personal injury.
•  This procedure involves fuel handling. Be prepared for fuel spillage at all times and always observe fuel handling precautions. Failure to follow these instructions may result in personal injury.
•  Do not carry out any repairs to the fuel injection system with the engine running. The fuel pressure within the system can be as high as 1600 bar. Failure to follow this instruction may result in personal injury.
•  Wait at least one minute after the engine stops before commencing any repair to the fuel injection system. Failure to follow this instruction may result in personal injury.
Caution
•  Diesel fuel injection equipment is manufactured to very precise tolerances and fine clearances. It is therefore essential that absolute cleanliness is observed when working with these components. Always install blanking plugs to any open orifices or lines.
•  Do not disassemble fuel injectors or clean the nozzles, even with an ultrasonic cleaner. Always install new fuel injectors when required.
•  Always carry out the cleaning process before carrying out any repairs to the fuel injection system components to prevent foreign matter ingress to the components.
Note
•  If new fuel injectors are being installed, use the M-MDS and program the new fuel injector calibration codes into the PCM. (SeeFUEL INJECTOR CALIBRATION CODE PROGRAM[MZ-CD 1.6 (Y6)].)

1.  Remove the battery cover. (See BATTERY REMOVAL/INSTALLATION[MZ-CD 1.6 (Y6)].)

2.  Disconnect the negative battery cable.

3.  Remove the engine cover.

4.  Drain the engine coolant. (High power-Euro 4) (See ENGINE COOLANT REPLACEMENT[MZ-CD 1.6 (Y6)].)

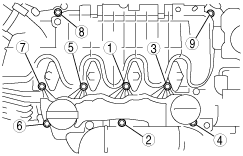
5.  Remove in the order indicated in the table.

6.  Install in the reverse order of removal.

7.  Inspect all related parts by performing “AFTER SERVICE PRECAUTION”. (See AFTER SERVICE PRECAUTION[MZ-CD 1.6 (Y6)].)

am3zzw00000997

1
Air pipe
2
Oil filler body
3
Fuel return hose
4
EGR valve, EGR water cooler (High power-Euro 4) and pipe
5
Glow plug lead stay
6
High-pressure fuel pipe
7
Fuel injector


Fuel Return Hose Removal Note

1.  Remove the fuel return hose retaining clip.

2.  Install the new blanking plugs to the open ends of the fuel return hoses and fuel injectors after disconnecting the fuel return hose from the fuel injector.


High-pressure Fuel Pipe Removal Note

1.  Install the new blanking plugs to the open threaded ports on the fuel injectors and the common rail after removing the high-pressure fuel pipes.


Fuel Injector Removal Note

Caution
•  The fuel injector calibration codes must be accurately recorded from the fuel injectors.
Note
•  The example shown is not a valid calibration code and is to indicate the location the code only.

1.  Make a note of the fuel injector calibration codes and their cylinder locations.

am3zzw00000998

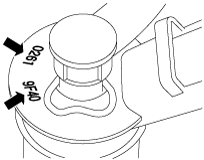
2.  Make a note of the position of the fuel injector threaded union before removal.


Fuel Injector Installation Note

Caution
•  Do not use excessive force to press the new fuel injection seal into the lower cylinder head cover using the SST. Failure to follow this instruction may result in damage to the fuel injector seal.

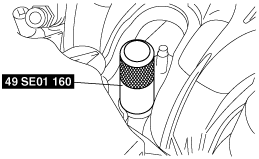
1.  Press the new fuel injector seal into the lower cylinder head cover using the SST.

am3zzw00000999

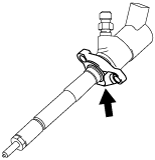
2.  Make sure the fuel injector bracket and clip is correctly installed.

am3zzw00001000

3.  Remove the blanking plug from the fuel injector nozzle.

Note
•  If original fuel injectors are to be installed, they must be matched to the cylinders they were removed from.

4.  Install the fuel injector so that the threaded union is in the same position as when removed.

5.  Install the fuel injector retaining bracket nuts hand tight.

6.  Record the fuel injector calibration codes and the respective cylinder locations of all new fuel injectors.


High-pressure Fuel Pipe Installation Note

Note
•  If it is not possible to correctly install the new high-pressure fuel pipe, it will be necessary to remove the remaining high-pressure fuel pipes and to loosen the common rail to allow correct alignment.

1.  Remove the blanking plugs from the common rail.

2.  Install the new high-pressure fuel pipe.

3.  Hand tighten the high-pressure fuel pipe unions.

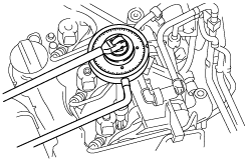
4.  Tighten the fuel injector bracket bolts in two steps.

(1)  4 N·m {40.8 kgf·cm, 35.4 in·lbf}
(2)  75 degrees
am3zzw00001001
Note
•  Individual high-pressure fuel pipes must have both unions tightened to Step 1 and then Step 2 before continuing on to the next high-pressure fuel pipe.

5.  Tighten the high-pressure fuel pipe unions in two steps.

(1)  20 N·m {2.0 kgf·m, 14.8 ft·lbf}
(2)  25 N·m {2.5 kgf·m, 18 ft·lbf}


Oil Filler Body Installation Note

Note
•  Install the oil filler body and the intake manifold retaining bolts in the sequence shown.

1.  Tighten the intake manifold and oil filler body installation bolts in the following steps.

(1)  Temporarily tighten the bolts.
(2)  Tighten the bolts in the order shown in the figure.

Tightening torque
8.9—12.1 N·m {90.8—123.3 kgf·cm, 78.8—107.0 in·lbf}
am3zzw00001002