am3zzw00020555
|
FRONT FENDER INSULATOR No.2 INSTALLATION
id091000804300
1. If front fender insulator No.2 is to be reused, perform the following procedure.
am3zzw00020555
|
2. If front fender insulator No.2 is to be newly replaced, perform the following procedure.
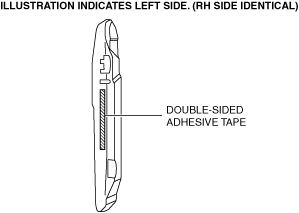
3. Peel off the paper backing of the double-sided adhesive tape from front fender insulator No.2.
4. Press front fender insulator No.2 into the grooves in the body in the order of the upper, lower, and middle parts without allowing the double-sided adhesive tape to contact the body.
5. Align the front fender insulator No.2 marking with the installation position on the body shown in the figure.
am3zzw00020556
|
6. Press front fender insulator No.2 to adhere the double-sided adhesive tape to the body, and install front fender insulator No.2.
7. Install the front mudguard. (See MUDGUARD REMOVAL/INSTALLATION.)