 |
aaxjjw00020392
BACK-UP LIGHT BULB REMOVAL/INSTALLATION
id091800810000
4SD
1. Disconnect the negative battery cable. (See NEGATIVE BATTERY CABLE DISCONNECTION/CONNECTION [SKYACTIV-G 1.5, SKYACTIV-G 2.0, SKYACTIV-G 2.5].) (See NEGATIVE BATTERY CABLE DISCONNECTION/CONNECTION [SKYACTIV-D 1.5].) (See NEGATIVE BATTERY CABLE DISCONNECTION/CONNECTION [SKYACTIV-D 2.2].) (See NEGATIVE BATTERY CABLE DISCONNECTION/CONNECTION [MZR 1.6].)
2. Partially peel back the trunk lid trim. (See TRUNK LID TRIM REMOVAL/INSTALLATION.)
3. Disconnect the connector.
aaxjjw00020392
|
4. Turn the socket counterclockwise and remove it in the direction of arrow (1) shown in the figure.
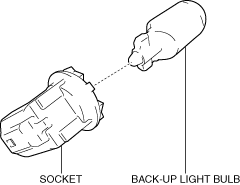
5. Remove the back-up light bulb.
aaxjjw00020393
|
6. Install in the reverse order of removal.
5HB
1. Disconnect the negative battery cable. (See NEGATIVE BATTERY CABLE DISCONNECTION/CONNECTION [SKYACTIV-G 1.5, SKYACTIV-G 2.0, SKYACTIV-G 2.5].) (See NEGATIVE BATTERY CABLE DISCONNECTION/CONNECTION [SKYACTIV-D 1.5].) (See NEGATIVE BATTERY CABLE DISCONNECTION/CONNECTION [SKYACTIV-D 2.2].) (See NEGATIVE BATTERY CABLE DISCONNECTION/CONNECTION [MZR 1.6].)
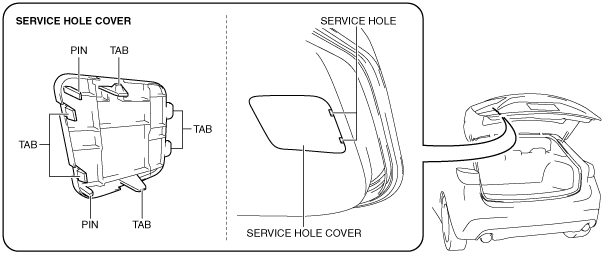
2. Remove the service hole cover.
aaxjjw00020394
|
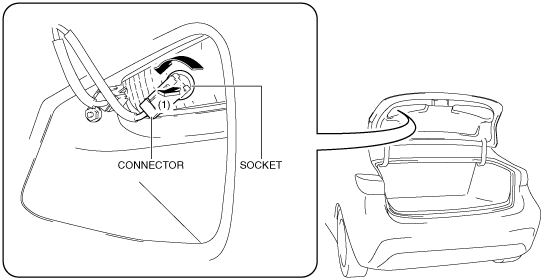
3. Disconnect the connector.
aaxjjw00020395
|
4. Turn the socket counterclockwise and remove it in the direction of arrow (1) shown in the figure.
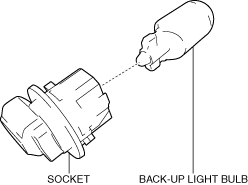
5. Remove the back-up light bulb.
aaxjjw00020396
|
6. Install in the reverse order of removal.