|
am6zzb00000472
REAR SIDE FRAME REMOVAL [PANEL REPLACEMENT]
id098008801200
Symbol Mark
am6zzb00000472
|
Removal Procedure
4SD
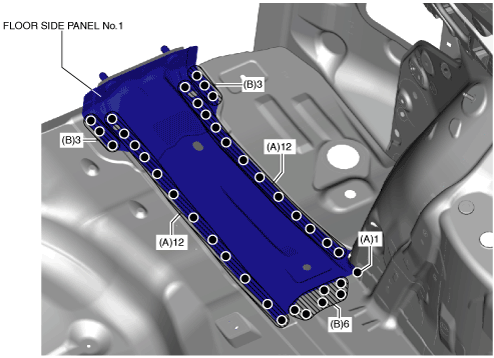
1. Drill the 25 locations indicated by (A) shown in the figure.
2. Drill the 12 locations indicated by (B) shown in the figure, then remove the floor side panel No.1.
am3uub00000458
|
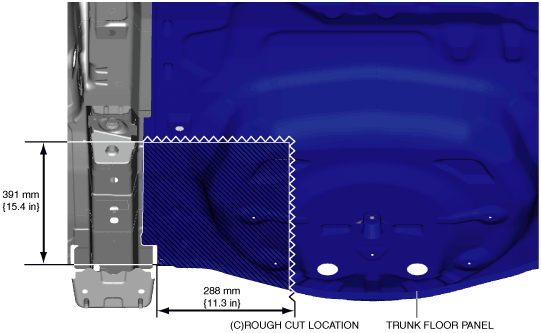
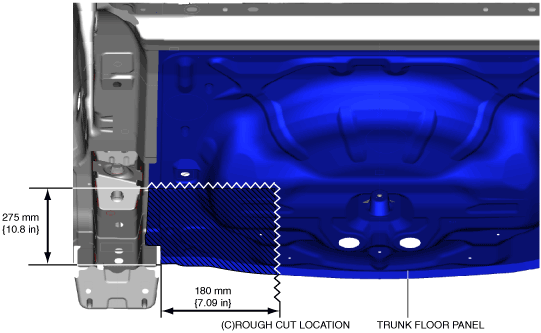
3. Rough cut the location indicated by (C) shown in the figure.
am3uub00000459
|
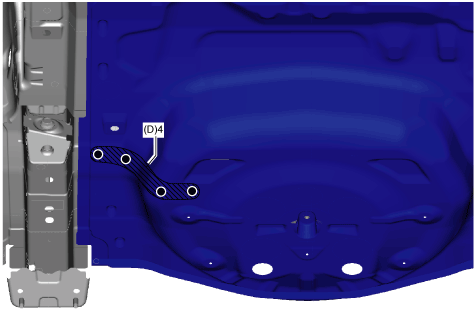
4. Drill the 4 locations indicated by (D) shown in the figure, then remove the part of trunk floor panel.
am3uub00000460
|
5. Drill the 13 locations indicated by (E) shown in the figure.
am3uub00000461
|
6. Remove the rear side frame.
5HB
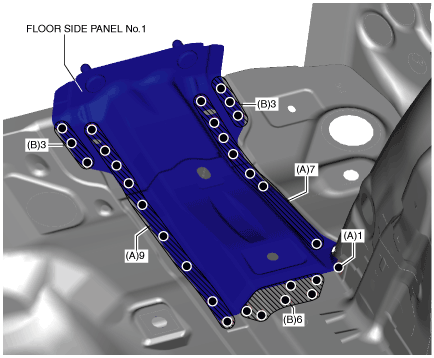
1. Drill the 17 locations indicated by (A) shown in the figure.
2. Drill the 12 locations indicated by (B) shown in the figure, then remove the floor side panel No.1.
am3uub00000462
|
3. Rough cut the location indicated by (C) shown in the figure.
am3uub00000463
|
4. Drill the 6 locations indicated by (D) shown in the figure, then remove the part of trunk floor panel.
am3uub00000464
|
5. Drill the 12 locations indicated by (E) shown in the figure.
am3uub00000465
|
6. Remove the rear side frame.