|
azzjjw00001432
REAR PLANETARY GEAR DISASSEMBLY
id051700660900
Structural View
azzjjw00001432
|
|
1
|
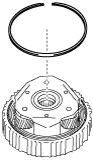
Snap ring
|
|
2
|
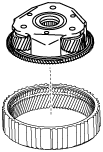
Rear planetary carrier
|
|
3
|
Front internal gear
|
Disassembly Procedure
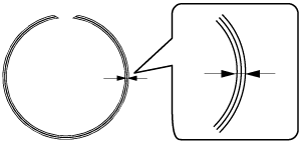
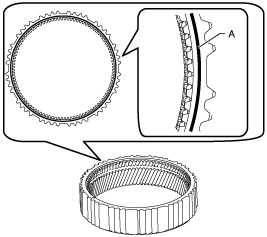
1. Perform the following inspection:
azzjjw00001629
|
azzjjw00001632
|
2. Remove the snap ring.
azzjjw00000840
|
azzjjw00001433
|
3. Remove the rear planetary carrier.
azzjjw00001434
|
4. Clean the disassembled parts. (See AUTOMATIC TRANSAXLE CLEANING.)