 |
am3zzw00018001
CONSOLE LID REMOVAL/INSTALLATION
id091700607400
Console lid compornent removal/installation
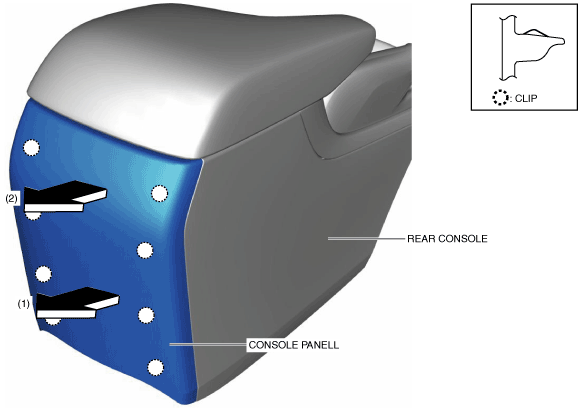
1. Pull the console panell in the direction of the arrow in the order of (1), (2) and remove the clips.
am3zzw00018001
|
2. Remove the console panell from the rear console.
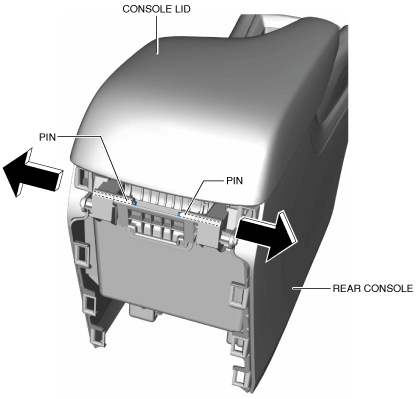
3. Remove the pins in the direction of the arrows shown in the figure.
am3zzw00018002
|
4. Remove the console lid from the rear console.
5. Install in the reverse order of removal.
Console lid rock removal/installation
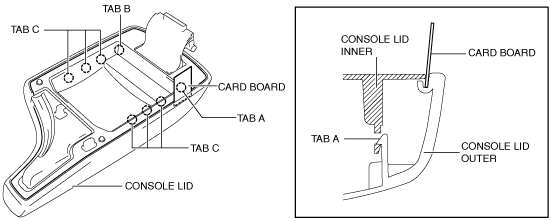
1. Insert cardboard into the position shown in the figure.
am3zzw00018003
|
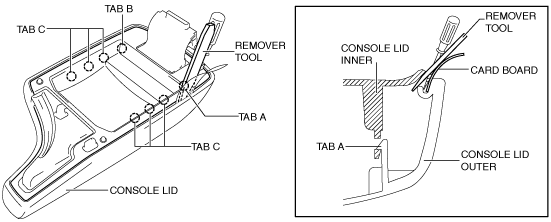
2. Insert a tape-wrapped flathead screwdriver to the position shown in the figure and secure a clearance for inserting the remover tool.
am3zzw00018004
|
3. Insert the remover tool into the clearance secured in Step 2.
am3zzw00018005
|
4. Move the remover tool in the direction of the arrow shown in the figure and detach tab A of the console lid outer from the console lid inner.
am3zzw00018006
|
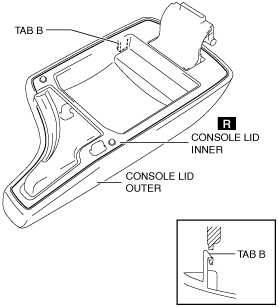
5. Perform Steps 1 to 4 for the opposite side and detach tab B of the console lid outer from the console lid inner.
am3zzw00018007
|
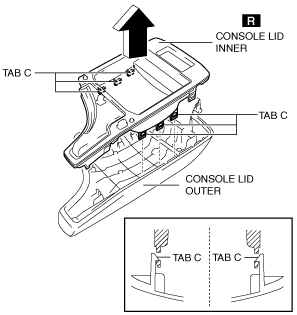
6. Pull the console lid inner in the direction of the arrow shown in the figure and detach all tabs C of the console lid outer from the console lid inner.
am3zzw00018008
|
7. Remove the console lid inner.
8. Install in the reverse order of removal.