 |
am3zzw00014838
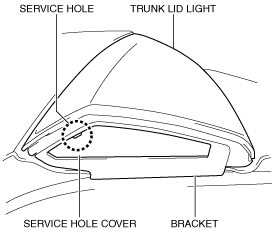
TRUNK LID LIGHT REMOVAL/INSTALLATION
id091800900000
1. Disconnect the negative battery cable. (See NEGATIVE BATTERY CABLE DISCONNECTION/CONNECTION [MZR 1.6].) (See NEGATIVE BATTERY CABLE DISCONNECTION/CONNECTION [SKYACTIV-G 1.5, SKYACTIV-G 2.0, SKYACTIV-G 2.5].) (See NEGATIVE BATTERY CABLE DISCONNECTION/CONNECTION [SKYACTIV-D 2.2].)(See NEGATIVE BATTERY CABLE DISCONNECTION/CONNECTION [SKYACTIV-D 1.5].)
2. Partially peel back the trunk lid trim. (See TRUNK LID TRIM REMOVAL/INSTALLATION.)
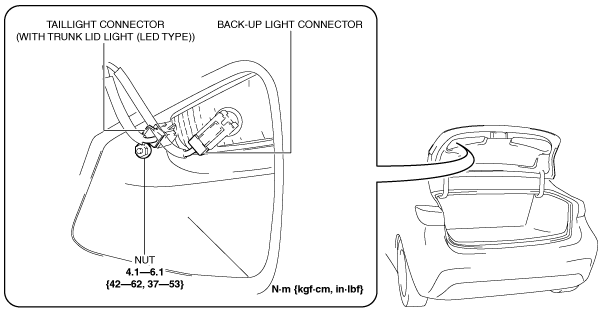
3. Disconnect the connector.
am3zzw00014838
|
4. Remove the nut.
5. Insert the remover tool into the service hole at the position shown in the figure.
am3uuw00010518
|
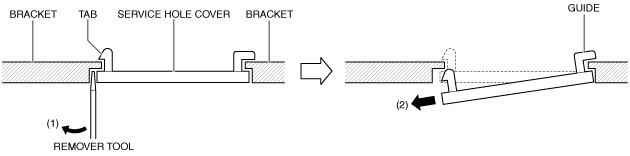
6. Move the remover tool in the direction of arrow (1) shown in the figure to detach the tab of the service hole cover from the bracket.
am3uuw00010519
|
7. Pull the guide of the service hole cover in the direction of arrow (2) shown in the figure and remove the service hole cover.
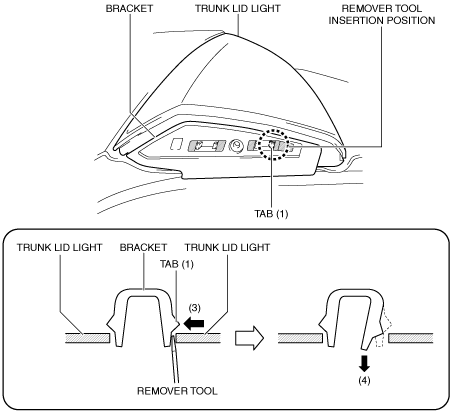
8. Insert the remover tool into the gap between tab (1) of the bracket and the trunk lid light.
am3uuw00010520
|
9. While pressing tab (1) of the bracket in the direction of arrow (3) shown in the figure using the remover tool, pull the bracket in the direction of arrow (4) to detach tab (1) of the bracket from the trunk lid light.
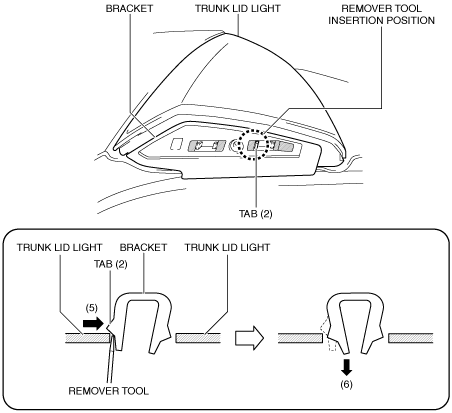
10. Insert the remover tool into the gap between tab (2) of the bracket and the trunk lid light.
am3uuw00010521
|
11. While pressing tab (2) of the bracket in the direction of arrow (5) shown in the figure using the remover tool, pull the bracket in the direction of arrow (6) to detach tab (2) of the bracket from the trunk lid light.
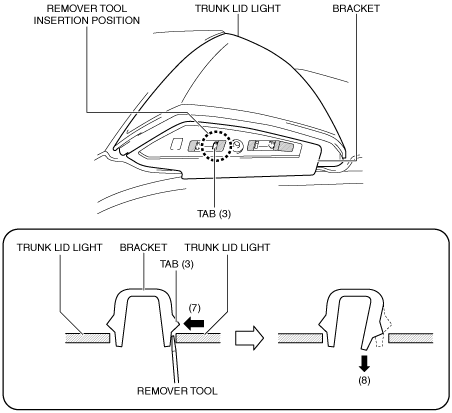
12. Insert the remover tool into the gap between tab (3) of the bracket and the trunk lid light.
am3uuw00010522
|
13. While pressing tab (3) of the bracket in the direction of arrow (7) shown in the figure using the remover tool, pull the bracket in the direction of arrow (8) to detach tab (3) of the bracket from the trunk lid light.
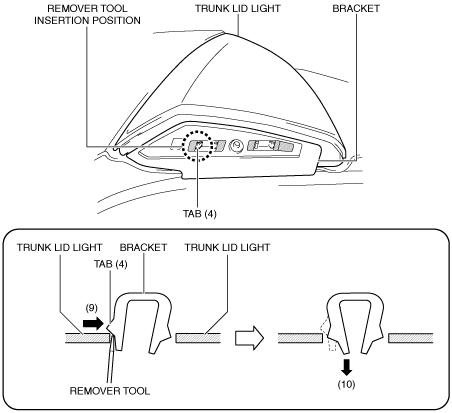
14. Insert the remover tool into the gap between tab (4) of the bracket and the trunk lid light.
am3uuw00010523
|
15. While pressing tab (4) of the bracket in the direction of arrow (9) shown in the figure using the remover tool, pull the bracket in the direction of arrow (10) to detach tab (4) of the bracket from the trunk lid light.
16. Detach all the tabs of the bracket from the trunk lid light and remove the bracket from the trunk lid light.
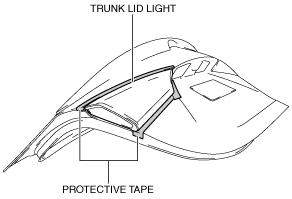
17. To prevent scratches or damage, affix protective tape to the position shown in the figure.
am3uuw00010524
|
18. Pull the trunk lid light in the direction of the arrow shown in the figure and pull out the guides, pin and stud bolt from the trunk lid.
am3uuw00010525
|
19. Remove the trunk lid light.
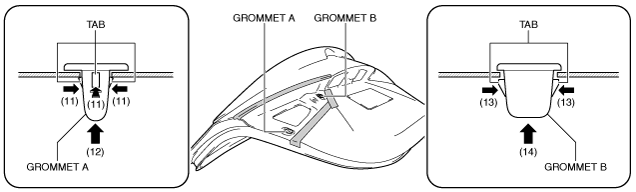
20. While pressing tabs of grommet A in the direction of arrow (11) shown in the figure, push out grommet A in the direction of arrow (12) to remove grommet A from the trunk lid.
am3uuw00011946
|
21. While pressing tabs of grommet B in the direction of arrow (13) shown in the figure, push out grommet B in the direction of arrow (14) to remove grommet B from the trunk lid.
22. Install in the reverse order of removal.