 |
am3zzw00007306
BATTERY REMOVAL/INSTALLATION [LF, L3]
id0117008005a4
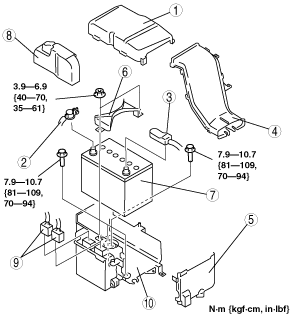
1. Remove in the order indicated in the table.
2. Install in the reverse order of removal.
am3zzw00007306
|
|
1
|
Battery cover
(See Battery Cover Removal Note.)
|
|
2
|
Negative battery cable
|
|
3
|
Positive battery cable
|
|
4
|
Battery duct
|
|
5
|
Battery box
|
|
6
|
Battery clamp
|
|
7
|
Battery
|
|
8
|
PCM cover
(See PCM Cover Installation Note.)
|
|
9
|
PCM Connectors
|
|
10
|
Battery tray and PCM component
|
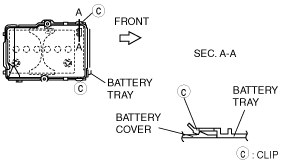
Battery Cover Removal Note
am3zzw00007307
|
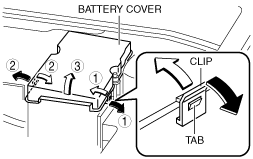
1. Remove the battery cover using the following procedure.
am3zzw00007308
|
PCM Cover Installation Note
1. Install with the PCM cover hooks B aligned with the PCM box holes.
am3zzw00007309
|
2. Install the PCM cover to the PCM box hook.
am3zzw00007310
|
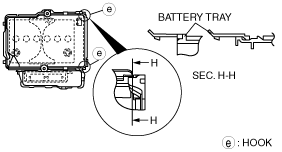
Battery Box Installation Note
1. Assemble with the battery box hooks E aligned with the battery tray holes at two points.
am3zzw00007311
|
Battery Duct Installation Note
1. Match the mark of the shroud panel and notch in the battery duct, and install the battery duct to the shroud panel.
am3zzw00007312
|
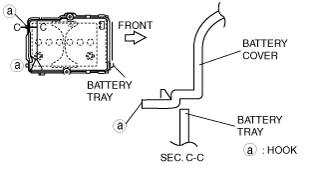
Battery Cover Installation Note
1. Install the battery duct between the battery cover and the battery box.
am3zzw00007313
|
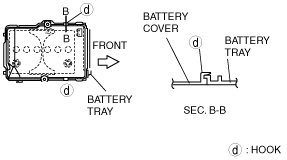
2. Install with the battery cover hooks A aligned with the battery tray holes at two points.
am3zzw00007314
|
3. Install with the battery cover hooks D aligned with the battery tray flange at two points.
am3zzw00007315
|
4. Set the battery cover to the battery tray clips C at two points.
am3zzw00007316
|