|
am6zzw00001413
SIDE STEP MOLDING REMOVAL
id091600804400
1. Remove the fasteners A.
am6zzw00001413
|
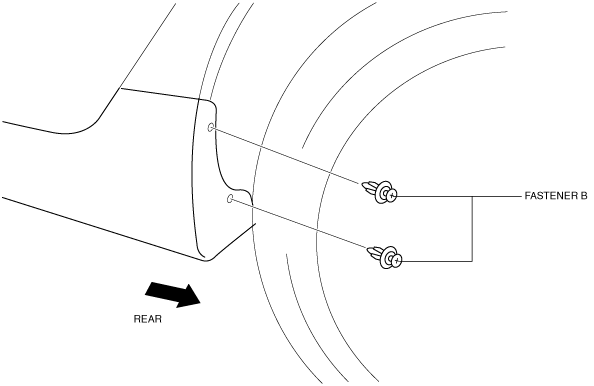
2. Remove the fasteners B.
am6zzw00001414
|
3. Affix the protective tape to the position shown in the figure.
am6zzw00007573
|
4. Insert the plastic spatula in the position shown in the figure.
am6zzw00007574
|
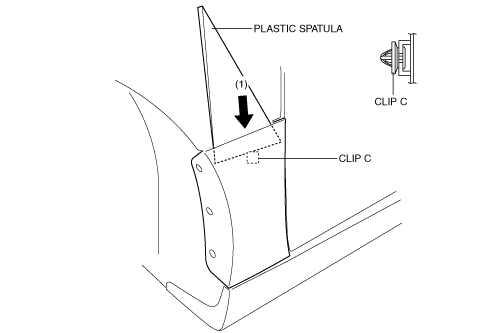
5. Insert the removal tool in the direction of arrow (1) shown in the figure, and disengage clip C.
6. Using the removal tool, disengage clip D.
am6zzw00007575
|
7. Remove the side step molding upper in the direction of arrow shown in the figure.
8. Insert the plastic spatula in the position shown in the figure.
9. Insert the removal tool in the direction of arrow (2) shown in the figure, and disengage clip E.
am6zzw00007576
|
10. Open the rear door.
11. Affix the protective tape to the position shown in the figure.
am6zzw00007577
|
12. Insert the plastic spatula in the position shown in the figure.
am6zzw00007578
|
13. Insert the removal tool in the direction of arrow (3), (4) shown in the figure, and disengage clips F.
14. Pull the shaded area in the direction of arrow (5) shown in the figure, while side the side step molding in the direction of the arrow (6) shown in the figure and remove the side step molding from clips G and H.
am6zzw00007579
|
15. After removing the side step molding, remove clips G and H from the body using a fastener remover.