 |
am6zzw00013151
LIFTGATE REMOVAL/INSTALLATION
id091100521200
1. Disconnect the negative battery terminal. (See NEGATIVE BATTERY TERMINAL DISCONNECTION/CONNECTION.)
2. Remove the liftgate upper trim. (See LIFTGATE UPPER TRIM REMOVAL/INSTALLATION.)
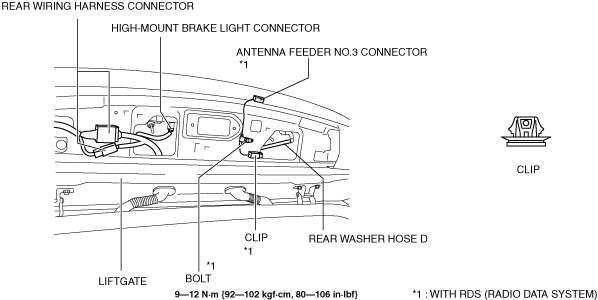
3. Disconnect the connectors shown in the figure.
am6zzw00013151
|
4. Disconnect rear washer hose D.
5. Remove bolt. (with RDS (radio data system))
6. Remove clip. (with RDS (radio data system))
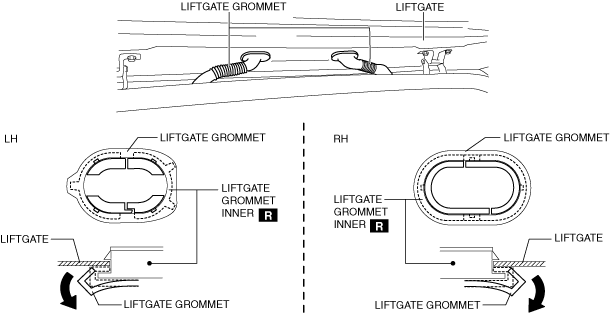
7. Partially peel the liftgate grommet in the direction of arrow shown in the figure, and remove the liftgate grommet from the liftgate grommet inner.
am6zzw00013152
|
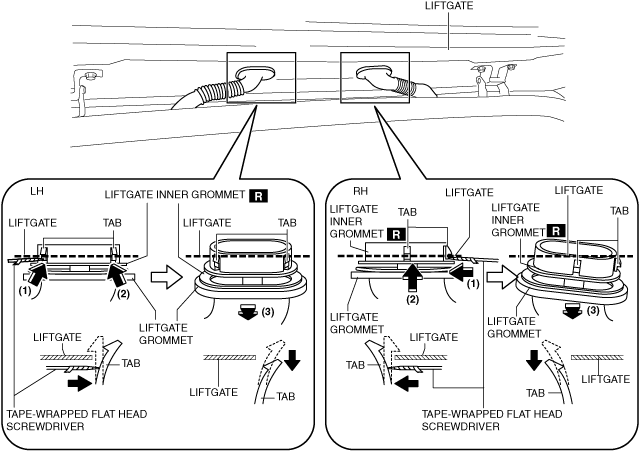
8. Using a tape-wrapped flathead screwdriver, press the liftgate grommet inner tabs in the directions of arrows (1) and (2) shown in the figure and remove the liftgate grommet inner from the liftgate in the direction of arrow (3).
am6zzw00013153
|
9. Remove rear washer hose D from the liftgate and set them aside.
10. Remove the wiring harness from the liftgate and set them aside.
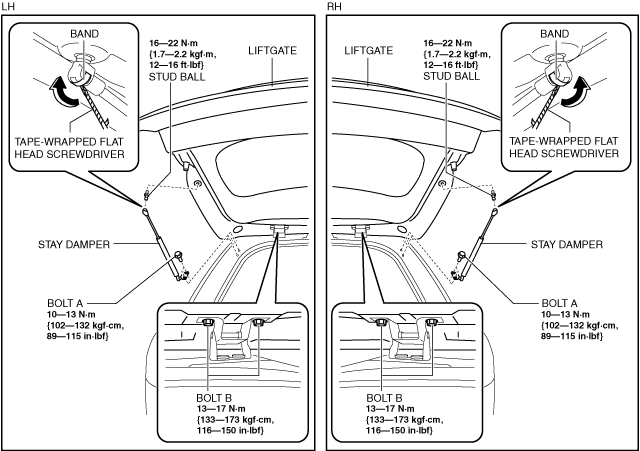
11. Using a tape-wrapped flathead screwdriver, remove the stay damper securing band in the direction of arrows shown in the figure.
am6zzw00015606
|
12. Remove bolts A.
13. Remove the stay dampers.
14. Remove the stud balls.
15. Remove bolts B.
16. Remove the liftgate.
17. Install in the reverse order of removal.
18. Adjust the liftgate. (See LIFTGATE ADJUSTMENT.)