Warning
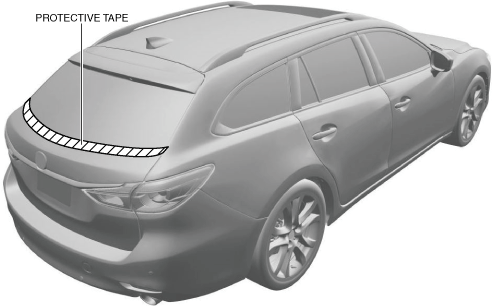
• Affix protective tape to the position shown in the figure.
am6zzw00015880
|
REAR FINISHER REMOVAL/INSTALLATION
id091600800200
am6zzw00015880
|
1. Disconnect the negative battery terminal. (See NEGATIVE BATTERY TERMINAL DISCONNECTION/CONNECTION.)
2. Remove the following parts:
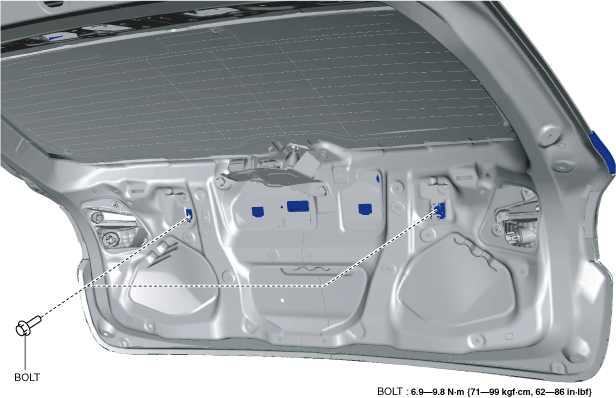
3. Remove the bolts.
am6zzw00015881
|
4. Remove the cap.
am6zzw00015882
|
5. Remove the screw.
6. Disconnect the connectors.
am6zzw00015883
|
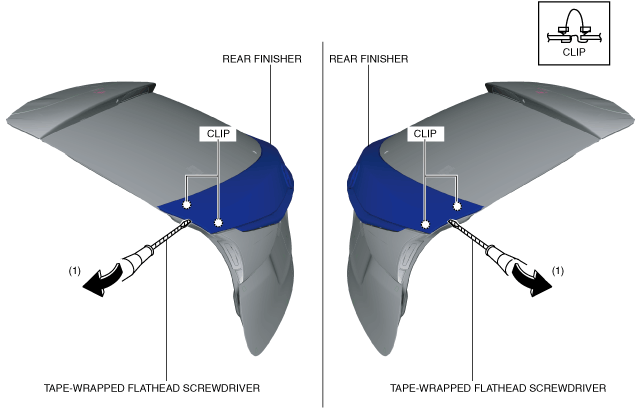
7. Insert a tape-wrapped flathead flathead screwdriver into the position shown in the figure, move it in the direction of arrow (1), and detach the clips.
am6zzw00015884
|
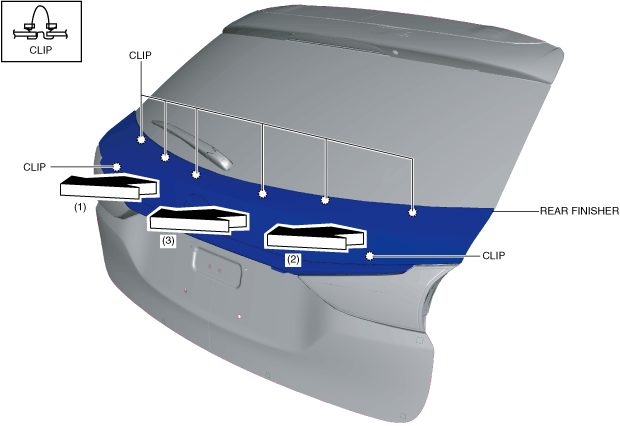
8. Remove the rear finisher in the direction of arrow in the order of (1), (2), (3) shown in the figure while detaching the clips.
am6zzw00015885
|
9. Install in the reverse order of removal.