Note
• There are two types of ornament. Verify the ornament shape before performing the procedures.
am6zzw00018074
|
ORNAMENT INSTALLATION
id091600994300
am6zzw00018074
|
Type A
1. Degrease the adhesion area of the ornament.
2. Warm the ornament to 15 °C {59 °F} to 40 °C {104 °F} using a heat gun.
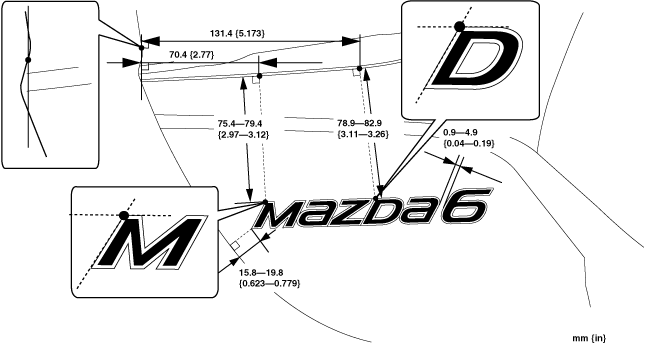
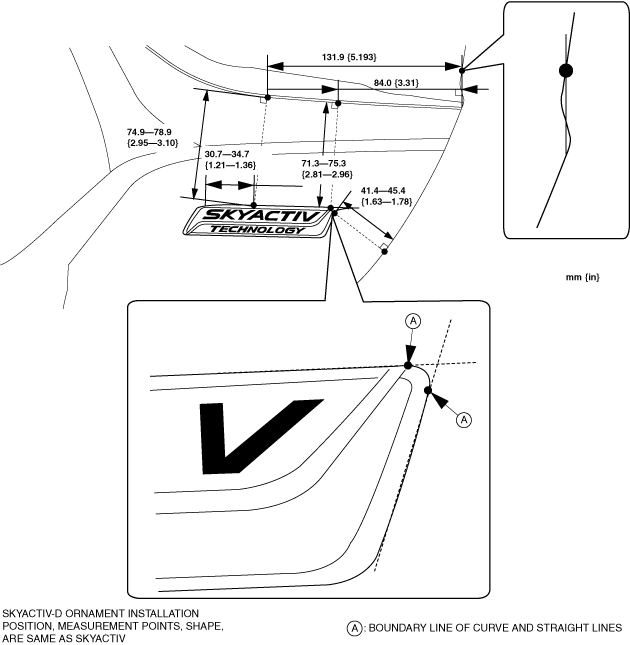
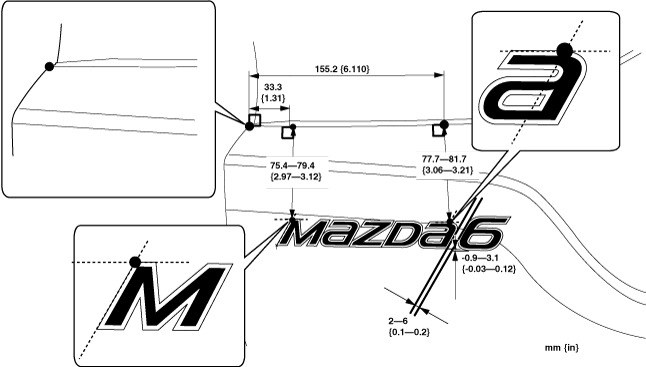
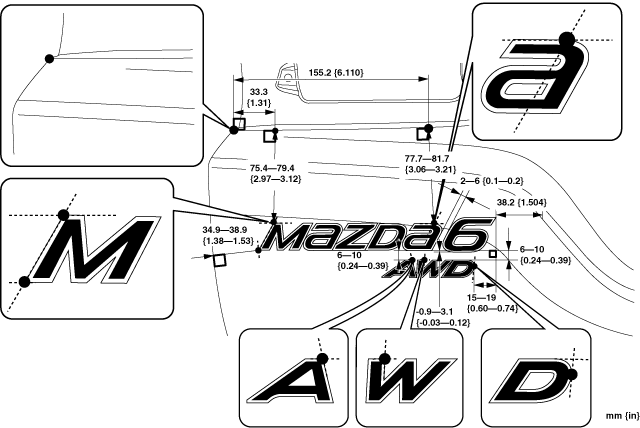
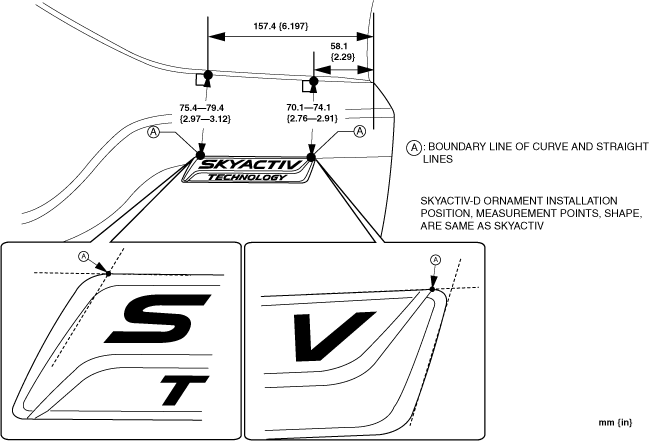
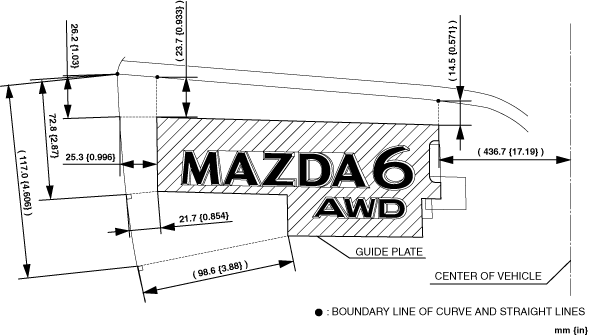
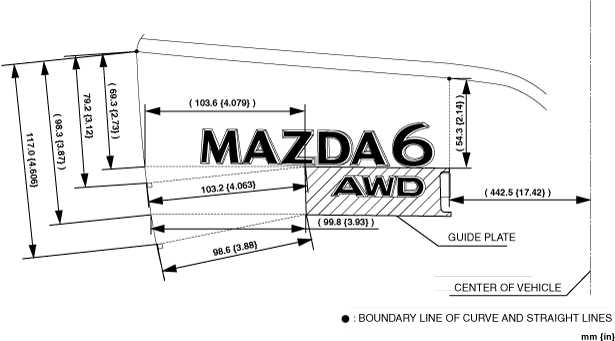
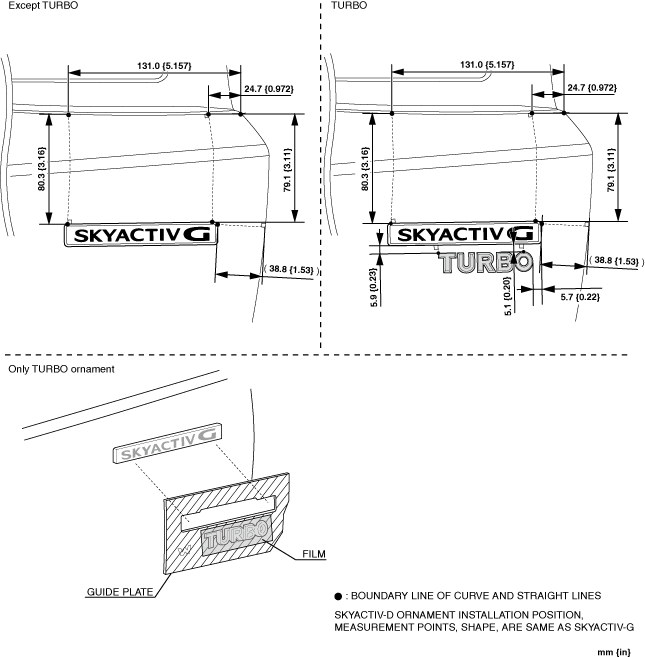
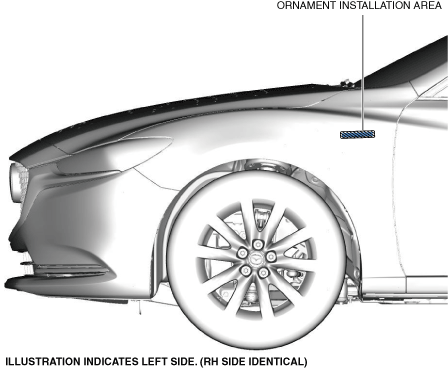
3. Install the ornament to the position shown in the figure.
4SD (LH)
am6zzw00017543
|
4SD (RH)
am6zzw00017544
|
WGN (LH (2WD))
am6zzw00017545
|
WGN (LH (4WD))
am6zzw00017546
|
WGN (RH)
am6zzw00017547
|
4. Press the ornament with a force of 49 N {5.0 kgf, 11 lbf} or more so that the clearance between the ornament and the adhesion area of the ornament is 0.8 mm {0.03 in} or less.
Type B
1. Degrease the adhesion area of the ornament.
2. Warm the ornament to 15 °C {59 °F} to 40 °C {104 °F} using a heat gun.
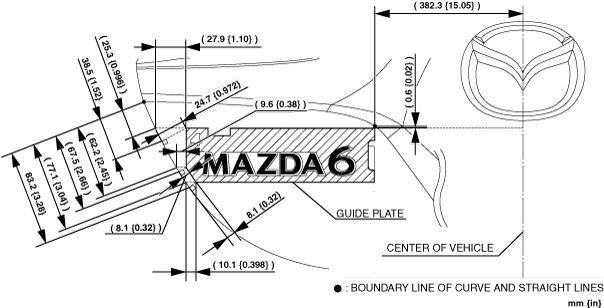
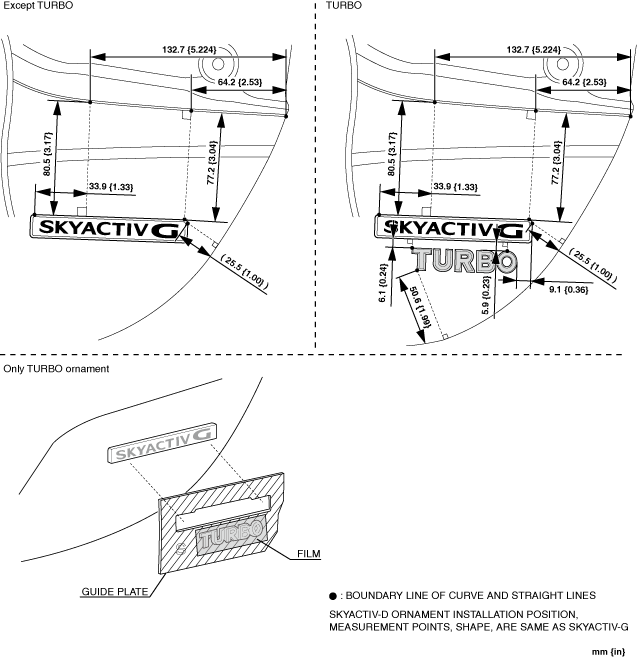
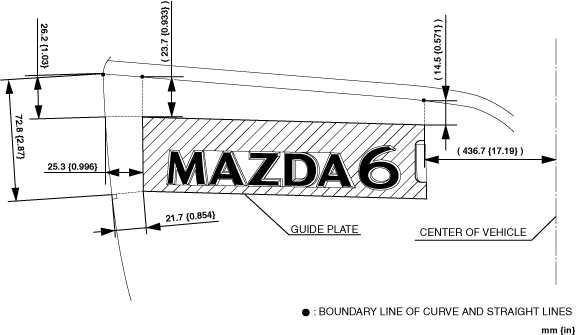
3. Install the ornament to the position shown in the figure.
4SD (LH)
am6zzw00018064
|
4SD (RH)
am6xuw00013025
|
WGN (LH (2WD))
am6zzw00018155
|
WGN (LH (4WD))
am6zzw00018156
|
am6zzw00018157
|
WGN (RH)
am6zzw00018543
|
4. If there is a guide plate, perform the following procedure:
5. Verify that the clearance between the ornament and the adhesion area of the ornament is within the standard clearance.
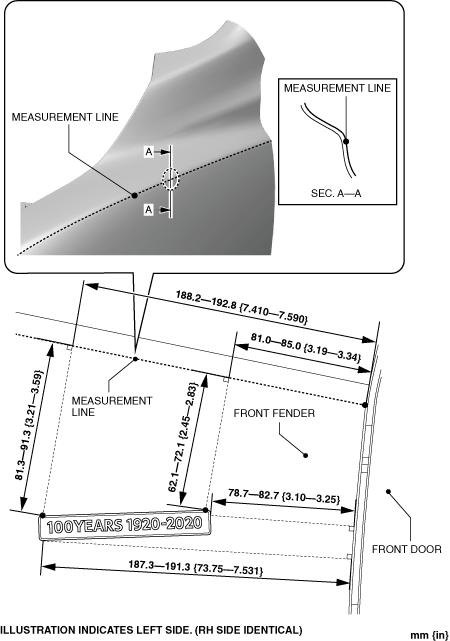
100YEARS Ornament
1. Remove any grease or dirt from the ornament installation surface of the front fender.
am6zzw00018541
|
2. Warm the double-sided adhesive tape on the underside of the ornament to between 15 °C {59 °F} and 40 °C {104 °F} using a heat gun.
3. Install the ornament to the position shown in the figure.
am6zzw00018542
|
4. Press the ornament with a force of 24 N {2.4 kgf, 18 lbf} or more.