TRUNK BOARD REMOVAL/INSTALLATION
id091700810000
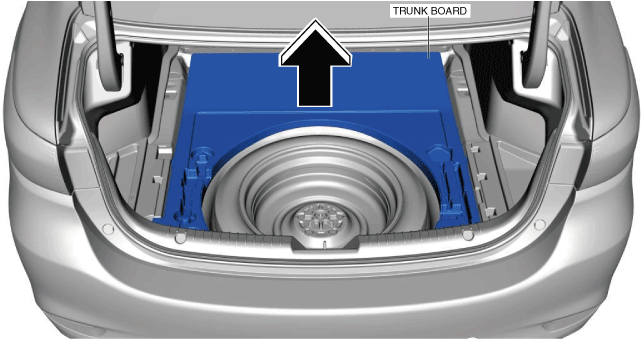
4SD
With temporary spare tire
1. Remove the trunk covering. (See TRUNK COVERING REMOVAL/INSTALLATION.)
2. Remove the trunk board in the direction of the arrow shown in the figure.
3. Install in the reverse order of removal.
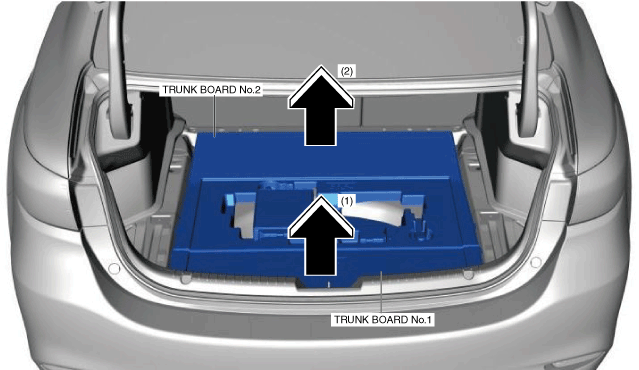
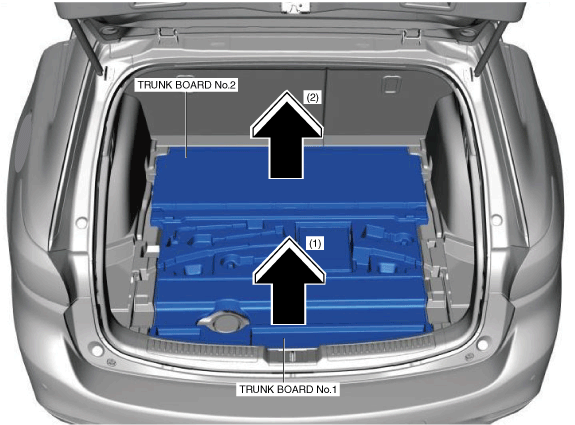
Without temporary spare tire
1. Remove the trunk covering. (See TRUNK COVERING REMOVAL/INSTALLATION.)
2. Remove the trunk board No.1 in the direction of the arrow (1) shown in the figure.
3. Remove the trunk board No.2 in the direction of the arrow (2) shown in the figure.
4. Install in the reverse order of removal.
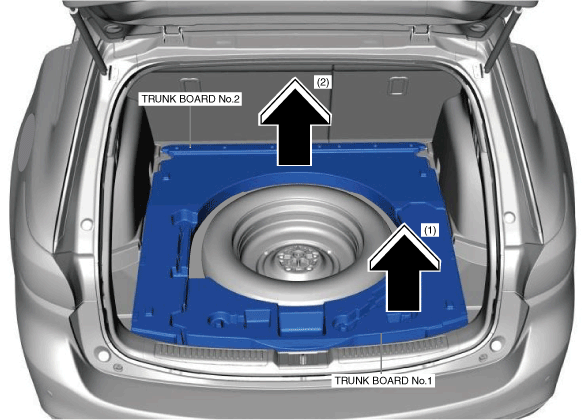
WGN
With temporary spare tire
-
― Type A
-
2. Remove the trunk board No.1 in the direction of the arrow (1) shown in the figure.
3. Remove the trunk board No.2 in the direction of the arrow (2) shown in the figure.
4. Install in the reverse order of removal.
-
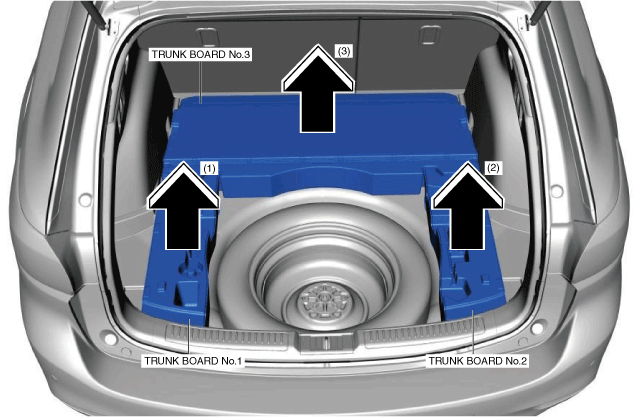
― Type B
-
2. Remove the trunk board No.1 in the direction of the arrow (1) shown in the figure.
3. Remove the trunk board No.2 in the direction of the arrow (2) shown in the figure.
4. Remove the trunk board No.3 in the direction of the arrow (3) shown in the figure.
5. Install in the reverse order of removal.
-
― Type C
-
2. Remove the trunk board No.1 in the direction of the arrow (1) shown in the figure.
3. Remove the trunk board No.2 in the direction of the arrow (2) shown in the figure.
4. Remove the trunk board No.3 in the direction of the arrow (3) shown in the figure.
5. Install in the reverse order of removal.
Without temporary spare tire
-
― Type A
-
2. Remove the trunk board No.1 in the direction of the arrow (1) shown in the figure.
3. Remove the trunk board No.2 in the direction of the arrow (2) shown in the figure.
4. Install in the reverse order of removal.
-
― Type B
-
2. Remove the trunk board No.1 in the direction of the arrow (1) shown in the figure.
3. Remove the trunk board No.2 in the direction of the arrow (2) shown in the figure.
4. Install in the reverse order of removal.