RADIATOR CAP INSPECTION [LF, L3]
id0112008015b5
-
Warning
-
• Never remove the radiator cap while the engine is running, or when the engine and radiator are hot. Scalding coolant and steam may shoot out and cause serious injury. It may also damage the engine and cooling system.
-
• Turn off the engine and wait until it is cool. Even then, be very careful when removing the cap. Wrap a thick cloth around it and slowly turn it counterclockwise to the first stop. Step back while the pressure escapes.
-
• When you are sure all the pressure is gone, press down on the cap using the cloth, turn it, and remove it.
1. Clean the radiator cap negative pressure valve and the sealed part.
2. Inspect the crack or turn over on sealed part of the radiator cap.
-
• If not as specified, replace the radiator cap.
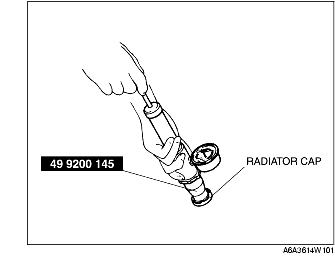
3. Fill the SST with the water or the engine coolant to the full level and attach the radiator cap to the SST.
4. Hold the radiator cap downward and apply pressure gradually. Verify that the pressure become held for 10 s within the specification.
-
• If the pressure is not held stable within the specification, replace the radiator cap.
-
Radiator cap valve opening pressure
-
113-142 kPa {1.1-1.4 kgf/cm2, 15-20 psi}