1. Disconnect the negative battery cable.
2. Drain the ATF into a separate suitable container. (See AUTOMATIC TRANSAXLE FLUID (ATF) REPLACEMENT [FN4A-EL].)
3. Remove the under cover.
4. Remove the front tires and splash shield.
5. Remove the crossmember. (See FRONT CROSSMEMBER REMOVAL/INSTALLATION.)
6. Remove the oil pan.
7. Disconnect the transaxle connectors and transaxle fluid temperature (TFT) sensor connector.
8. Remove the oil strainer.
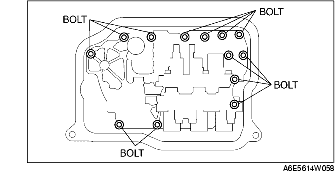
9. Remove the control valve body installation bolts A as shown, then remove the control valve body component as shown.
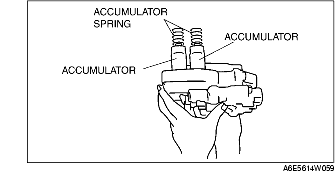
10. Remove the accumulators and accumulator springs.