-
Caution
-
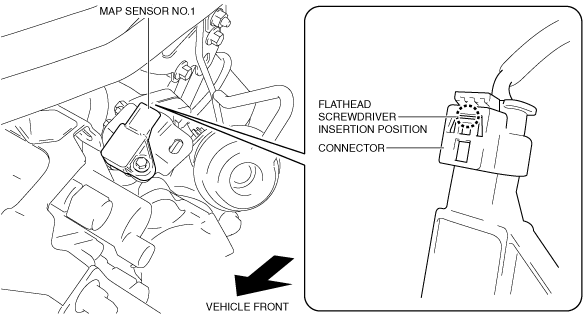
• Do not apply excessive force when using the flathead screwdriver so as to prevent damage to the connector tab.
am6zzw00010944
|
MANIFOLD ABSOLUTE PRESSURE (MAP) SENSOR REMOVAL/INSTALLATION [SKYACTIV-D 2.2]
id0140z7804300
MAP Sensor No.1
1. Disconnect the negative battery cable. (See NEGATIVE BATTERY CABLE DISCONNECTION/CONNECTION [SKYACTIV-D 2.2].)
2. Remove the air cleaner. (See INTAKE-AIR SYSTEM REMOVAL/INSTALLATION [SKYACTIV-D 2.2].)
3. Remove the battery and battery tray. (See BATTERY REMOVAL/INSTALLATION [SKYACTIV-D 2.2].)
4. Remove the air inlet pipe, air hose and turbocharger air inlet hose. (See INTAKE-AIR SYSTEM REMOVAL/INSTALLATION [SKYACTIV-D 2.2].)
5. Disconnect the connector for the MAP sensor No.1 using the following procedure:
am6zzw00010944
|
am6zzw00010945
|
6. Remove the clip from the bracket.
am6zzw00010946
|
7. Remove the bolts from the bracket.
am6zzw00010947
|
8. Remove the bracket.
am6zzw00010948
|
9. Remove the MAP sensor No.1. (See MAP Sensor No.1 Installation Note.)
am6zzw00018526
|
10. Install in the reverse order of removal.
MAP Sensor No.1 Installation Note
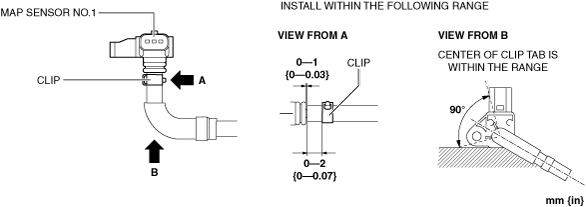
1. Install the MAP sensor No.1 shown in the figure.
am6zzw00008617
|
MAP Sensor No.1 Connector Connection Note
1. Connect the connector for the MAP sensor No.1 and press it in the lock direction of the arrow.
am6zzw00010950
|
MAP Sensor No.2
1. Disconnect the negative battery cable. (See NEGATIVE BATTERY CABLE DISCONNECTION/CONNECTION [SKYACTIV-D 2.2].)
2. Remove the engine cover. (See ENGINE COVER REMOVAL/INSTALLATION [SKYACTIV-D 2.2].)
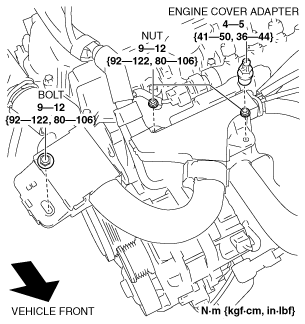
3. Remove the bolt, nuts and engine cover adapter.
am6zzw00011691
|
4. Set the wiring harness aside.
am6zzw00010951
|
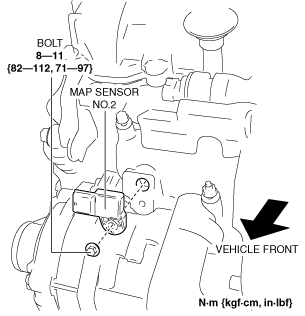
5. Disconnect the MAP sensor No.2 connector.
6. Remove the MAP sensor No.2.
am6zzw00011741
|
7. Install in the reverse order of removal. (See Protector Installation Note.)
Protector Installation Note
1. Install a protector shown in the figure.
am6zzw00008618
|