Caution
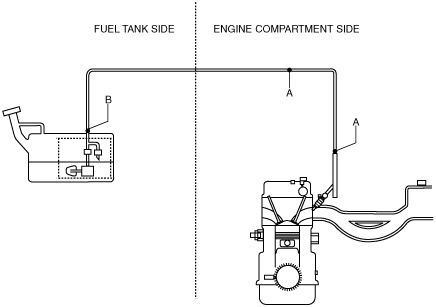
• There are two types of quick release connectors. Verify the type and location, and install/remove properly.
am6zzw00000270
|
QUICK RELEASE CONNECTOR REMOVAL/INSTALLATION [L8, LF, L5]
id0114a5801700
Quick Release Connector Type
am6zzw00000270
|
Type A Removal
1. Complete the “BEFORE SERVICE PRECAUTION”. (See BEFORE SERVICE PRECAUTION [L8, LF, L5].)
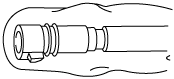
2. Rotate the release tab on the quick release connector to the stopper position.
am3zzw00000367
|
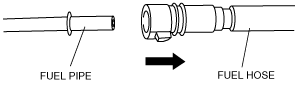
3. Pull out the fuel hose straight from the fuel pipe and disconnect it.
am3zzw00000368
|
4. Cover the disconnected quick release connector and fuel pipe with vinyl sheeting or a similar material to prevent it from scratches or dirt.
am3zzw00000369
|
Type B Removal
1. Complete the “BEFORE SERVICE PRECAUTION”. (See BEFORE SERVICE PRECAUTION [L8, LF, L5].)
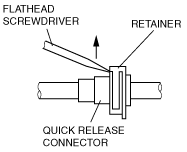
2. Move the retainer upward using a small flathead screwdriver or a similar tool.
am3zzw00000374
|
3. Pull out the fuel hose straight from the fuel pipe and disconnect it.
4. Cover the disconnected quick release connector and fuel pipe with vinyl sheeting or a similar material to prevent it from scratches or dirt.
am3zzw00000369
|
Type A Installation
am3zzw00000375
|
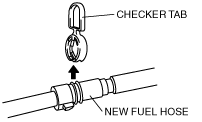
1. Inspect the fuel hose and fuel pipe sealing surface for damage and deformation.
2. Apply a small amount of clean engine oil to the sealing surface of the fuel pipe.
3. Reconnect the fuel hose straight to the fuel pipe until a click is heard.
4. Lightly pull and push the quick release connector a few times by hand, and then verify that it can move 2.0—3.0 mm {0.08—0.12 in} and is connected securely.
5. Complete the “AFTER SERVICE PRECAUTION”. (See AFTER SERVICE PRECAUTION [L8, LF, L5].)
Type B Installation
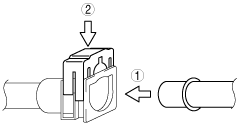
1. Inspect the fuel hose and fuel pipe sealing surface for damage and deformation.
2. Install the quick release connector.
am2zzw00001569
|
3. Lightly pull and push the quick release connector a few times by hand, and then verify that it is connected securely.
4. Inspect all related parts by performing “AFTER SERVICE PRECAUTION”. (See AFTER SERVICE PRECAUTION [L8, LF, L5].)