|
am6zzw00001346
CENTER PANEL UPPER REMOVAL/INSTALLATION
id091700898700
am6zzw00001346
|
1. Disconnect the negative battery cable.
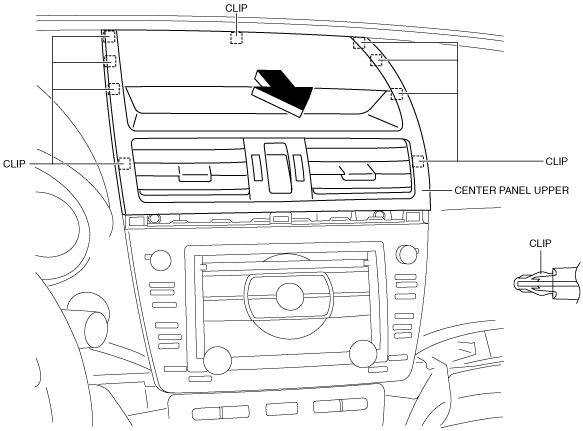
2. Insert a tape-wrapped fastener remover into the position indicated by the arrow in the figure, slide it to remove the clips and hook, and raise the front side of the center panel upper.
am6zzw00001344
|
3. Pull the center panel upper in the direction of the arrow shown in the figure and remove it while detaching clips.
am6zzw00001345
|
4. Disconnect the information display connector.
5. Disconnect the center speaker connector. (Vehicles with Bose®)
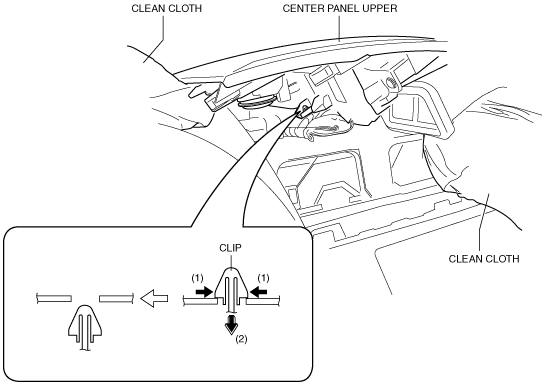
6. Spread the clean cloth, between the dashboard and center panel upper.
7. Rotate the center panel upper in the direction of the arrow shown in the figure.
am6zzw00007614
|
8. Detach the wiring harness clip in the direction of the arrow (1) shown in the figure, and then remove it in the direction of the arrow (2) shown in the figure.
am6zzw00007615
|
9. Disconnect the hazard warning switch connector.
10. Disconnect the microphone connector. (Vehicles with microphone)
11. Disconnect the passenger-side seat belt waning connector.
12. Install in the reverse order of removal.