 |
am6zzw00002288
FRONT COMBINATION LIGHT REMOVAL/INSTALLATION
id091800800700
1. Disconnect the negative battery cable.
2. Remove the front bumper. (See FRONT BUMPER REMOVAL/INSTALLATION.)
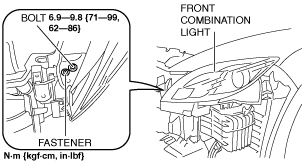
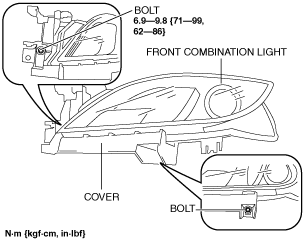
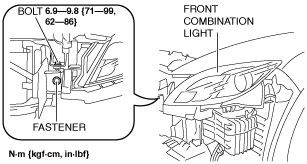
3. Remove the bolt and fastener shown in the figure.
am6zzw00002288
|
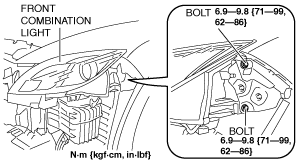
4. Remove the bolt and fastener shown in the figure.
am6zzw00002289
|
5. Remove the bolts shown in the figure.
am6zzw00003598
|
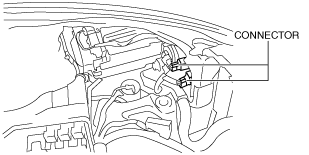
6. Disconnect the connectors shown in the figure.
am6zzw00002291
|
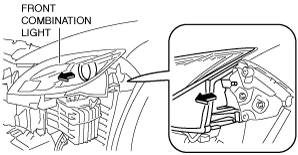
7. Pull the front combination light in the direction of the arrow shown in the figure and remove the pin from the body.
am6zzw00002292
|
8. Remove the front combination light.
9. Remove the bolts shown in the figure.
am6zzw00003599
|
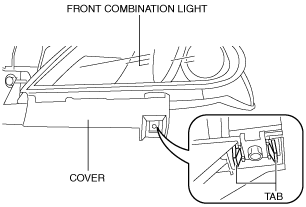
10. Remove the tabs shown in the figure.
am6zzw00002526
|
11. Remove the cover from the combination light.
12. Install in the reverse order of removal. (See Front Combination Light Installation Note.)
13. Adjust the headlight aiming. (See HEADLIGHT AIMING.)
14. Inspect the AFS operation. (with AFS) (See AFS (ADAPTIVE FRONT LIGHTING SYSTEM) OPERATIONAL INSPECTION.)
Front Combination Light Installation Note
With AFS
am6zzw00014634
|
Without AFS
am6zzw00014635
|