 |
am2zzb00000111
REAR FENDER PANEL REMOVAL [PANEL REPLACEMENT]
id098008744900
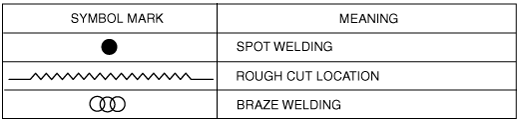
Symbol Mark
am2zzb00000111
|
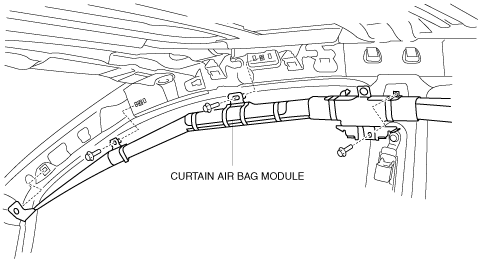
Removal Procedure
4SD
Front-side
am6zzb00000252
|
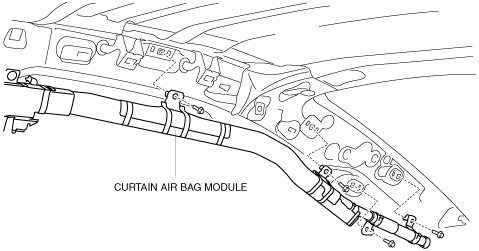
Rear-side
am6zzb00000253
|
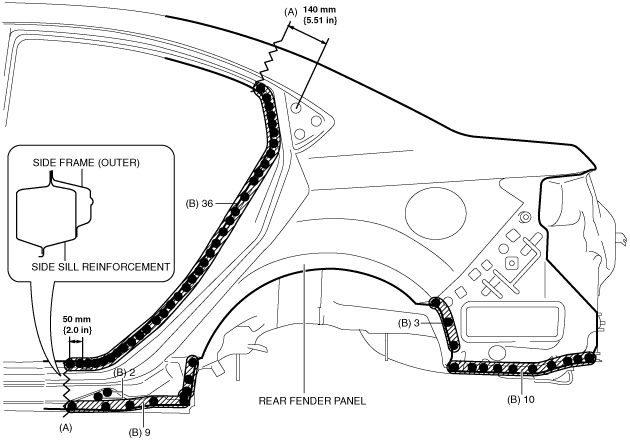
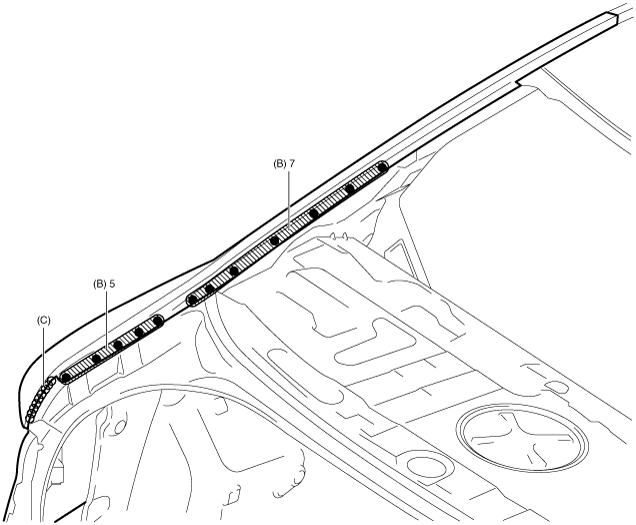
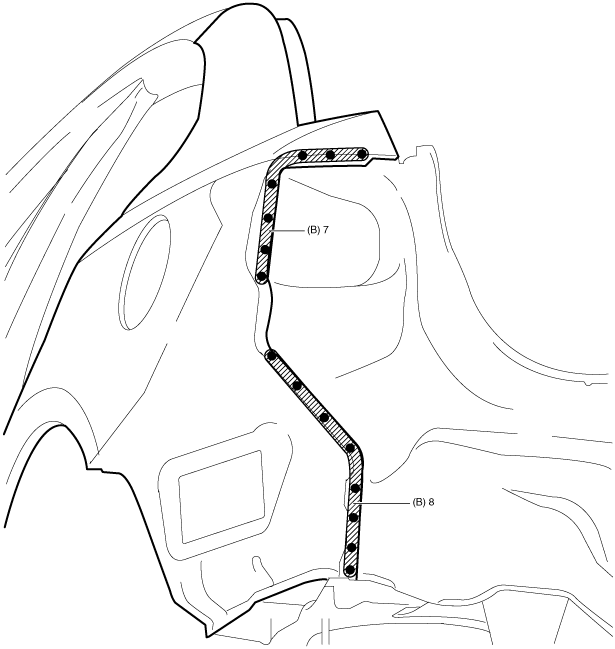
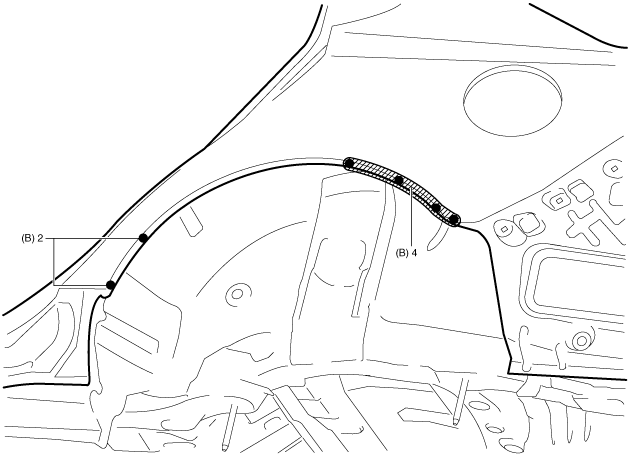
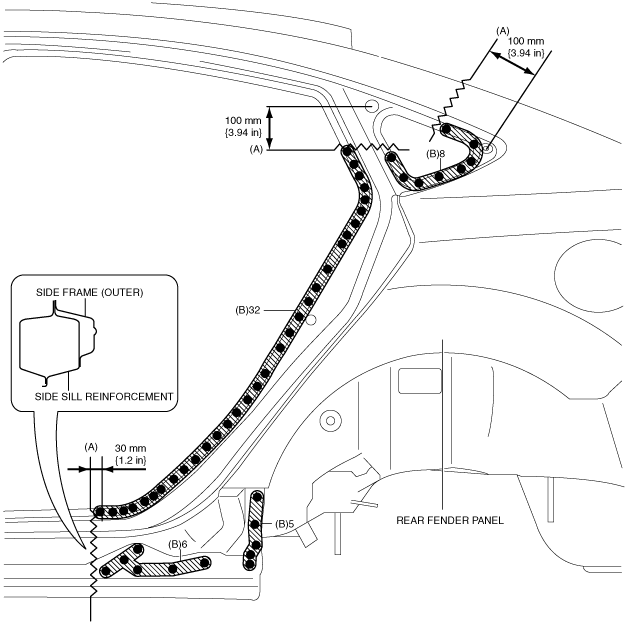
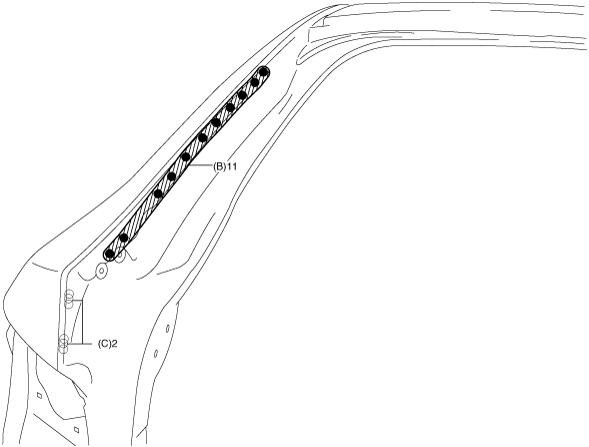
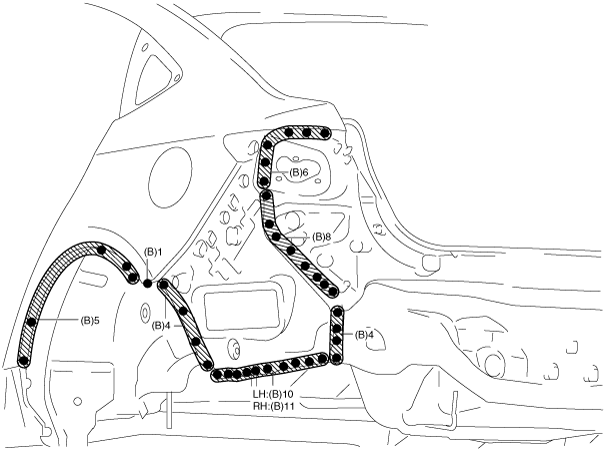
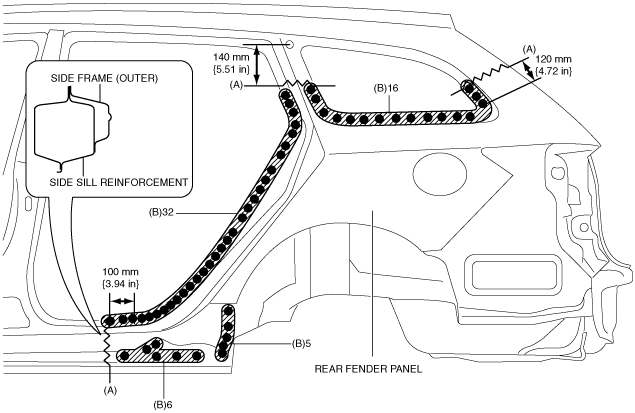
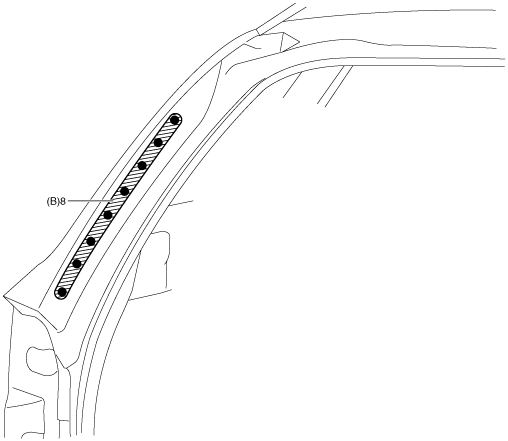
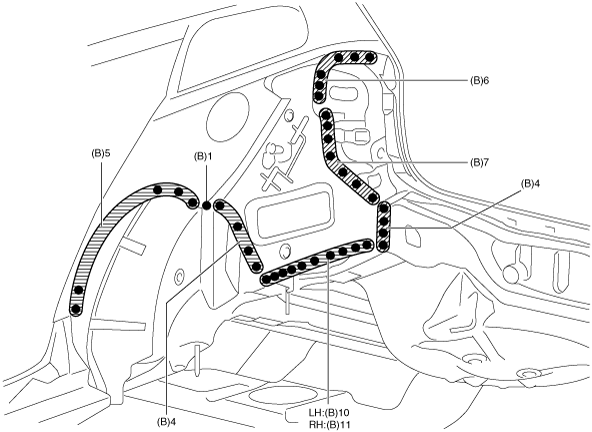
1. Rough cut area locations indicated by (A) then drill the 84 locations indicated by (B) shown in the figure.
2. Remove the braze weld location indicated by (C) shown in the figure.
am6zzb00000093
|
am6zzb00000094
|
am6zzb00000095
|
am6zzb00000096
|
3. The rear fender panel and the rear pillar (inner) are joined with spot weld sealer at the tire arch line. Use a spatula to separate the rear fender panel from the rear pillar (inner), then remove the rear fender panel.
4. Remove the rear fender panel.
5HB
Front-side
am6zzb00000254
|
Rear-side
am6zzb00000255
|
1. Rough cut area locations indicated by (A) then drill the 100 (LH) or 101 (RH) locations indicated by (B) shown in the figure.
am6zzb00000263
|
2. Remove the braze weld 2 locations indicated by (C) shown in the figure.
am6zzb00000195
|
am6zzb00000297
|
3. The rear fender panel and the rear pillar (inner) are joined with spot weld sealer at the tire arch line. Use a spatula to separate the rear fender panel from the rear pillar (inner), then remove the rear fender panel.
4. Remove the rear fender panel.
Wagon
Front-side
am6zzb00000254
|
Rear-side
am6zzb00000256
|
1. Rough cut area locations indicated by (A) then drill the 104 (LH) or 105 (RH) locations indicated by (B) shown in the figure.
am6zzb00000264
|
am6zzb00000198
|
am6zzb00000298
|
2. The rear fender panel and the rear pillar (inner) are joined with spot weld sealer at the tire arch line. Use a spatula to separate the rear fender panel from the rear pillar (inner), then remove the rear fender panel.
3. Remove the rear fender panel.