FRONT DOOR TRIM REMOVAL/INSTALLATION
id091700802500
-
Caution
-
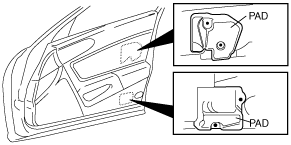
• If the pad installed to the inside of the front door trim is damaged it could cause looseness resulting in the occurrence of abnormal noise. Be careful when handling the front door trim so that it does not receive an impact by being hit or dropped.
1. Disconnect the negative battery cable.
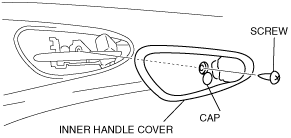
2. Using a small flathead screwdriver, open the cap and remove the screw, then remove the inner handle cover.
3. Remove the inner garnish. (See INNER GARNISH REMOVAL/INSTALLATION.)
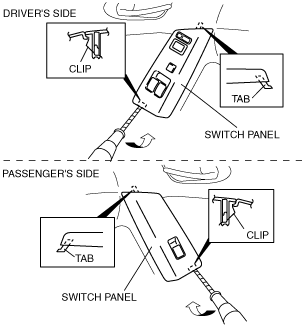
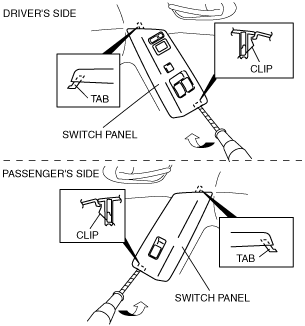
4. Using a flathead screwdriver, pry up the rear part of the switch panel and detach the clip.
L.H.D.
R.H.D.
5. Remove the switch panel from the front door trim keeping the tab from catching.
6. Disconnect the power window main switch connector, the power mirror switch connector, and the power window subswitch connector.
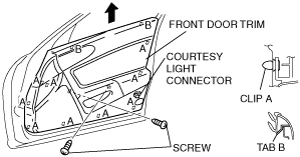
7. Remove the screws.
8. Detach clips A from the front door using a fastener remover.
9. Pull the front door trim upward, then detach tabs B from the front door.
10. Disconnect the courtesy light connector.
11. Remove the front door trim.
12. Install in the reverse order of removal.