 |
atraaw00000838
FUEL TANK REMOVAL/INSTALLATION[L3]
id0114a2801600
1. Park the vehicle on a level surface.
2. Perform the "Fuel Line Safety Procedure" referring to the BEFORE SERVICE PRECAUTION. (See BEFORE SERVICE PRECAUTION[L3].)
3. Disconnect the negative battery cable.
4. Remove the fuel pump unit. (See FUEL PUMP UNIT REMOVAL/INSTALLATION[L3].)
5. Drain the fuel from the service hole.
6. Remove the rear tire (LH) (See WHEEL AND TIRE REMOVAL/INSTALLATION.)
7. Remove the main silencer. (See EXHAUST SYSTEM REMOVAL/INSTALLATION[L3].)
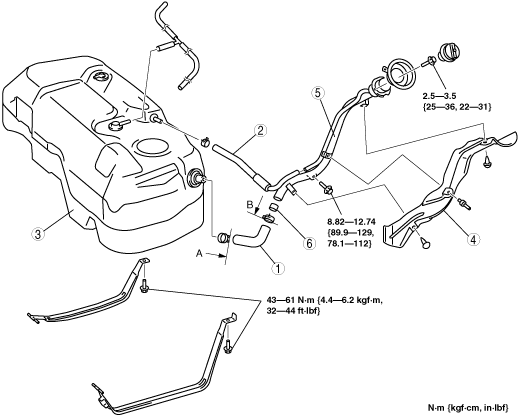
8. Remove in the order indicated in the figure.
9. Install in the reverse order of removal.
10. Inspect all parts by performing the AFTER SERVICE PRECAUTION. (See AFTER SERVICE PRECAUTION[L3].)
atraaw00000838
|
|
1
|
Joint hose
(See Joint Hose Installation Note.)
|
|
2
|
Breather hose
|
|
3
|
Fuel tank
(See Fuel Tank Removal Note.)
|
|
4
|
Protector
(See Protector Removal Note.)
|
|
5
|
Fuel-filler pipe
|
|
6
|
Nonreturn valve
|
Fuel Tank Removal Note
1. Remove the propeller shaft. (See PROPELLER SHAFT REMOVAL/INSTALLATION.)
2. Position the rear differential out of way.
3. Remove the fuel tank.
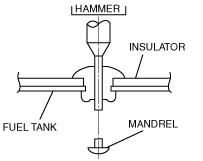
Protector Removal Note
1. Push out the mandrel using a hammer and punch (2—2.8 mm {0.08—0.11 in} diameter).
atraaw00000839
|
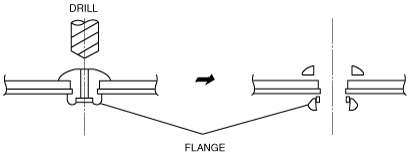
2. Remove the flange using a drill (5 mm {0.20 in} drill bit).
atraaw00000840
|
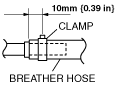
Breather Hose Installation Note
1. Install the breather hose and clamps as shown in the figure.
atraaw00000841
|
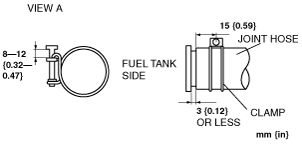
Joint Hose Installation Note
1. Install the joint hose and clamps as shown in the figure.
atraaw00000842
|
atraaw00000843
|