|
atraaw00002382
TRANSAXLE SUPPORT INSULATOR (LH) REMOVAL[LA4AX-EL (CD4E)]
id051708805000
1. Disconnect the negative battery cable.
2. Remove the battery and battery tray. (See BATTERY REMOVAL/INSTALLATION[AJ (3.0L Duratec)].)
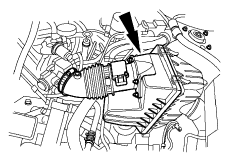
3. Disconnect the crankcase vent hose and MAF sensor connector.
atraaw00002382
|
4. Remove the air hose and air cleaner cover.
atraaw00002383
|
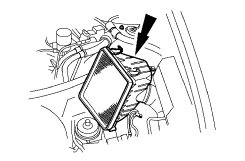
5. Remove the air cleaner component.
atraaw00002570
|
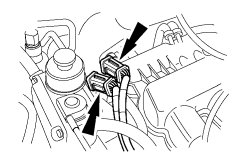
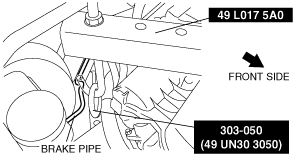
6. Remove the power steering pressure hose bracket to install the SST (49 UN30 3050).
7. Remove the connectors from the valve cover.
atraaw00002581
|
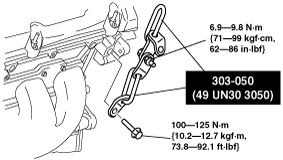
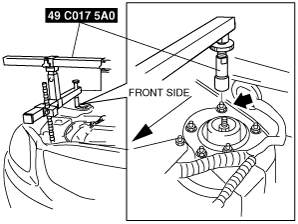
8. Assemble two SSTs using the bolt (M6) and nut, then install them in the position shown in the figure for the cylinder head (RH).
atraaw00003128
|
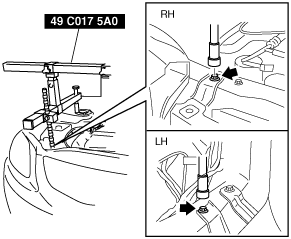
9. Install the SST using the following procedure.
atraaw00002180
|
atraaw00000060
|
atraaw00003129
|
atraaw00000062
|
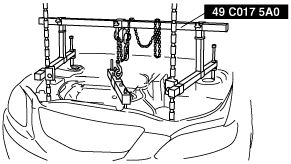
10. Support the engine using the SST.
atraaw00000063
|
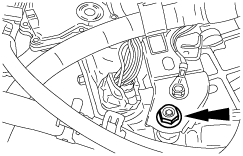
11. Remove the wiring harness bracket nut and bracket.
atraaw00002836
|
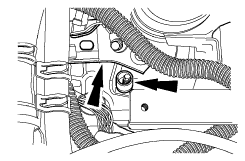
12. Position the wiring harness bracket out of the way and remove the spacer.
atraaw00002574
|
13. Remove the upper transaxle mount plate component.
atraaw00002690
|
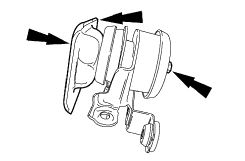
14. Disassemble the upper transaxle mount plate component.
atraaw00002659
|
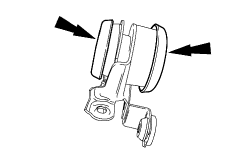
15. Remove the top and bottom mount cups.
atraaw00002660
|