1. Mark and separate the parts and clean with solvent. Clean the oil passages.
2. Remove the connecting rod bearing cap.
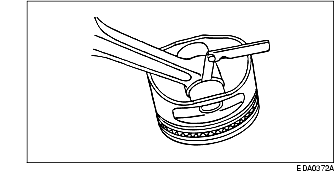
3. Position a piece of Plastigage across the bearing surface.
4. Install and tighten to specifications, then remove the connecting rod bearing cap.
5. Measure the Plastigage to get the connecting rod bearing journal clearance. The Plastigage should be smooth and flat. A changing width indicates a tapered or damaged connecting rod or connecting rod bearing.
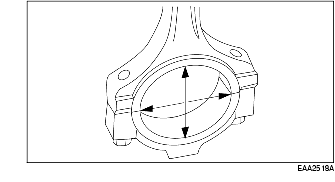
6. Measure the bore in two directions. The difference is the connecting rod bore out-of-round. Verify the out-of-round is within specification.
7. Measure the inner diameter of the connecting rod bushing, if equipped. Verify the diameter is within specification.
8. Measure the connecting rod bend on a suitable alignment fixture. Follow the instructions of the fixture manufacturer. Verify the bend measurement is within specification.
9. Measure the connecting rod twist on a suitable alignment fixture. Follow the instructions of the fixture manufacturer. Verify the measurement is within specification.
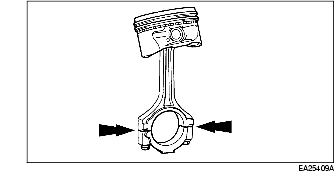
10. Measure the clearance between the connecting rod and the piston. Verify the measurement is within specification.