PLANETARY GEARSETS AND CHAIN DRIVE PARTS REMOVAL/INSTALLATION
BUE051700000115
Installation
1. Inspect the low/intermediate sun gear component for damage.
-
• Gear teeth
-
• Thrust bearing surfaces
-
• Journal surface
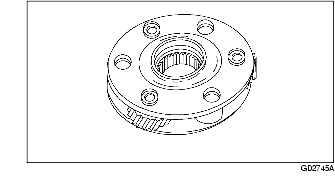
2. Inspect the low/intermediate carrier component.
-
• Pinion gear teeth
-
• Spline teeth
-
• Pinion gear surfaces
-
• Bushing surfaces
-
• Pinion gear bearings
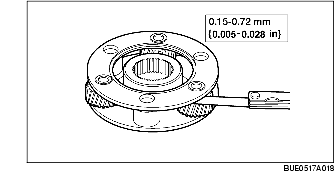
3. Use a feeler gauge to measure the low/intermediate carrier component end play.
-
• If end play is out of specification, install a new low/intermediate carrier component.
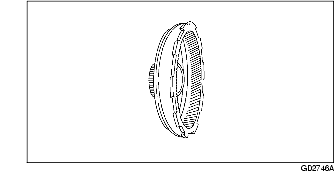
4. Inspect the low/intermediate ring gear.
-
• Gear teeth
-
• Spline teeth
-
• Thrust bearing surfaces
-
• Journal surface
-
• Lug teeth
5. Inspect the reverse/overdrive sun gear and shell component for damage or wear.
-
• Gear teeth
-
• Lug teeth
-
• Thrust bearing surfaces
-
• Bushing surface
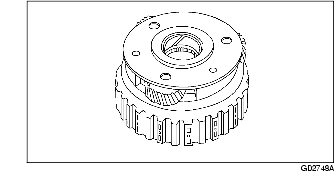
6. Inspect the reverse/overdrive carrier component.
-
• Pinion gear teeth
-
• Clutch plate spline teeth
-
• Pinion gear bearings
-
• Thrust bearing surfaces
-
• Bushing surfaces
-
• No.8 thrust bearing captured between the pinions and carrier
7. Use feeler gauge to measure the reverse/overdrive carrier component end play.
-
• If end play is out of specification, install a new low/intermediate carrier component.
8. Inspect the reverse/overdrive ring gear.
-
• Gear teeth
-
• Spline teeth
-
• Drive sprocket teeth
-
• Thrust bearing surfaces
-
• Journal surface
-
• Bearing
9. Inspect the driven sprocket component.
-
• Gear teeth
-
• Parking gear lug teeth
-
• Driven sprocket teeth
-
• Thrust bearing surfaces
-
• Bearing surfaces
-
• Rivet
-
• Bushing surfaces
-
• Lubrication holes
10. Inspect the drive chain.
-
(1) Inspect the drive chain for wear, stretching, or tightness of the chain links.
-
(2) The chain must move freely.
-
(3) The chain gap must be within 3.175 mm {0.125 in}.
• If there is any malfunction, replace the drive chain.