• To prevent the foreign material from entering the transfer, perform disassembly and servicing in a clean, dust-free environment.
• Inspect the each part while disassembling.
• Disassemble with bare hand or using vinyl gloves. To prevent foreign material from entering the transfer, do not use cotton work gloves or rag.
• When disassembling areas of the transfer that are made of light alloy, tap lightly with a plastic hammer. Do not use a flathead screwdriver.
.
1. Remove the rear cover and drain the transfer oil.
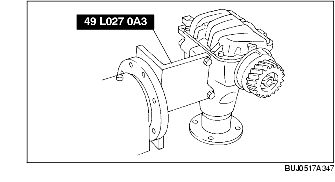
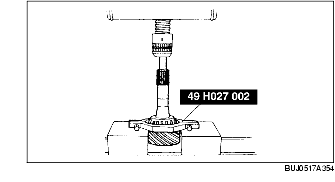
2. Assemble the SST.
3. Install the transfer to the SST.
4. Remove the side cover.
5. Remove the O-ring from the side cover.
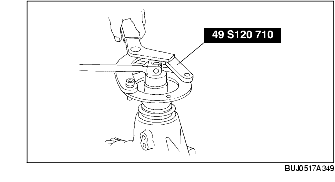
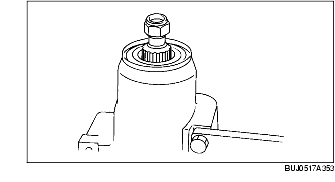
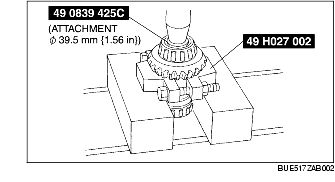
6. Using the SST, secure the companion flange, and remove the idle gear locknut.
7. Using the SST, secure the companion flange, and remove the locknut and washer.
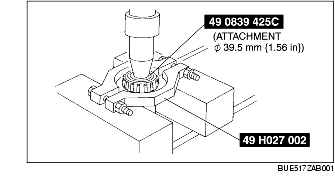
8. Using the SST, remove the companion flange.
9. Using a flathead screwdriver, remove the oil seal.
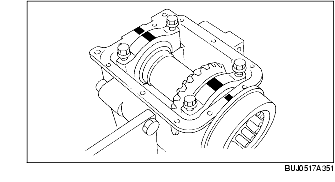
10. Using a copper hammer and pin punch, tap the idle gear locknut lightly to remove the idle gear.
11. Remove the spacer (locknut side).
12. Make alignment marks on the bearing cap and carrier.
13. Remove the bearing cap.
14. Using the SSTs, remove the ring gear component.
15. Remove the spacer (idle gear side).
16. Install an appropriate nut to the drive pinion to prevent the thread from being damaged.
17. Lightly tap the drive pinion using a copper hammer and remove the drive pinion.
18. Remove the bearing inner race (rear) and distance piece.
19. Using the SST, remove the bearing inner race (front).
20. Remove the spacer.
21. Detach the clip.
22. Using the SST, remove the bearing.
23. Using a flathead screwdriver, remove the oil seal.
24. Attach the brass stick to the notch, tap the race end lightly and evenly, then remove the outer race.
25. Using the SSTs, remove the bearing inner race (side) (locknut side).
26. Using the SSTs, remove the bearing inner race (side), then remove the ring gear.