 |
atraaw00003549
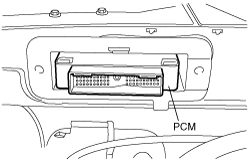
PCM REMOVAL/INSTALLATION [L3]
id0140a7802400
R.H.D. Model
1. Disconnect the negative battery cable.
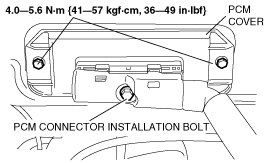
2. Loosen the PCM connector installation bolt and remove the PCM connector.
atraaw00003549
|
3. Remove the PCM cover installation bolts and the PCM cover.
4. Remove the PCM.
atraaw00003550
|
5. When replacing the PCM, perform the following:
6. Install in the reverse order of removal.
L.H.D. Model
1. Disconnect the negative battery cable.
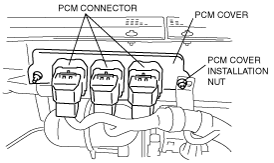
2. Disconnect the PCM connector.
atraaw00003551
|
3. Remove the PCM cover installation nut and the PCM cover.
4. Remove the PCM.
5. When replacing the PCM, perform the following:
6. Install in the reverse order of removal.