1. If the ABS HU is not filled with brake fluid, perform air bleeding by using the WDS or equivalent.
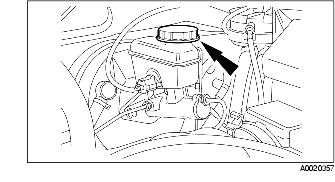
1. Fill the reserve tank with specified brake fluid.
2. Begin air bleeding the system, going in order from the rear wheel (LH), to the rear wheel (RH), then to the front wheel (LH) and ending with the front wheel (RH).
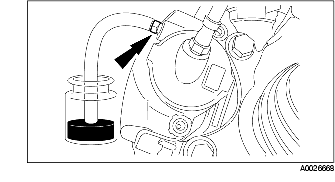
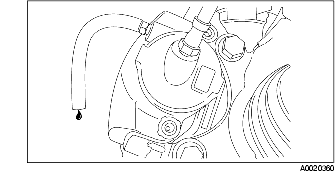
1. Attach a rubber drain hose to the bleeder screw and submerge the free end of the hose in a container partially filled with clean brake fluid.
2. Have an assistant pump the brake pedal 10 times and then hold firm pressure on the brake pedal.
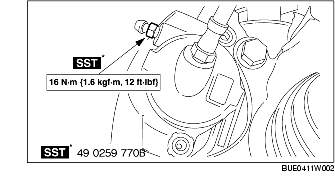
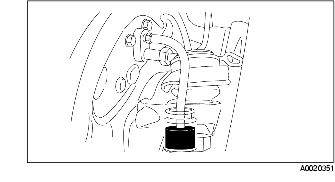
3. Loosen the bleeder screw until brake fluid flow stops. Maintain pressure on the brake pedal and tighten the bleeder screw.
4. Repeat Steps 2 and 3 until clear, bubble-free brake fluid flows.
5. Tighten the bleeder screw.
6. Continue air bleeding the rest of the system.
1. Attach a rubber drain hose to the bleeder screw and submerge the free end of the hose in a container partially filled with clean brake fluid.
2. Have an assistant pump the brake pedal 10 times and then hold firm pressure on the brake pedal.
3. Loosen the bleeder screw until brake fluid flow stops. Maintain pressure on the brake pedal and tighten the bleeder screw.
4. Repeat Steps 2 and 3 until clear, bubble-free brake fluid flows.
5. Tighten the bleeder screw.
6. Fill the reserve tank and install the cap.
1. Fill the reserve tank with specified brake fluid.
2. Begin air bleeding the system, going in order from the rear wheel (LH), to the rear wheel (RH), then to the front wheel (LH) and ending with the front wheel (RH).
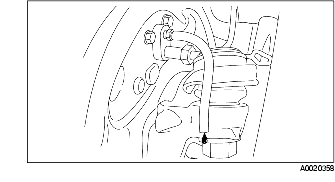
1. Loosen the bleeder screw and leave open until clear, bubble-free brake fluid flows.
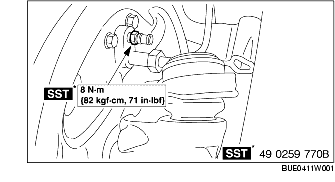
2. Tighten the bleeder screw.
1. Loosen the bleeder screw and leave open until clear, bubble-free brake fluid flows.
2. Tighten the bleeder screw.
3. Fill the reserve tank with brake fluid and install the cap.