REFRIGERANT LINE (HI PRESSURE SIDE) REMOVAL/INSTALLATION [AJ (3.0L Duratec), YF (2.0L Zetec)]
id0711000005c7
-
Note
-
• When removing/installing the refrigerant line, refer to removal/installation note. (See Refrigerant Line Removal Note.)(See Refrigerant Line Installation Note.)
L.H.D.
1. Discharge the refrigerant from the system. (See DISCHARGING AND RECOVERY.)
2. Remove the A/C pressure switch. (See A/C PRESSURE SWITCH REMOVAL/INSTALLATION.)
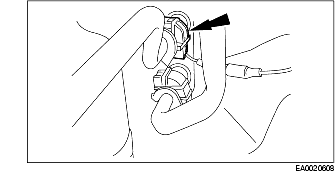
3. Disconnect the refrigerant line from the evaporator.
-
Caution
-
• Plug all ports to prevent contamination from dirt or moisture.
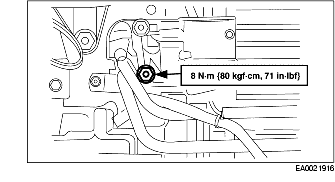
4. Remove the nut and disconnect the refrigerant line from the condenser.
-
Caution
-
• Plug all ports to prevent contamination from dirt or moisture.
5. Install in the reverse order of removal.
-
(1) Lubricate the new O-ring with PAG Compressor Oil.
R.H.D.
1. Discharge the refrigerant from the system. (See DISCHARGING AND RECOVERY.)
2. Remove the A/C pressure switch. (See A/C PRESSURE SWITCH REMOVAL/INSTALLATION.)
3. Remove the nut and bracket from the dash lower panel.
4. Disconnect the refrigerant line from the evaporator.
-
Caution
-
• Plug all ports to prevent contamination from dirt or moisture.
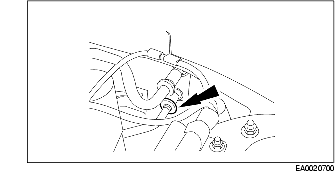
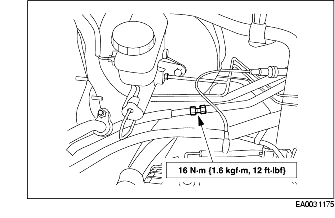
5. Disconnect the refrigerant line.
-
Caution
-
• Plug all ports to prevent contamination from dirt or moisture.
-
• Use a wrench on each side of the fitting to prevent damage to A/C fitting.
6. Remove the front bumper. (See FRONT BUMPER REMOVAL/INSTALLATION.)
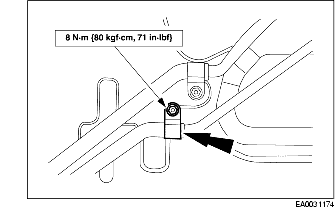
7. Remove the nut and disconnect the refrigerant line from the condenser.
-
Caution
-
• Plug all ports to prevent contamination from dirt or moisture.
8. Install in the reverse order of removal.
-
(1) Lubricate the new O-ring with PAG Compressor Oil.