Removal and Installation


COMPONENTS
REMOVAL
1. RUN ENGINE AT IDLE SPEED WITH A/C ON FOR APPROX. 10 MINUTES
2. STOP ENGINE
3. DISCONNECT NEGATIVE (-) TERMINAL CABLE FROM BATTERY
4. DISCHARGE REFRIGERANT FROM REFRIGERATION SYSTEM
5. REMOVE FRONT ENGINE UNDER COVER
6. REMOVE DRIVE BELT
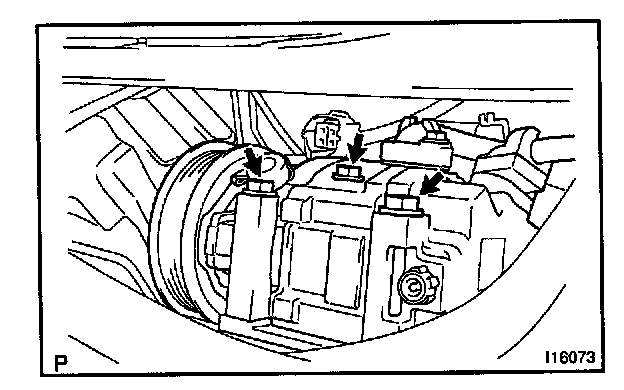
7. REMOVE COMPRESSOR
a. Disconnect the connector.
b. Disconnect the wire harness clamp.
c. Remove the 3 bolts and disconnect the compressor.
NOTE: Be careful not to damage the discharge and suction hose
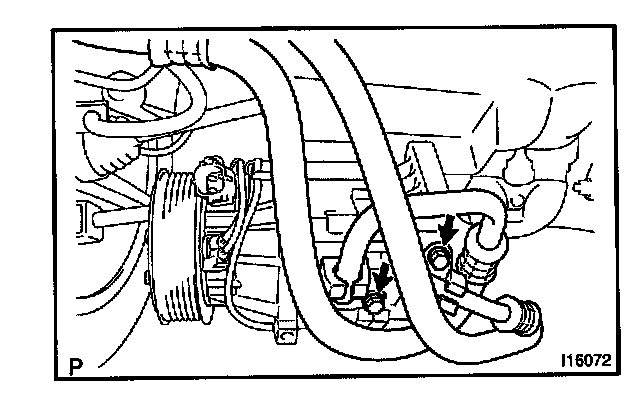
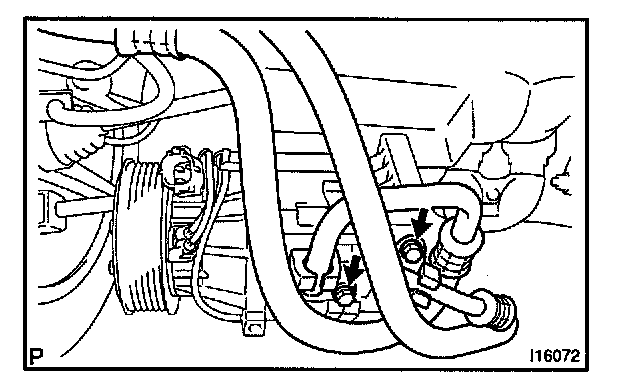
8. DISCONNECT DISCHARGE AND SUCTION HOSES
Remove the 2 bolts and disconnect the both hoses.
NOTE: Cap the open fittings immediately to keep moisture or dirt out of the system.
INSTALLATION
1. CONNECT DISCHARGE AND SUCTION HOSES
a. Lubricate 2 new O-rings with compressor oil and install them to the hoses.
b. Connect the both hoses with the 2 bolts.
Torque: 9.8 Nm (100 kg.cm, 7 ft.lb)
NOTE:
- Hose should be connected immediately after the caps have been removed.
- Be careful not to damage the discharge and suction hose.
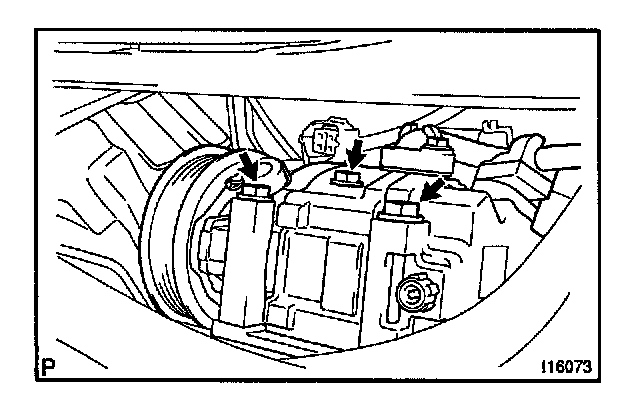
2. INSTALL COMPRESSOR
a. Install the compressor with the 3 bolts.
Torque: 24.5 Nm (250 kg.cm, 18 ft.lb)
b. Connect the connector.
3. INSTALL AND CHECK DRIVE BELT
4. CONNECT NEGATIVE (-) TERMINAL CABLE TO BATTERY
5. EVACUATE AIR FROM REFRIGERATION SYSTEM CHARGE SYSTEM WITH REFRIGERANT
Specified amount: 500 ± 30 g (17.64 ± 1.06 oz.)
6. INSPECT FOR LEAKAGE OF REFRIGERANT
Using a gas leak detector, check for leakage of refrigerant.
If there is leakage, check the tightening torque at the joints.
7. INSPECT A/C OPERATION