Front Seat Disassembly/Reassembly
Front Seat Disassembly/Reassembly
Special Tools Required
- KTC Trim Tool Set SOJATP2014
*Available through the Acura Tool and Equipment Program, 888-424-6857
SRS components are located in this area. Review the SRS component locations Locations and the precautions and procedures Service and Repair before doing repairs or service.
Do the ODS unit initialization ODS Unit Initialization after front passenger's seat replacement.
NOTE:
- Put on gloves to protect your hands.
- Take care not to tear the seams or damage the seat covers.
- Use the appropriate tool from the KTC trim tool set to avoid damage when removing components.
- DTCs will set if the ignition is turned ON (II) with the seats removed.
1. Remove the front seat Front Seat Removal/Installation.
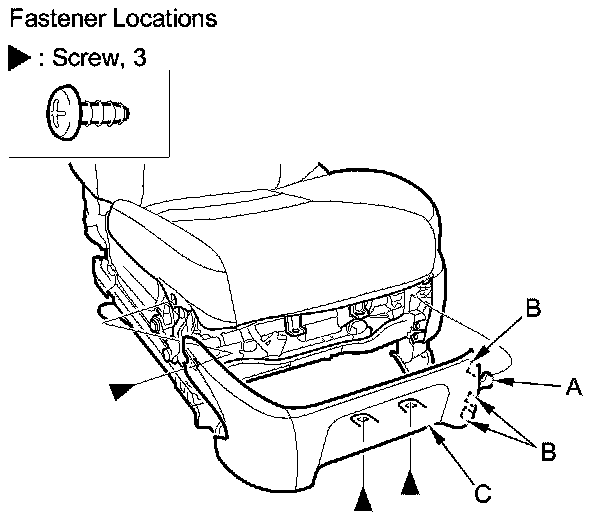
2. Remove the screws and release the hook (A), the tabs (B), then remove the front cover (C).
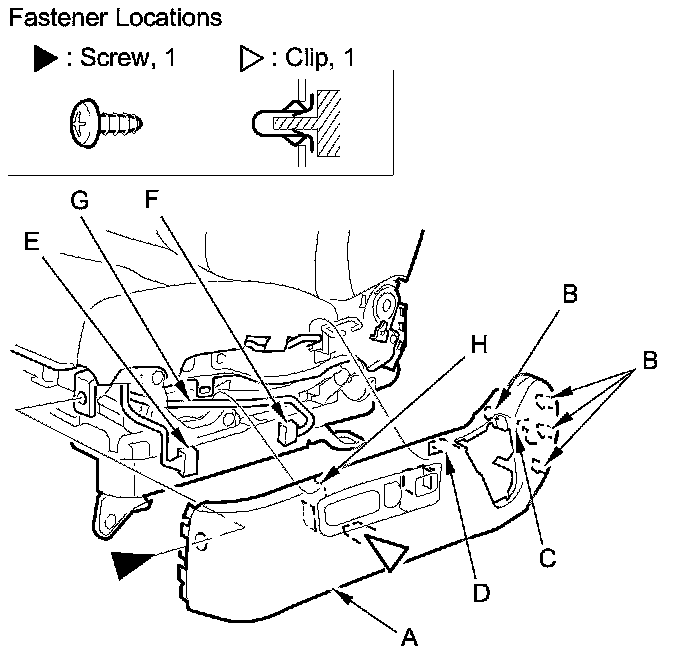
3. Remove the recline cover (A).
1. Remove the screw and detach the clip and hooks (B).
2. Pull up the cover, then detach the hooks (C, D).
3. Disconnect the recline switch and up-down switch connector (E), and on the driver's seat, lumbar support switch connector (F).
4. Remove the wire harness (G) from the hook (H).
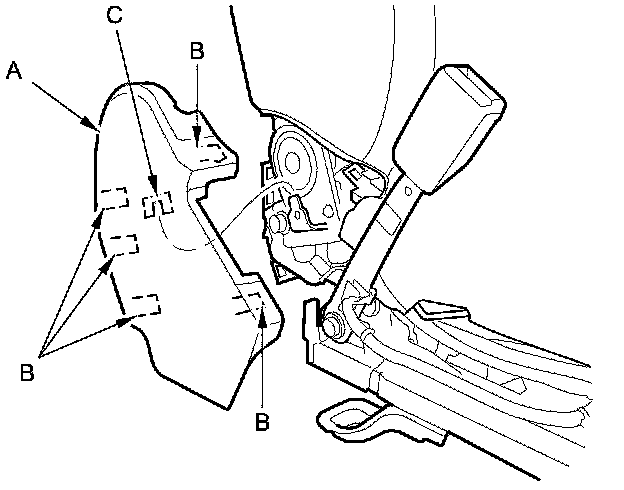
4. Remove the center cover (A).
1. Release the hooks (B).
2. Pull up the cover, then detach the hook (C).
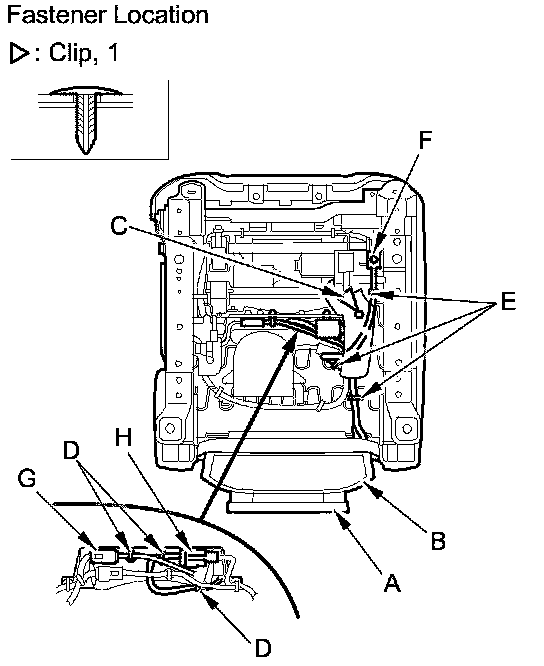
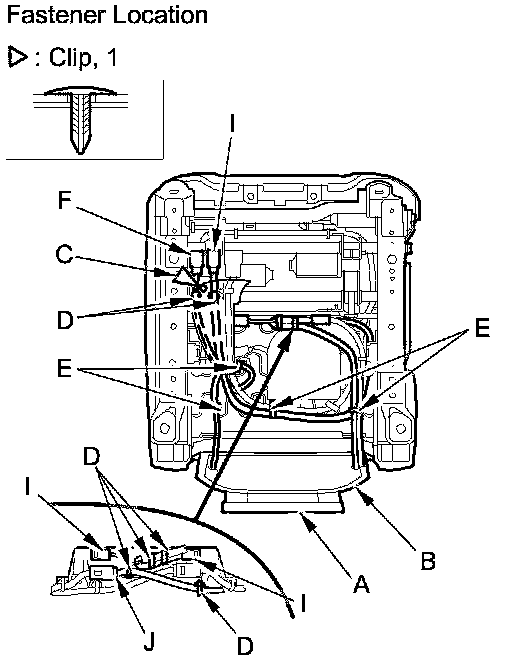
5. From under the seat cushion, release the hook strips (A) and pull the seat cushion cover (B) back. Detach the clip fastening the harness sock (C). Disconnect or detach the connectors, detach the harness clips (D), release the wire ties (E), then pull out the harness(es) out through the harness sock.
- Driver's seat
- Side airbag connector (F)
- Seat-back heater harness connector (G)
- Recline motor/lumbar support motor harness connector (H)
- Passenger's seat
- Side airbag connector (F)
- ODS unit harness connector (I)
- Recline motor harness connector (J)
Driver's seat
Passenger's seat
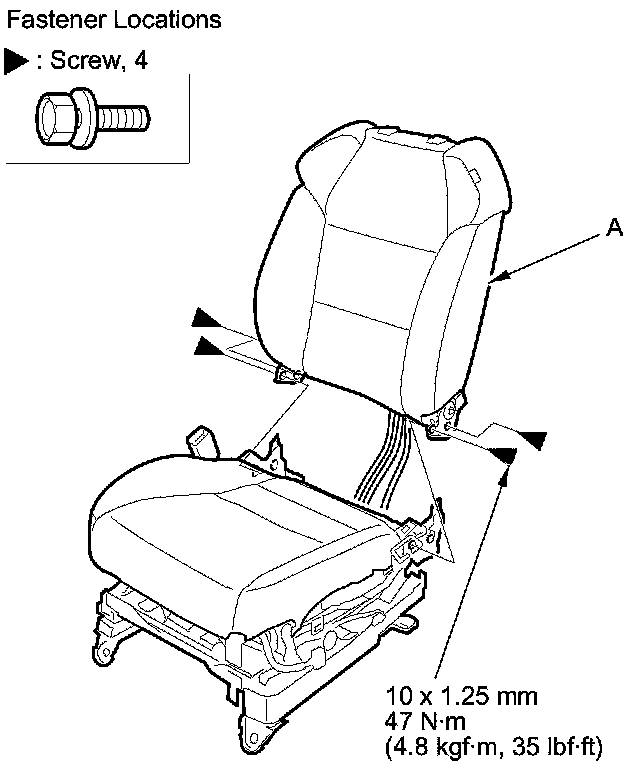
6. Remove bolts, then remove the seat-back (A).
7. Assemble the seat-back and seat cushion in the reverse order of disassembly, and note these items:
- If the clips are damaged, replace them with new ones.
- Push the clip and the hooks on the covers into place securely.
- Apply multipurpose grease to the moving parts of the seat track.
- Replace the wire ties you removed with new ones.
- Make sure each connector is plugged in properly.
- To prevent wrinkles in the seat cushion cover, stretch the material evenly over the pad before securing the hook strips.