Replacement
REMOVALCAUTION: Determine correct radio anti-theft coding before disconnecting the battery.
- Disconnect battery negative cable (ground strap).
- Disconnect harness connector for speedometer at transmission.
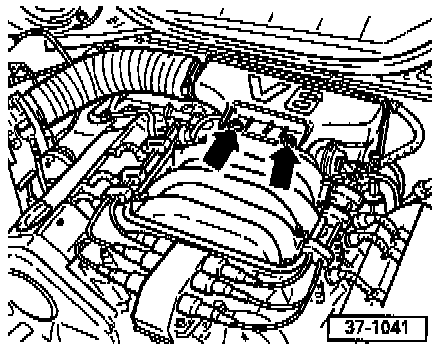
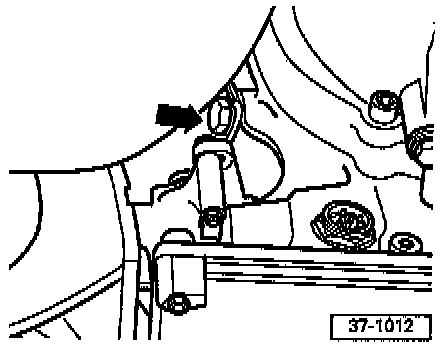
- Remove engine compartment noise insulation by detaching vacuum hoses, removing intake air duct and removing mounting bolts (arrows), then remove noise insulation.
- Vehicles with split ATF filler pipe
Detach ATF filler pipe at top and remove.
Seal filler pipe opening with cleaning rags.
- Remove top engine/transmission connecting bolts.
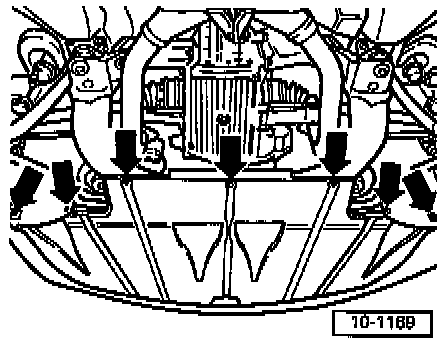
- Remove under engine noise insulation.
- Loosen mounting bolts for torque support.
- Attach lifting hooks of engine support bridge to left engine lifting lug only (arrow).
- Take up weight of engine via spindle.
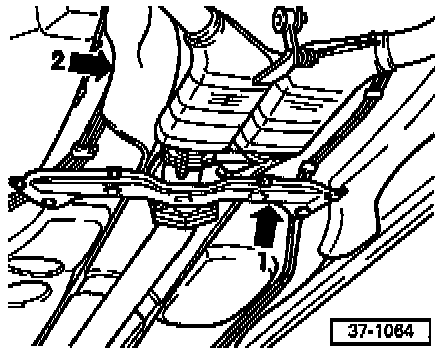
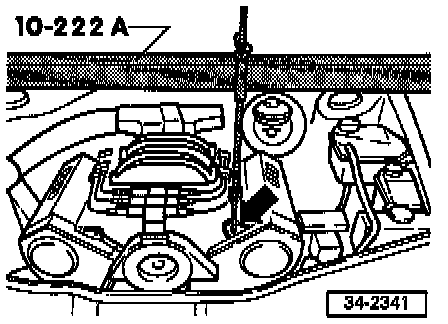
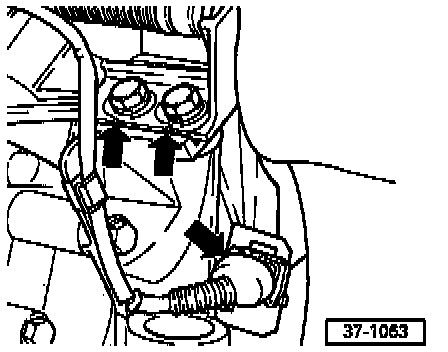
- Remove crossmember (arrow -1-) at front, below exhaust system.
- Remove complete exhaust system.
- Remove heat shield (arrow -2-), and remove heat shield for left-side drive axle.
- Detach drive axles from transmission and tie up.
- Remove starter.
NOTE:
^ The subframe should be lowered at the front in order to remove the starter, refer to Suspension and Steering.
^ The vehicle must not be moved when subframe is detached.
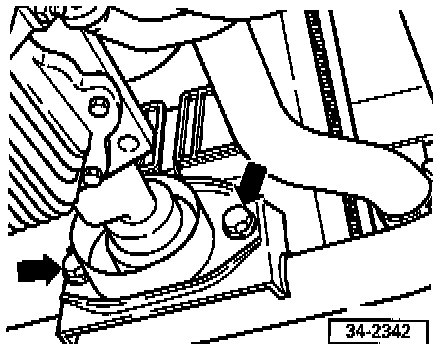
- Unscrew torque converter (3 bolts).
NOTE: Counter-hold the center bolt of the drive belt pulley or vibration damper (depending on engine version) in order to loosen the bolts for the torque converter.
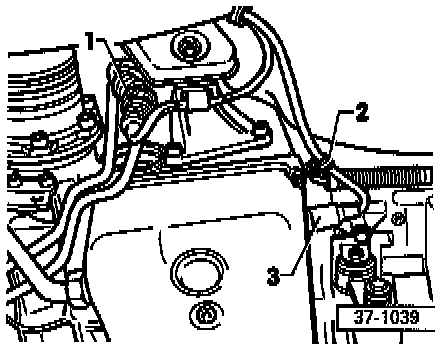
- Separate harness connector for multi-function transmission range switch -1-.
- Disconnect 8-pin connector -3- at transmission by turning bayonet lock to left.
- Release cable bracket -2-.
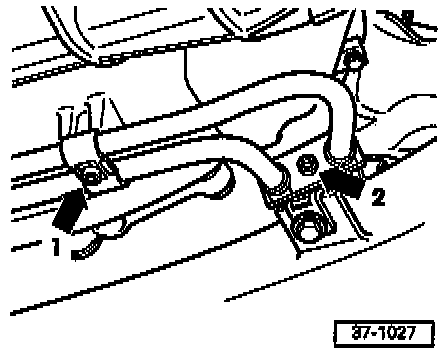
- Release bracket for ATF lines (arrow -1-).
- Separate ATF lines to radiator at junction block (arrow -2-).
NOTE: Replace the O-rings and lubricate the new O-rings with ATF before re-connecting the ATF lines.
- Unscrew supporting plate for selector lever cable at transmission.
- Separate harness connector for transmission Vehicle Speed Sensor (VSS).
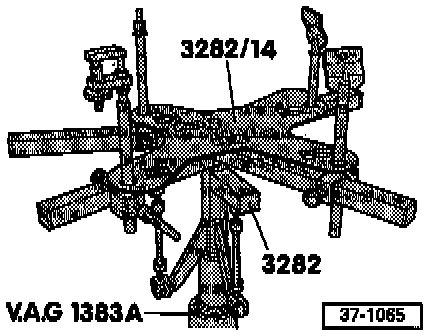
- Align transmission support 3282 as follows.
- Adjusting plate 3282/14 is used with transmission support 3282 for removing and installing automatic transmission 01K.
- The symbols on the adjusting plate show the supports required for automatic transmission 01K.
- Place jack VAG 1383 A with transmission support 3282 below transmission and support transmission.
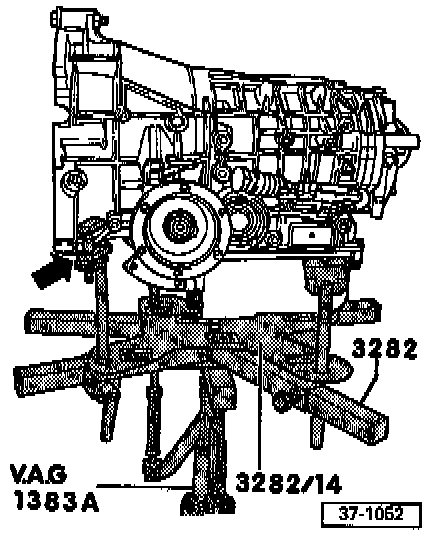
- Secure transmission to transmission support 3282 by attaching support bracket to transmission using mounting bolt for selector lever cable support (arrow).
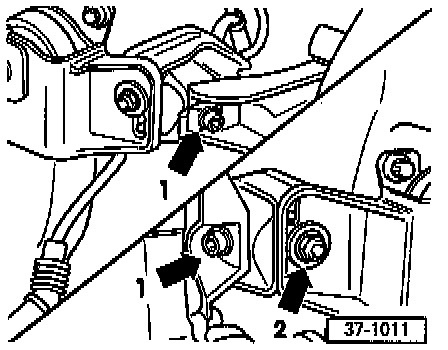
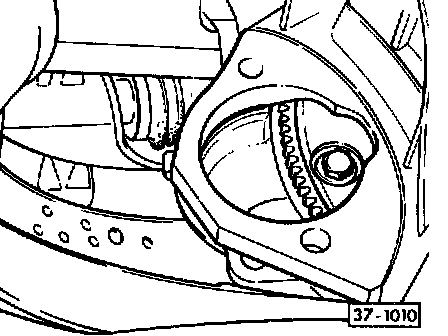
- Loosen mounting nut for right-side bonded rubber bushing at subframe (arrow -2-).
- Unscrew right and left transmission support at bonded rubber bushing (arrow -1-).
- Lower transmissions lightly.
- Unscrew selector lever cable at selector shaft lever.
- Unscrew flanged nut (arrow) for cable guide (procon-ten).
- Release cable guide at transmission and push up, along with cables.
- Remove bottom engine/transmission connecting bolts.
- Disconnect transmission from engine and carefully lower.
NOTE: Carefully push torque converter off drive plate when removing transmission.
- Secure torque converter to prevent it dropping out.
INSTALLATION
- Install in reverse order of removal, noting the following:
CAUTION: Whenever the transmission (or engine) is removed, or when carrying out work that involves the drive plate, the assembly must be carefully aligned during installation, or the drive plate could crack. Flex Plate
- Ensure the engine/transmission alignment dowel sleeves are correctly seated.
- Adjust selector lever cable. Adjustments
- Check ATF level, refer to Checking/Filling ATF.
- Check gear oil in final drive.
- Install exhaust system, refer to Exhaust System.
- Tighten the following components to:
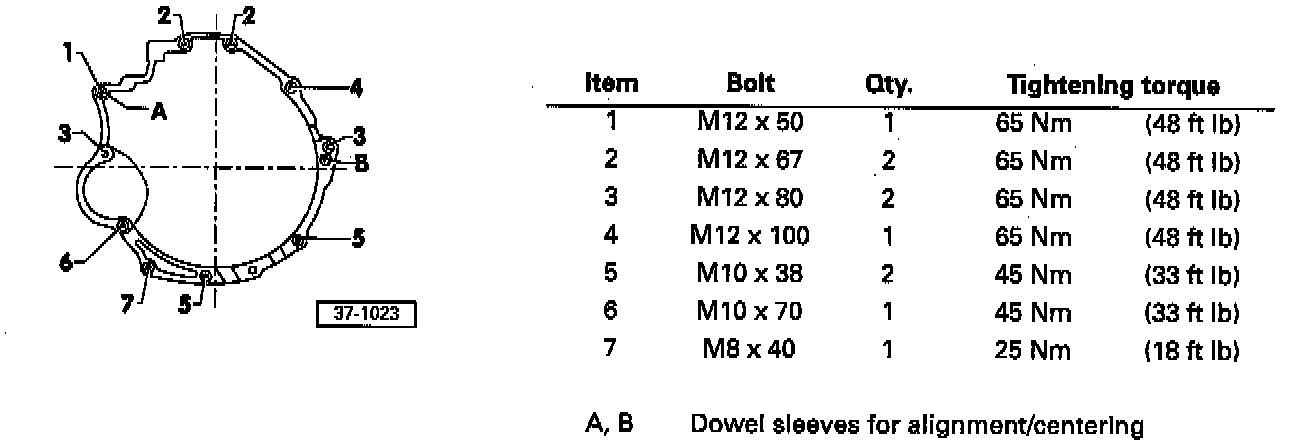
Engine-to-transmission, refer to illustration above.
Torque converter to drive plate: 85 Nm (63 ft lb)
Drive axle to drive flange: 80 Nm (59 ft lb)
Transmission support to transmission: 40 Nm (30 ft lb)
Transmission support to bonded rubber bushing: 40 Nm(30 ft lb)
ATF lines to junction block and transmission: 25 Nm(18 ft lb)
ATF line bracket to transmission: 8 Nm (71 inch lb)
ATF filler pipe to ATF oil pan (where applicable): 40 Nm (30 ft lb)
Supporting bracket for selector lever cable to transmission: 23 Nm (17 ft lb)
Procon-ten cable guide to transmission: 40 Nm (30 ft lb)
Crossmember to body: 25 Nm (18 ft lb)
Torque support to body: 45 Nm (33 ft lb)
Cover to fuel rail: 10 Nm (7 ft lb)
Drive axle heat shield to bracket: 25 Nm (18 ft lb)