C-Pillar Trim
C-Pillar Trim
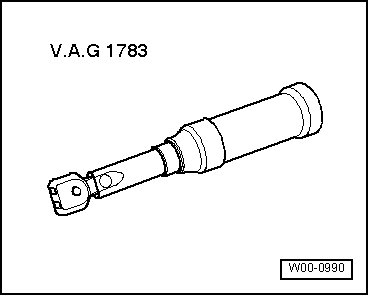
Special tools, testers and auxiliary items required
• torque wrench (V.A.G 1783)
CAUTION!
Observe safety precautions for working on head-level airbags. Refer to => [ Side Curtain Additional Airbag Safety Precautions ] Side Curtain Additional Airbag Safety Precautions.

1 C-pillar Trim
• Removing
- Remove roof panel trim. Refer to => [ Roof Panel Trim ] Roof Panel Trim.
- Remove D-pillar trim. Refer to => [ D-Pillar Trim ] D-Pillar Trim.
Vehicles with fixed rear seat backrests
- Remove rear seat backrest. Refer to => [ Fixed Rear Seat Backrest ] Fixed Rear Seat Backrest.
Vehicles with foldable rear seat backrests
- Remove side upholstery. Refer to => [ Rear Seat Side Upholstery ] Rear Seat Side Upholstery.
Procedure for all vehicles
- Detach rear shelf on respective side:
Rear shelf without sun shade. Refer to => [ Rear Shelf without Sun Shade ] Rear Shelf Without Sun Shade
Rear shelf with sun shade. Refer to => [ Rear Shelf with Sun Shade ] Rear Shelf With Sun Shade
- Remove screws - 2 - (quantity: 3).
- Unclip C-pillar trim - 1 - with clip - 4 -.
- Carefully remove C-pillar trim - 1 - under side curtain airbag - 3 -.
- Release belt guide and slide it back to stop => [ Belt guide, unlocking and locking ].
- Pull C-pillar trim - 1 - up over belt guide.
- Remove C-pillar trim - 1 -.
- Remove remainder of locking compound from threaded screw holes - 2 - (quantity: 3). You can use a thread cutter to do so.
If threaded holes are not cleaned, there is the danger that new screws could seize up during installation and shear off when removed again.
• Installing
- Check clamp - 4 - for damage or deformity.
Replace damaged or deformed clamp.
- Before installing lower C-pillar trim - 1 -, make sure clamp - 4 - is positioned correctly.
• Ensure side curtain airbag is not pinched or damaged when installing C-pillar trim - 1 -.
Follow steps for installing C-pillar trim - 1 -.
- Carefully slide upper area of C-pillar trim - 1 - under side curtain airbag - 3 -.
- Clip C-pillar trim - 1 - in with clip - 4 -.
- Install new screws - 2 - and tighten to the specification.
- Push belt guide forward to stop and lock.
Retainer tabs must engage with a click.
Ensure lower C-pillar trim - 1 - is held securely.
- Install rear shelf:
Rear shelf without sun shade. Refer to => [ Rear Shelf without Sun Shade ] Rear Shelf Without Sun Shade
Rear shelf with sun shade. Refer to => [ Rear Shelf with Sun Shade ] Rear Shelf With Sun Shade.
Vehicles with foldable rear seat backrests
- Install side upholstery. Refer to => [ Rear Seat Side Upholstery ] Rear Seat Side Upholstery.
Vehicles with fixed rear seat backrests
- Install rear seat backrest. Refer to => [ Fixed Rear Seat Backrest ] Fixed Rear Seat Backrest.
- Install D-pillar trim. Refer to => [ D-Pillar Trim ] D-Pillar Trim.
- Install roof panel trim. Refer to => [ Roof Panel Trim ] Roof Panel Trim.
- Install door seal lip over upper C-pillar trim - 1 -.
2 Screws
Quantity: 3
Self-locking
• Tightening specification 3.5 Nm
• Replace after each disassembly
• Threaded holes for screws must always be cleaned (for example, with thread cutter)
3 Side Curtain Airbag
4 Clips
• Replace if damaged or deformed
5 Insulation
Belt guide, unlocking and locking

• Do not turn the screws - 2 - under any circumstances. They are set by the manufacturer.
Unlocking:
- Disengage belt guide - 1 -.
- To do this, push retainer tab - arrow - upward.
- Push belt guide - 1 - back to stop.
Locking:
- Push belt guide - 1 - forward to stop.
- Ensure retainer tab - arrow - engages with a click.
• Screw heads - 2 - must lie below plate.