Modular Wiring Routing With Corrugated Tube on Front Seat
Standard Front Seats
• From 07.2006, the usual wiring harness routing to connector station under front seat => [ Connectors, Disconnecting ] has been replaced with modular wiring routing => [ Modular Wiring Routing, from 07.2006, Assembly Overview ].
• The modular wiring routing has not been implemented for all countries.
Modular Wiring Routing with Corrugated Tube on Front Seat
Special tools, testers and auxiliary items required
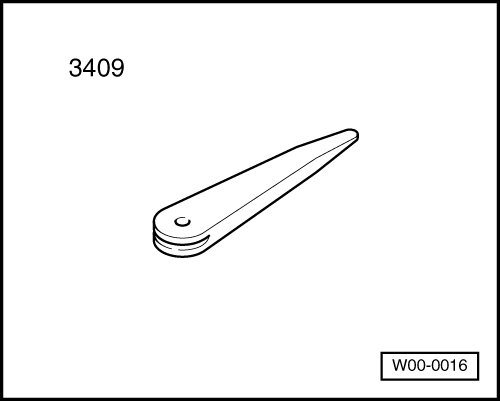
• Trim removal wedge (3409)
General Information
With the introduction of modular wiring routing, the complete sheathing of the entire wiring harness with a fabric strap between the seat tray and the connectors to the connector station has been eliminated. A two-shell corrugated tube in which the wires are routed separately has been implemented.
Opening corrugated tube and removing individual wire
CAUTION!
Observe safety precautions for work on airbags => [ Airbag Inspection ] .
- Move front seat as far back and up as possible.
- Unclip connector station cover - 1 - under front seat.
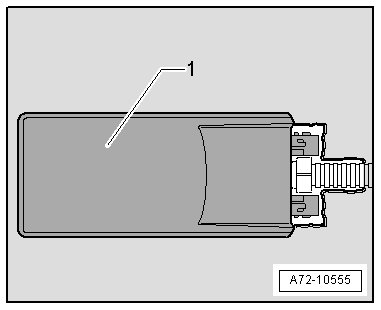
- Use Trim Removal wedge (3409) to do this.
- Disengage cover - 1 - on corrugated tube side.
- Release cable bracket - 2 - on connector station by pressing retaining tabs on both sides - arrows -.
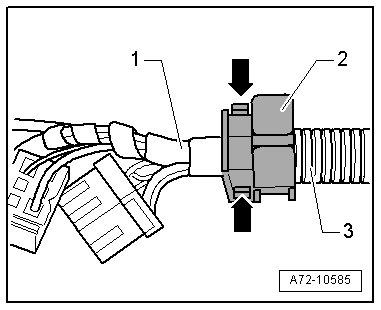
1 Wiring harness
3 Corrugated tube, two-shelled
CAUTION!
Before handling airbag units (e.g. disconnecting electrical connector), the person handling it must "discharge static electricity". This can be done by touching door striker, for example.
- Remove front seat:
• Front seat (standard seat), removing and installing => [ Standard Front Seat ] Standard Front Seats
• Front seat (memory seat, electric seat), removing and installing => [ Power Front Memory Seat ] Power Front Memory Seats
• S6 front seat (memory seat, electric seat), removing and installing => [ Front Seat ] Power Front Memory Seats, S6.
- Attach front seat to Fixture For Seat Repair (VAS 6136) => [ Front Seat, Installing on Fixture for Seat Repair VAS 6136 ] Power Front Memory Seats, S6 Overview.
- Using Trim Removal Wedge (3409), open cable bracket - 1 -.
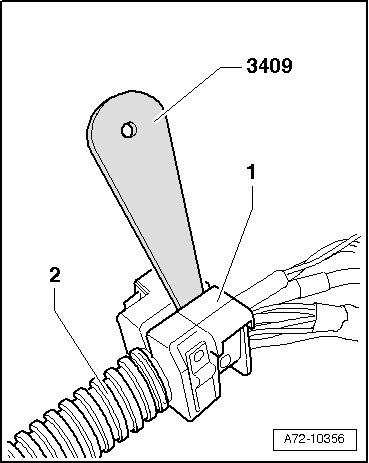
- Remove cable bracket - 1 - from corrugated tube - 2 -.
- Remove the bolt - 1 -.
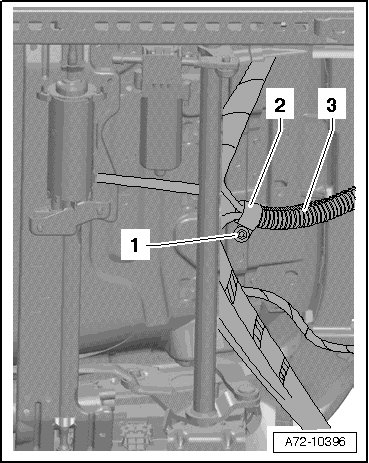
- Remove cable clip - 2 - from corrugated tube - 3 -.
- Open fabric band - 2 - in area of - arrow -.
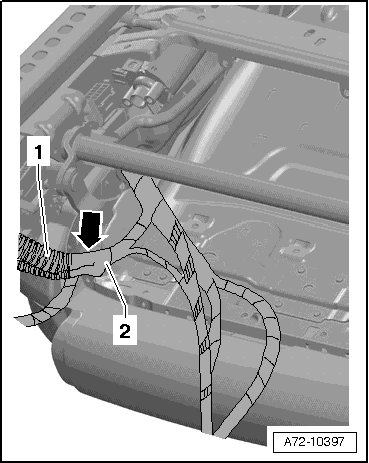
- Open corrugated tube - 1 -.
Install individual wires and close corrugated tube
To install, perform the steps used in removal in reverse order. Observe the following when doing so:
CAUTION!
• Observe safety precautions for work on airbags => [ Airbag Inspection ] .
• Before handling airbag units (e.g. disconnecting electrical connector), the person handling it must "discharge static electricity". This can be done by touching door striker, for example.
- When bundling and placing individual wires in corrugated tube, ensure wires are not twisted.
• Note installation position of two-part corrugated tube to wiring harness and position of cable bracket to corrugated tube.
- The beginning of the corrugated tube - 4 - should be placed immediately after the clip - 2 - or cable tie.

3 Wiring harness to connector station
- Ensure two-part corrugated tube - 4 - locks cleanly over entire length.
- Make sure the side - arrow A - of cable bracket - 1 - connects to the last rib - arrow B - on the corrugated tube - 4 -.
- Bind transition of seat side of corrugated tube - 1 - and wiring harness - 2 - with self-adhesive fabric tape - arrow -.
- First make sure the pins - A arrows - on cover - 1 - engage correctly in mounts - B arrows - on connector station - 2 -.
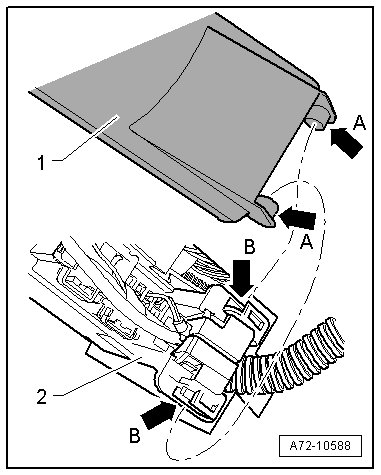
- They can only lock in the connector station when the cover is engaged correctly.
Tightening specifications => [ Modular Wiring Routing, from 07.2006, Assembly Overview ]