Fogging Sensor: Service and Repair
64 11 970 Replacing Fogging Sensor (From 10/2008)
Special tools required:

WARNING: Make sure rooms are well ventilated when working with adhesive remover indoors.

IMPORTANT: Do not under any circumstances use paint thinner to clean the bonding surface.
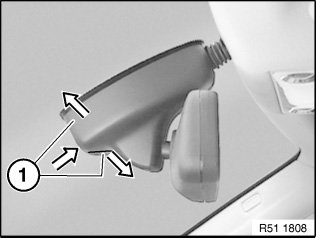
Press on end caps (1) and at same time press them apart; this releases clip connection of both caps (1).
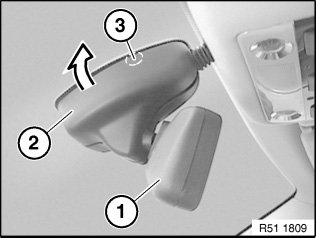
Twist mirror (1) at an angle towards front and right/top.
Swivel left end cap (2) off ball neck in direction of arrow; this detaches the engagement clip (3) from the metal foot.

Disconnect plug connection (1).
NOTE: If necessary, carefully heat fogging sensor (2) with a hot air blower to approx. 40-60 °C.
Lift off fogging sensor (2) with special tool 00 9 317 and slowly pull off from windshield.
Installation:
Bonding surface must be dry and free of dust and grease.
Clean bonding surface with adhesive remover (sourcing reference: BMW Parts Service).
After cleaning, do not touch bonding surface with bare hands.
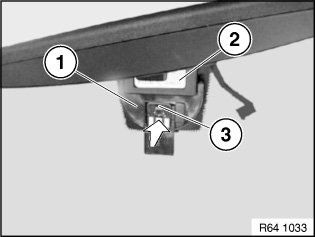
Pull off protective film completely from fogging sensor (3).
Place mounting template (1) as pictured on rain sensor (2).
Press fogging sensor (3) in direction of arrow with a contact pressure of ≥15 N/ cm2 onto inside of windshield.
NOTE: Firm thumb pressure achieves approx. 30 N/cm2
Remove mounting template (1) carefully from fogging sensor (3).