Control Arm: Service and Repair
Fig. 4 Control Arm Replacement:
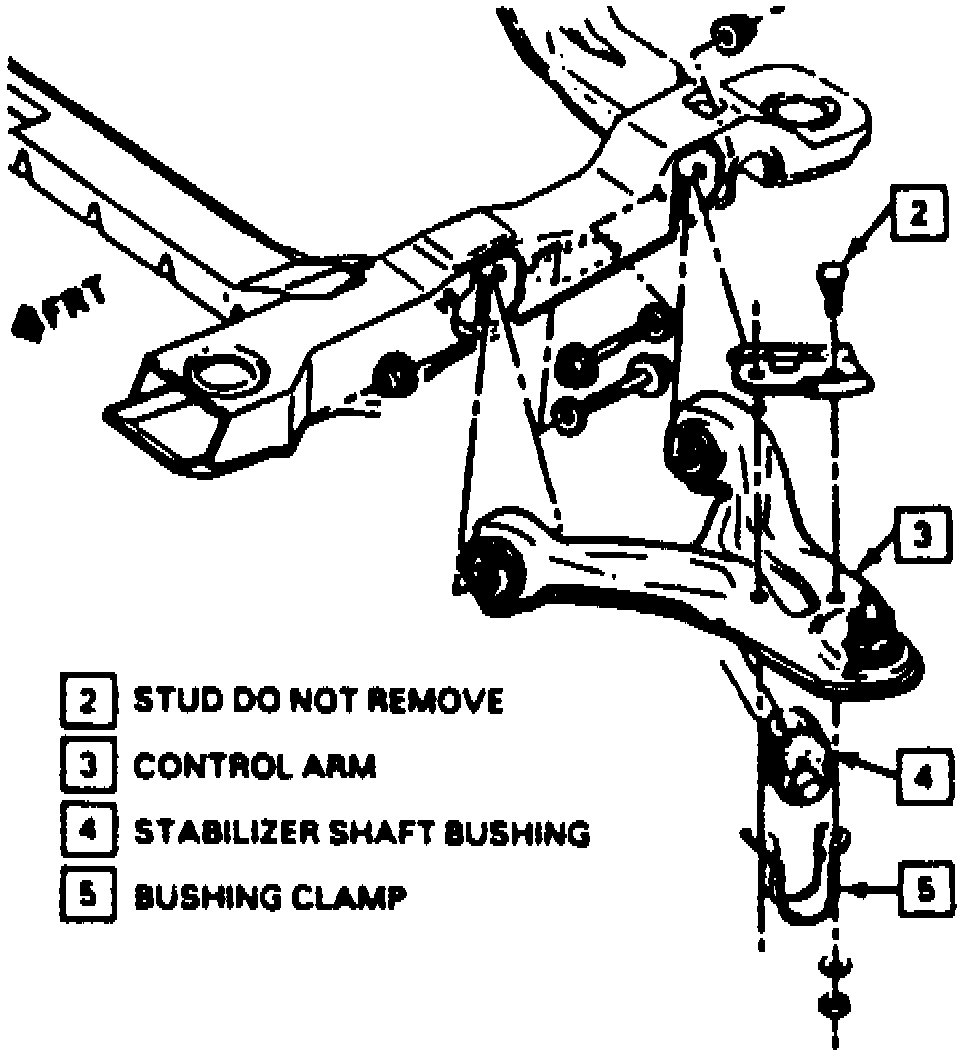
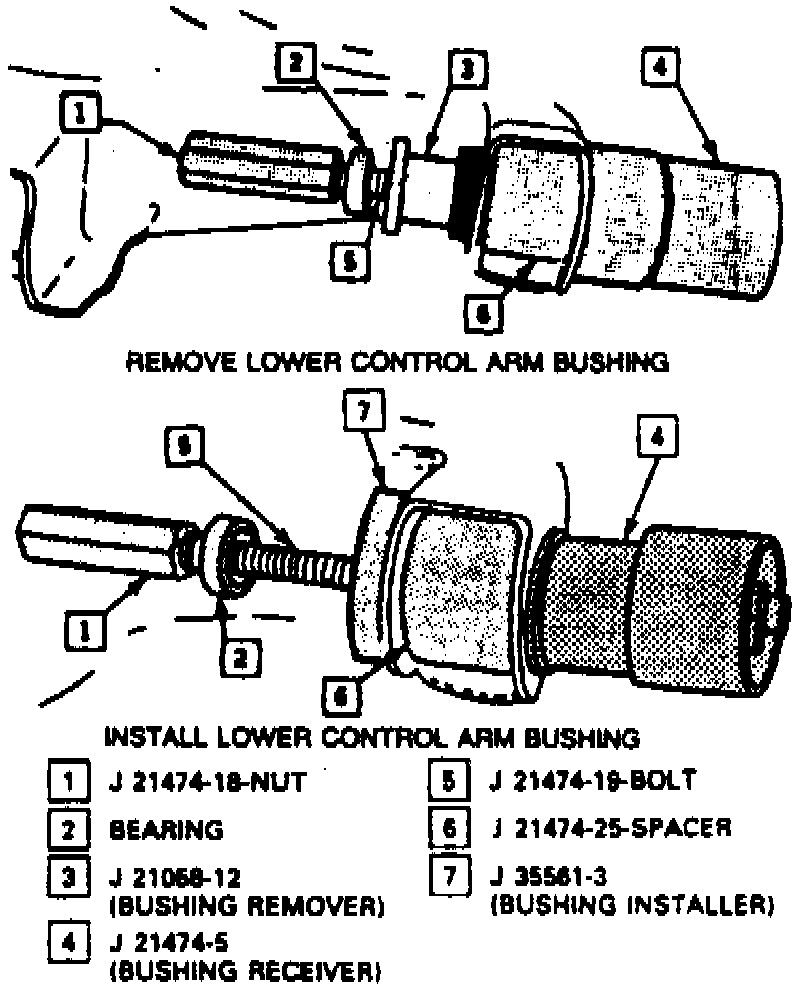
Fig. 5 Control Arm Bushing Replacement:
1. Raise and support vehicle, then place jack stands under suspension.
2. Lower vehicle slightly so weight of vehicle rests on jack stands, then remove wheel assembly.
3. Install drive axle seal protectors. These protectors should be used any time service is performed on or near drive axle. Failure to use them may result in interior joint or seal damage.
4. Remove pinch bolt holding ball joint to steering knuckle, then control arm mounting bolts.
5. Remove control arm from vehicle, Fig. 4.
6. Refer to Fig. 5. for bushing replacement procedure.
7. Reverse procedure to install, noting the following:
a. Weight of vehicle must be supported by control arms when tightening control arm mounting nuts.
b. Tighten bolts/nuts to specifications.