Assembly

1. Install a 0.50 mm (0.0197 inch) "test" shim and reinstall the bearing cup into the retainer. Install bearing cup, and then press in using Drive Handle C-4171 and Seal cap Installer L-4520. Oil baffle is not required when making shim selection.

2. Install bearing retainer into the case and torque bolts to 28 Nm (20 ft. lbs.).
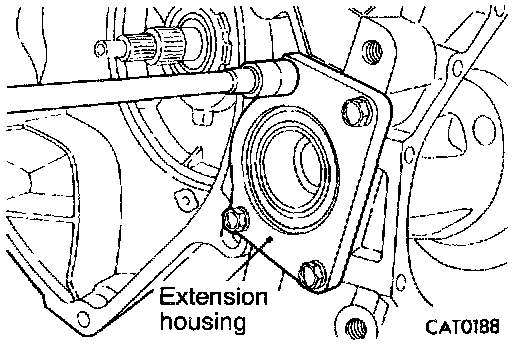
3. Install extension housing into the case and torque bolts to 28 Nm (20 ft. lbs.). Position transaxle assembly with oil pump facing up. Rotate ring gear one revolution to seal differential bearings.

4. Attach a dial indicator to the case and zero the dial indicator.
5. Place a large screwdriver to each side of the ring gear and lift. Check the dial indicator for the amount of end play.
CAUTION: Do not damage the transaxle case and/or differential cover sealing surface.


6. When the end play has been determined, refer to the Differential Bearing Shim Chart for correct shim combination.

7. Remove bolts from extension housing.
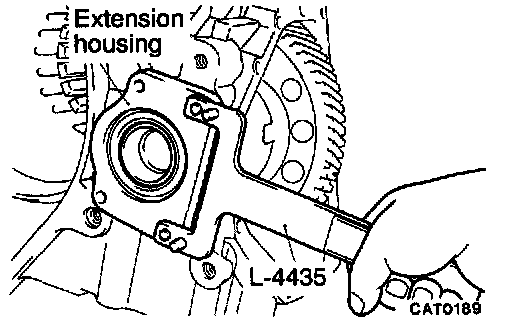
8. Loosen extension housing with Remover L-4435. Walk housing out of transaxle case using special tool.
9. Remove extension housing.

10. Remove differential retainer bolts.

11. Loosen differential bearing retainer with Remover L-4435. Walk retainer out of transaxle using special tool.
12. Remove differential bearing retainer.

13. Remove bearing cup with Cup Remover 6062A.
14. Remove the 0.50 mm (0.0197 inch) "test" shim.

15. Install the proper shim combination under the bearing cup.

16. Install bearing cup, and then press in using Drive Handle C-4171 and Seal Cap Installer L-4520.

17. Install differential bearing retainer into the case and torque bolts to 28 Nm (20 ft. lbs.).

18. Install extension housing into the case and torque bolts to 28 Nm (20 ft. lbs.).
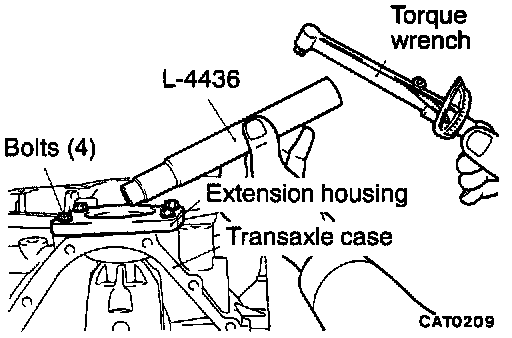

19. Install Checking Tool L-4436 and a torque wrench to check differential bearings turning torque. The turning torque should be 0.56 to 2.03 Nm (5 to 18 inch lbs.). If the turning torque is too high, install a 0.05 mm (0.0020 inch) thinner shim. If the turning torque is too low, install a 0.05 mm (0.0020 inch) thicker shim. Repeat until proper turning torque is obtained.

20. Install proper shim.

21. Install bearing cup, and then press in using Drive Handle C-4171 and Seal Cap Installer L-4520.

22. Install new oil seal, and then press in using Drive Handle C-4171 and Seal Cap Installer L-4520.

23. Using dial indicator and Adapter C-4996, check side gear end play at ring gear side and differential case side.
NOTE: Side gear end play each side must be 0.025 to 0.330 mm (0.00098 to 0.01299 inch).

Four select thrust washer are available:
0.81, 0.93, 1.07 and 1.19 mm (0.0319, 0.0366, 0.0421 and 0.0469 inch).
If either side gear end play is not within specifications, remove appropriate side gear thrust washer.
Measure existing thrust washer and replace with new thrust washer that provides end play closest to center of end play specifications.

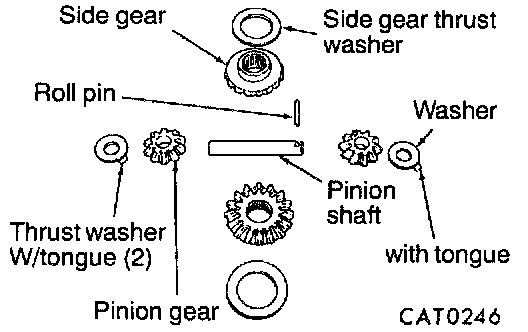
24. Install pinion gears, side gears and tabbed thrust washers by rotating pinion gears to opening in differential case.

25. Install pinion shaft.
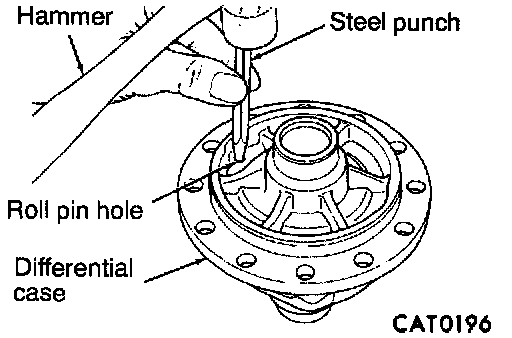
26. Install pinion shaft roll pin by tapping in with a hammer and steel punch.

27. Install ring gear bolts.
NOTE: Always use new ring gear bolts and torque to 95 Nm (70 ft. lbs.).


28. Install differential bearing, and then press in using Drive Handle C-4171 and Bearing Installer L-4410.
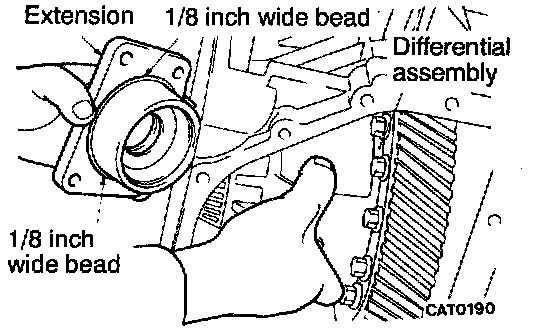
29. Install extension.
NOTE: Apply an 1/8 inch wide bead of Loctite 18718 or equivalent.

30. Install bolts to extension housing.

31. Install differential bearing retainer.
NOTE: Apply an 1/8 inch wide bead of Loctite 18718 or equivalent.

32. Install differential retainer bolts.

33. Install differential cover.
NOTE: Apply an 1/8 inch wide bead of Loctite 18718 or equivalent.

34. Install differential cover bolts.

35. Install new oil seal using Drive Handle C-4171 and Seal Cap Installer L-4520.