Installation
1. Flush the ATF cooler.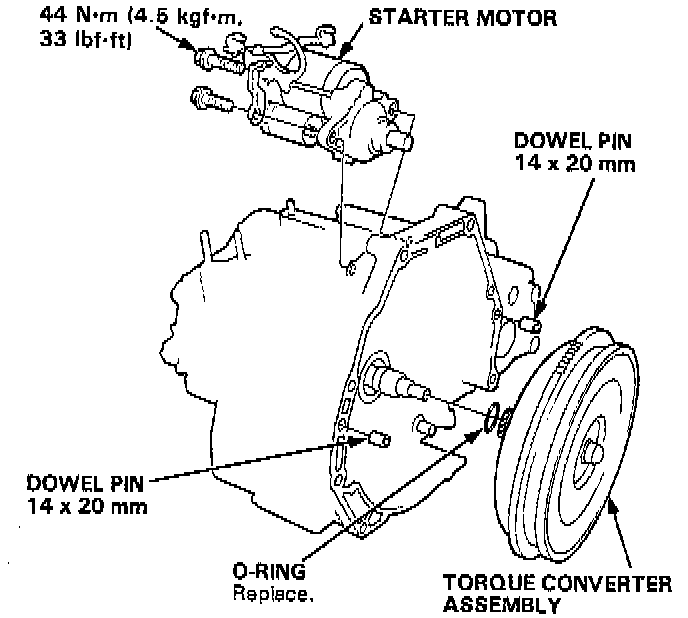
2. Install the starter motor and the two 14 x 20 mm dowel pins on the torque converter housing, then install the torque converter securely with a new O-ring on the mainshaft.
3. Place the transmission on a jack, and raise it to the engine level.
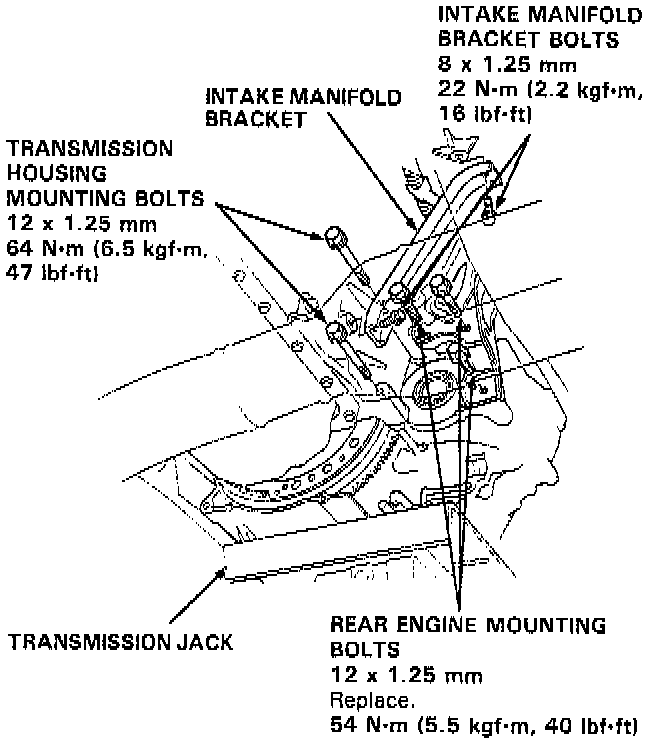
4. Attach the transmission on the engine, then install the transmission housing mounting bolts, the rear engine mounting bolts and the intake manifold bracket bolts.
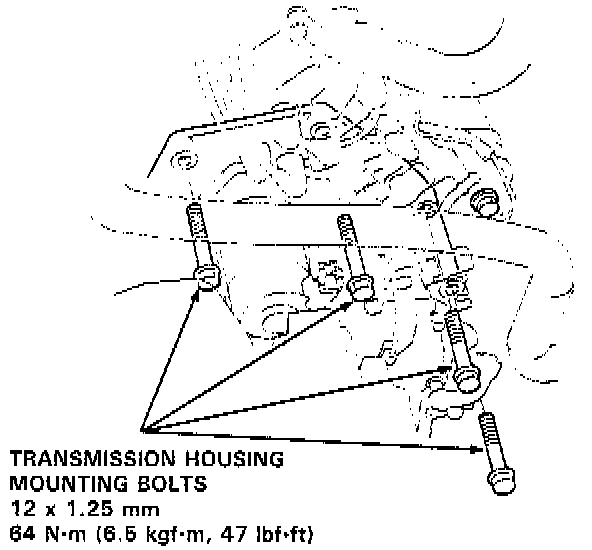
5. Install the transmission housing mounting bolts.
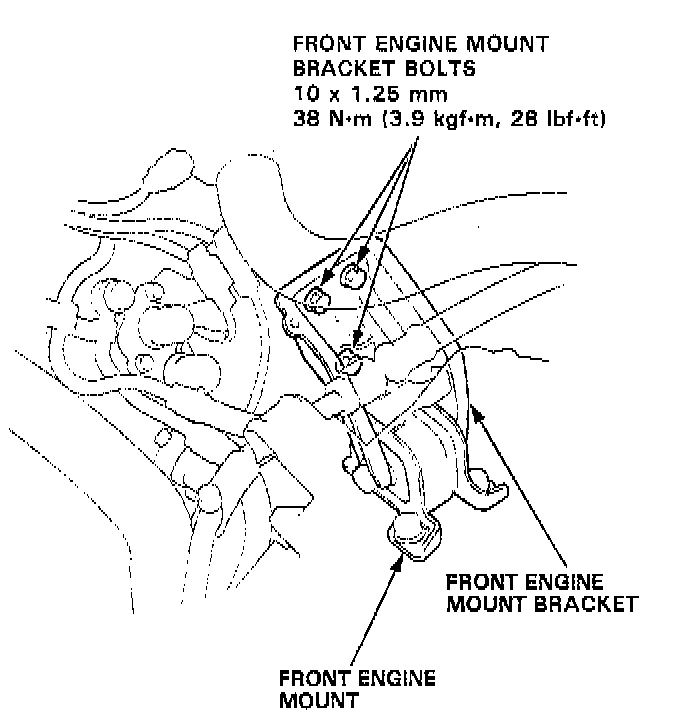
6. Tighten the front engine mount bracket bolts to the specified torque.
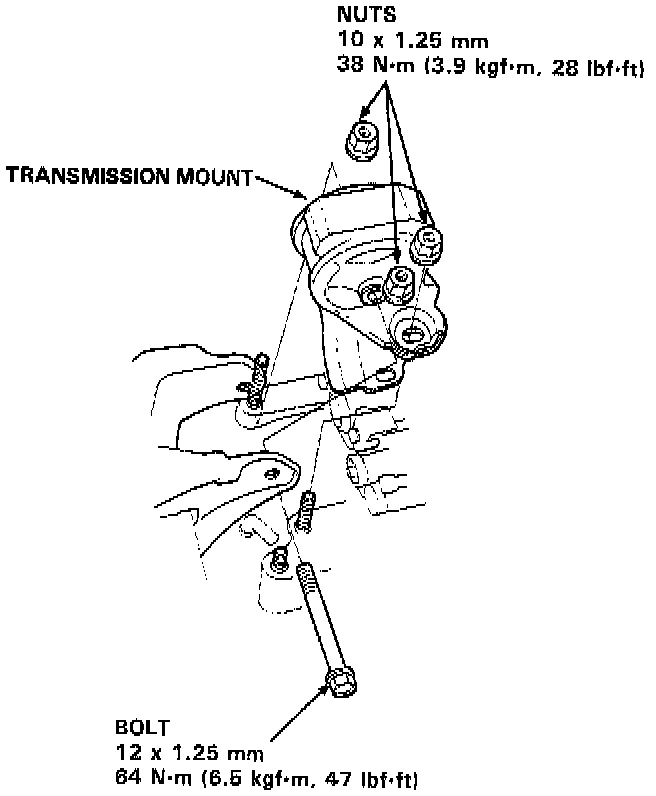
7. Install the transmission mount. Tighten the bolt loosely and tighten the nuts to the specified torque, then tighten the bolt to the specified torque.
8. Remove the transmission jack.
9. Attach the torque converter to the drive plate with eight bolts and Torque. Rotate the crankshaft as necessary to tighten the bolts to 1/2 of the specified torque, then to the final torque, in a crisscross pattern. After tightening the last bolt, check that the crankshaft rotates freely. Torque to 12 Nm (8.7 ft. lbs.)
10. Install the control lever with the shift cable on the control shaft.
CAUTION: Take care not to bend the shift cable.
11. Install the lock bolt with a new lock washer, then bend the lock tab.
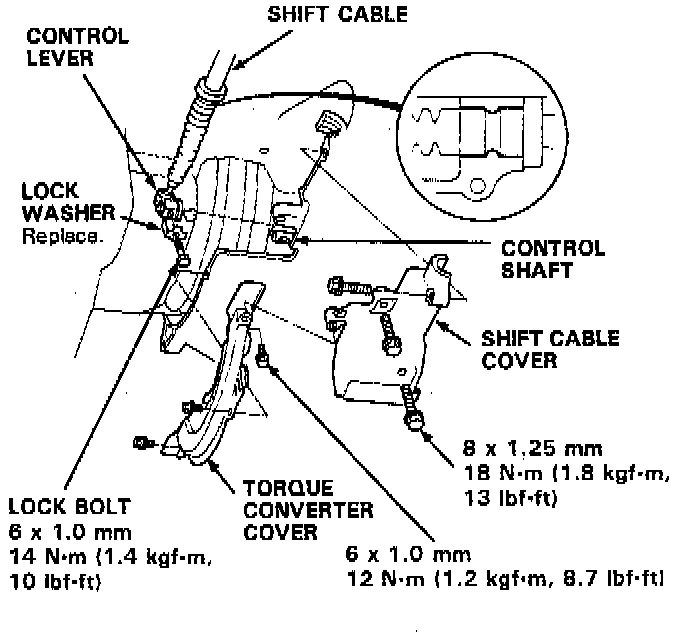
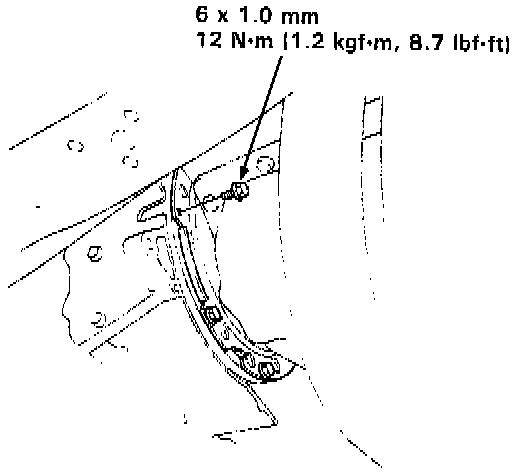
12. Install the torque converter cover and shift cable cover.
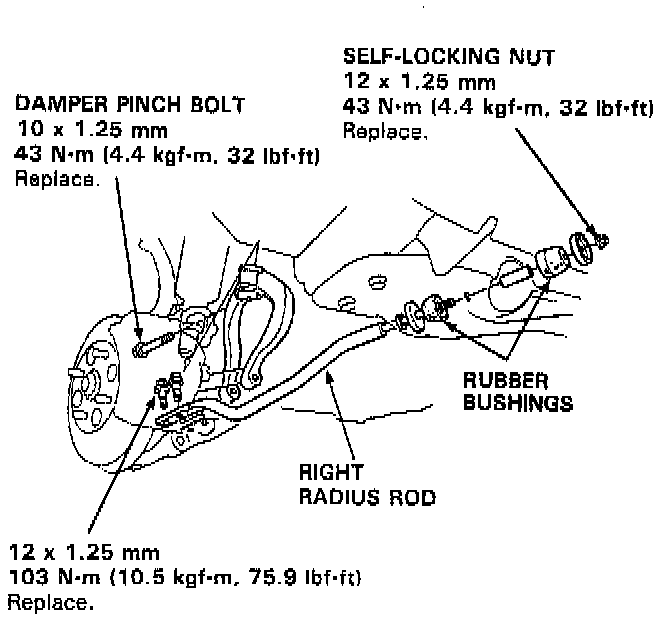
13. Install the right radius rod and damper fork.
NOTE: Check radius rod rubber bushings for deterioration and damage.
14. Install new set rings on the end of the driveshafts.
15. Install the right and left driveshafts.
NOTE: Turn the right and left steering knuckles fully outward, and slide the inner CV joints into the differential until you feel the set ring engage the side gear.
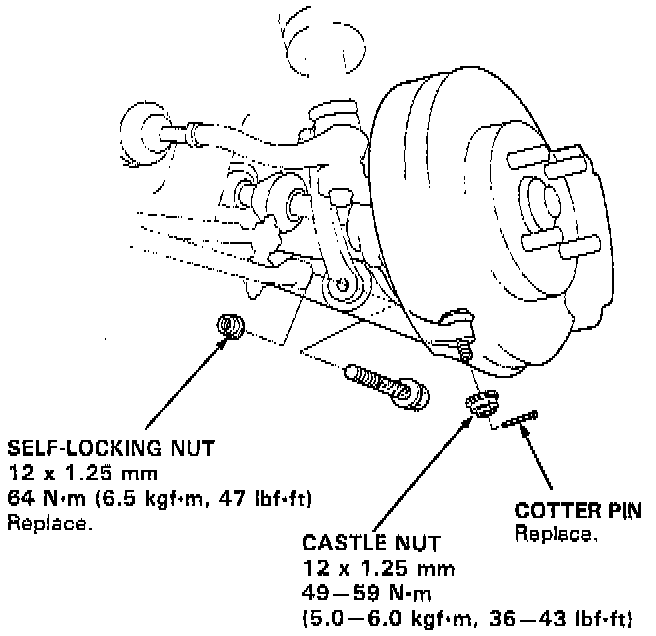
16. Install the damper fork to the lower arm. Then install the ball joint to the lower arm. Use the castle nuts with new cotter pins.
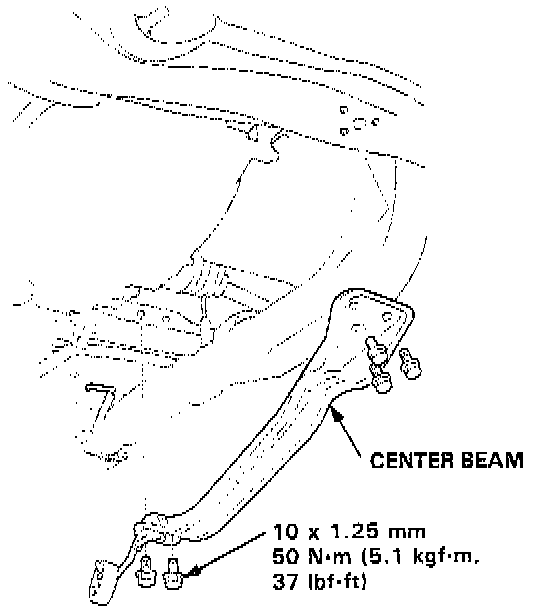
17. Install the center beam.
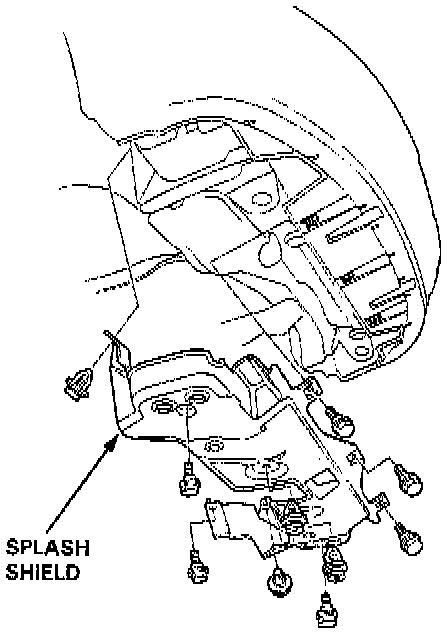
18. Install the splash shield.
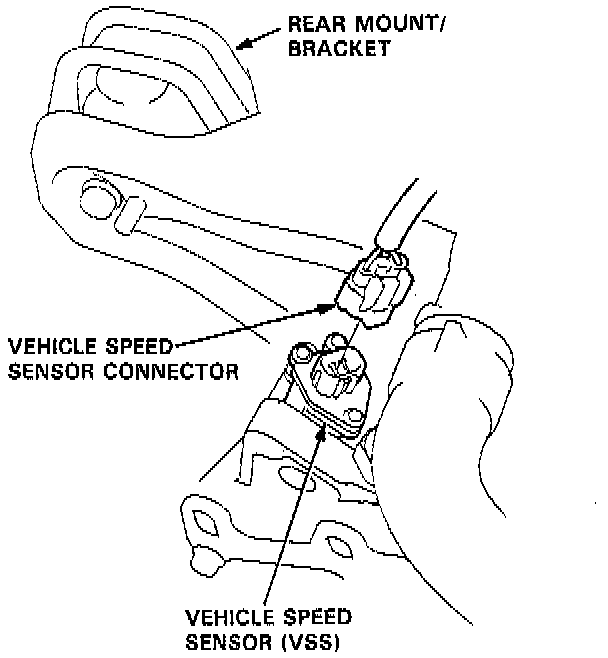
19. Connect the vehicle speed sensor connector.
20. Connect the ATF cooler hoses to the joint pipes.
21. Connect the lock-up control solenoid, shift control solenoid valve connectors, and the throttle control cable.

22. Connect the mainshaft speed sensor connector.
23. Connect the countershaft speed sensor connector.
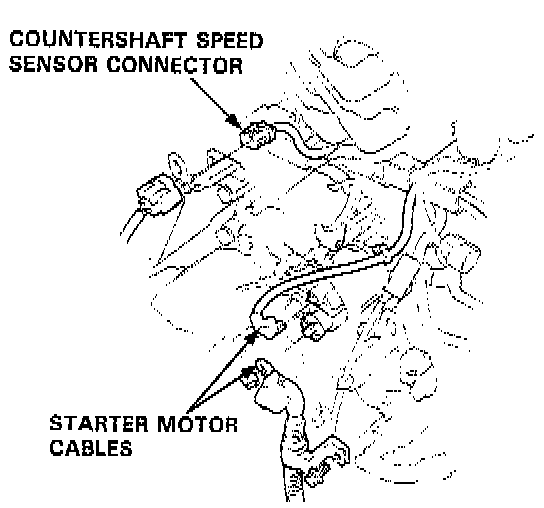
24. Connect the starter motor cables.
NOTE: When installing the starter cable, make sure that the crimped side of the ring terminal is facing out.
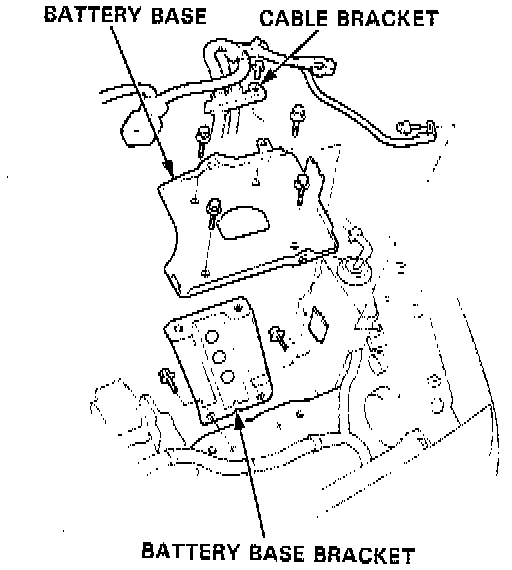
25. Install the battery base and base bracket, then install the cable bracket on the battery base.
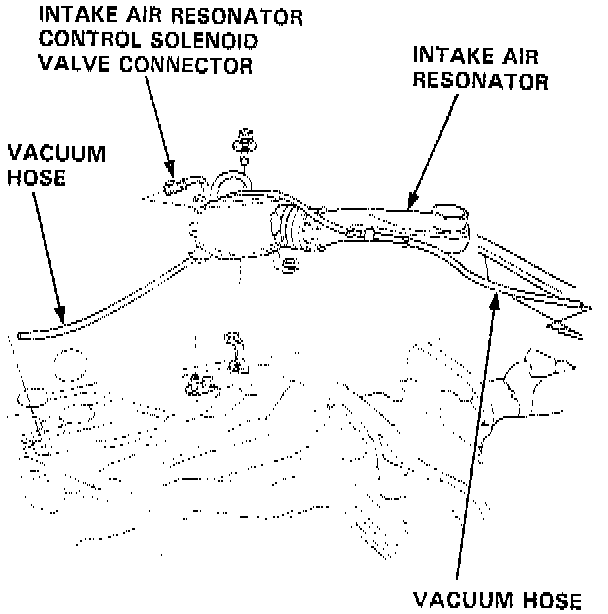
26. Install the intake air resonator, then connect the vacuum hoses and the intake air resonator control solenoid valve connector.
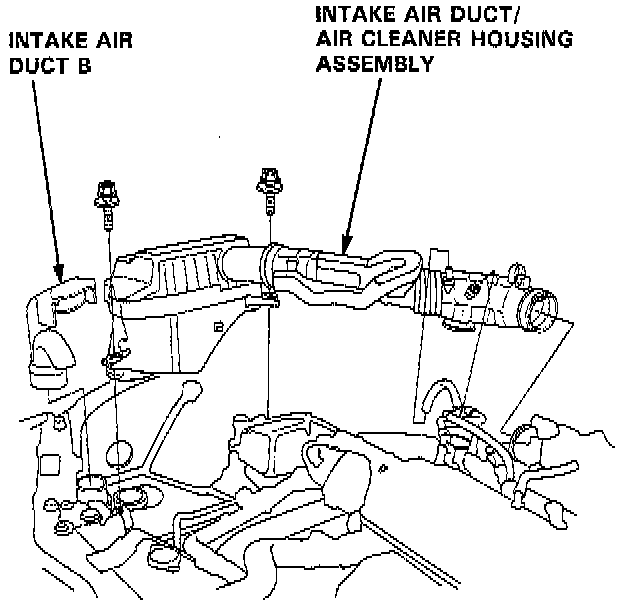
27. Install the intake air duct/air cleaner housing assembly and intake air duct B.
28. Refill the transmission with ATF.
29. Connect the battery positive ( + ) and negative ( - ) cables to the battery.
30. Start the engine. Set the parking brake, and shift the transmission through all gears three times.
31. Check the throttle control cable adjustment.
32. Check and adjust the front wheel alignment.
33. Let the engine reach operating temperature (the radiator fan comes on) with the transmission in N or P position, then turn it off and check fluid level.
34. Road test.
35. Reset the radio stations.

36. Loosen the front engine mount bracket bolts after the road test, and retighten them to specified torque.