Third Row Seat Removal/Installation
Third Row Seat Removal/InstallationSpecial Tools Required
- KTC trim tool set SOJATP2014 *
- Stopper plate 82217-SHJ-A01
* Available through the American Honda Tool and Equipment Program.
NOTE:
- Use the appropriate tool from the KTC trim tool set to avoid damage when prying components.
- Take care not to scratch the interior trim and body or tear the seat covers.
1. Store both third row seats in the floor recess.
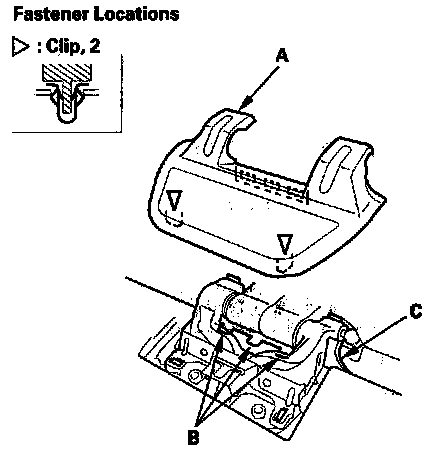
2. Detach the clips, and release the center upper pivot cover (A) from the tabs (B) on the center lower pivot cover (C), then remove it.
3. Raise both third row seats up, and secure them
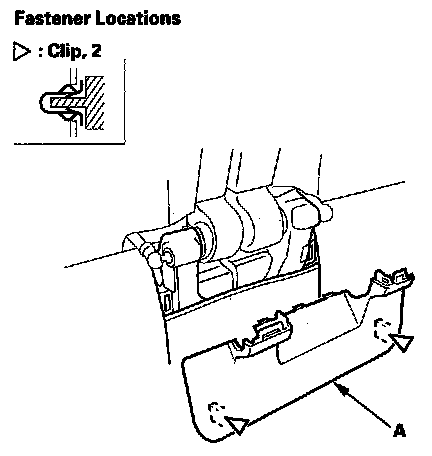
4. Detach the clips, then remove the center lower pivot cover (A).
5. Store the seat that is not being removed in the floor recess.
6. Release the seat cushion cover clips (A, B) around the left center cover (C) or right center cover (D).

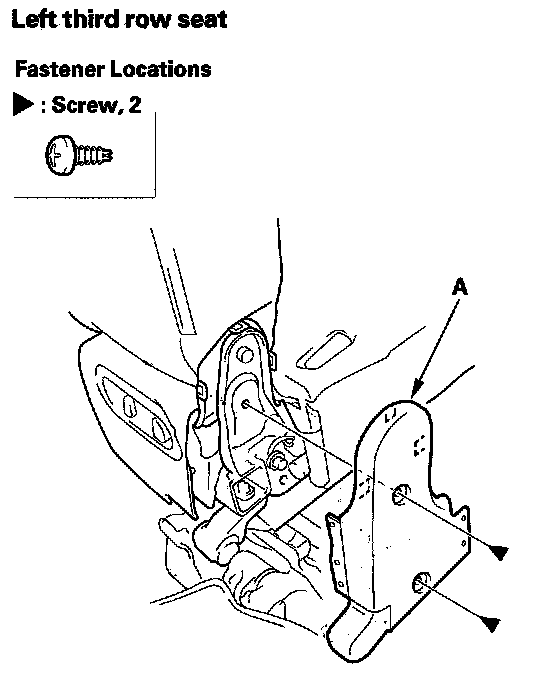
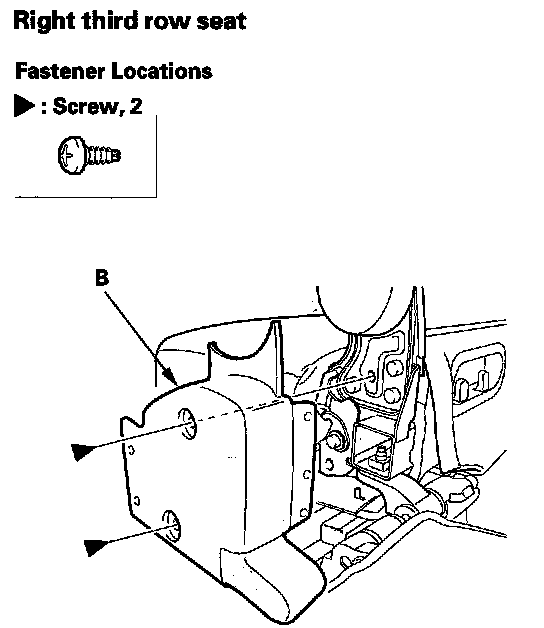
7. Remove the screws, then remove the left center cover (A) or right center cover (B).
8. Store the third row seat, which is to be removed, in the floor recess.
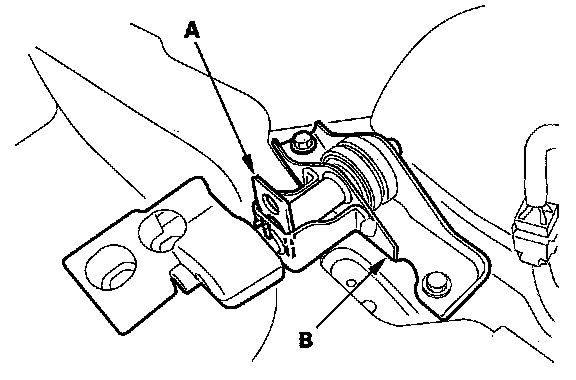
9. Remove the pivot bolt (A) from the center pivot bracket (B). Right third row seat removal is shown; the other side is similar.
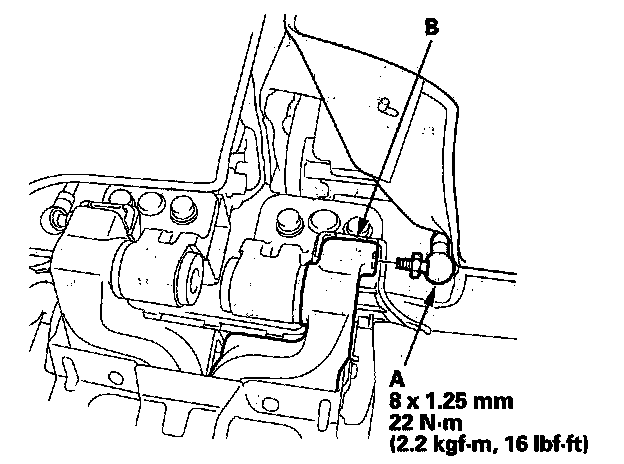
10. Remove the pivot cover.
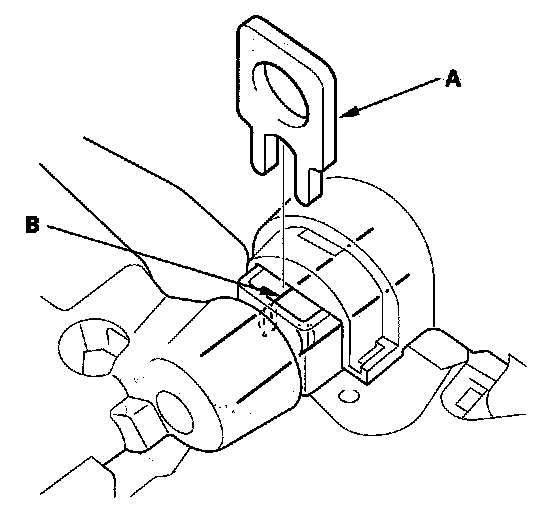
11. Insert the stopper plate (A) into the slot in the outer pivot shaft (B).
CAUTION: Be sure the stopper plate (P/N 82217-SHJ-A01) is fully inserted; otherwise, the seat may spring open forcefully.
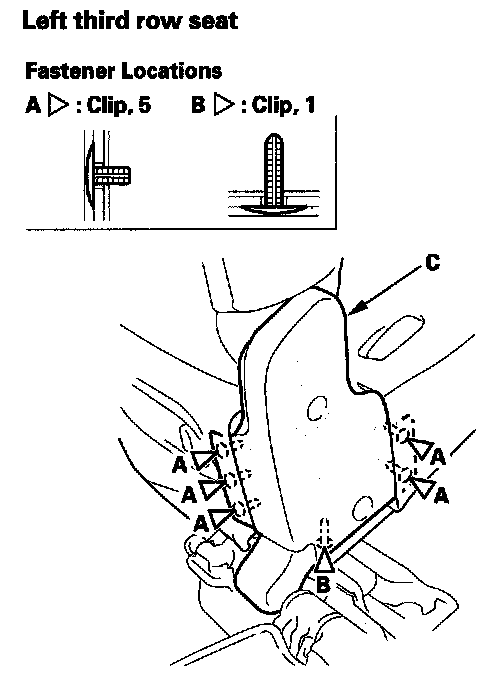
12. Release the hook (A), then pull back the edge of the seat-back mat (B) as needed. Remove the bolts (C, D) securing the left third row seat or right third row seat.
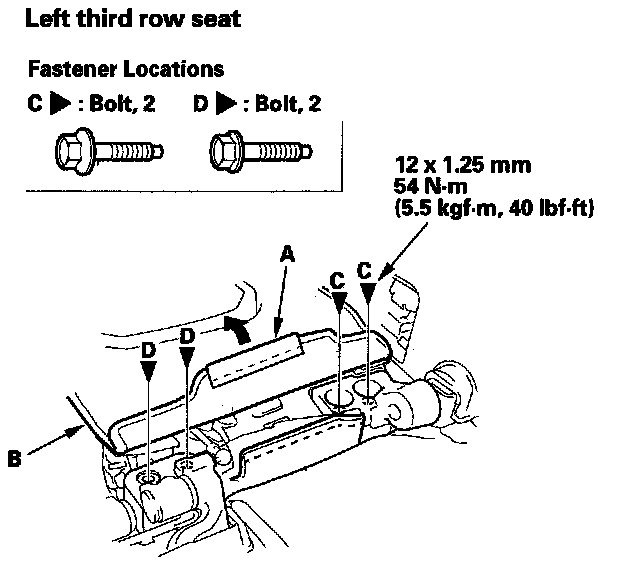
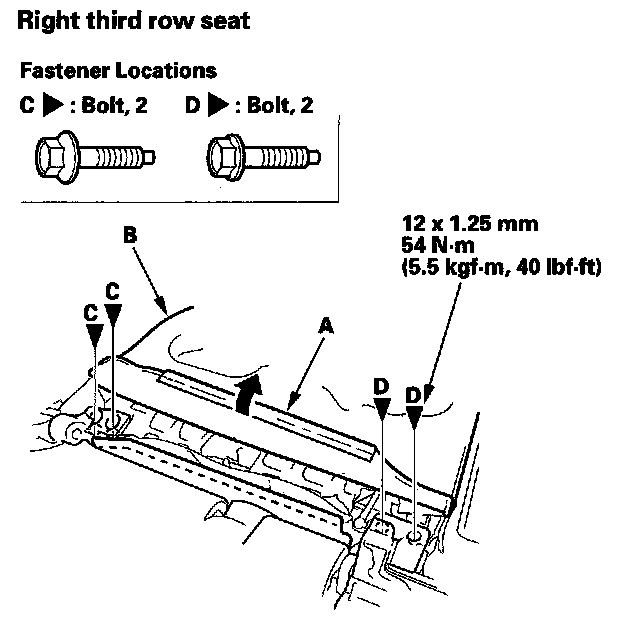
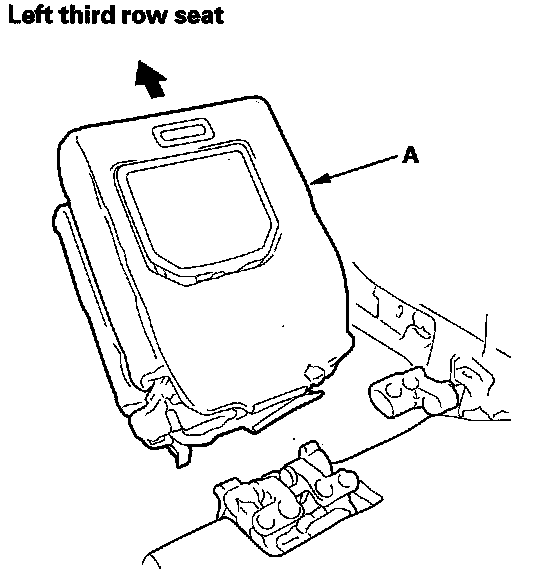
13. Remove the left third row seat (A) or right third row seat (B).

14. Install the seat in the reverse order of removal, and note these items:
- Check if the clips are damaged or stress-whitened, and if necessary, replace them with new ones.
- Do not remove the stopper plate (A) from the outer pivot bracket (B) before securing the seat.
- After mounting the seat, remove the stopper plate.