Removal and Replacement
Removal
CAUTION:
- Use fender covers to avoid damaging painted surfaces.
- To avoid damage, unplug the wiring connectors carefully while holding the connector portion.
NOTE:
- Mark all wiring and hoses to avoid misconnection.
- Turn the crankshaft pulley so that the No.1 piston is at top dead center.
1. Remove the engine cover(A).

2. Recover refrigerant by opening the high & low pressure pipe caps and connecting the refrigerant station .
3. Disconnect the negative terminal from the battery and remove the battery(A).
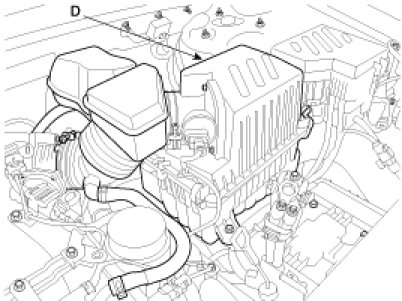
4. Remove the intake air hose and air cleaner assembly.
(1) Disconnect the MAF connector(A).
(2) Disconnect the breather hose(B) from air cleaner hose.
(3) Remove the intake air hose and air cleaner assembly(C).
(4) Disconnect the PCM connectors(D).
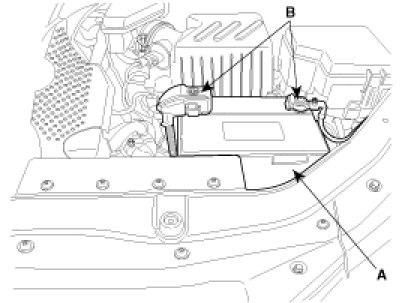
5. Remove the battery tray(A) while recovering refrigerant.

6. Disconnect the high and low pressure pipes from the radiator or the compressor.
7. Disconnect the engine wiring harness connectors.
(1) Disconnect RH oxygen sensor connector(A).

(2) Disconnect power steering oil pressure sensor connector. .
(3) Disconnect RH injector connector(A) and ignition coil connector(B).
(4) Disconnect OCV connector(A) and knock sensor connector(B).

(5) Disconnect LH front oxygen sensor connector(A).

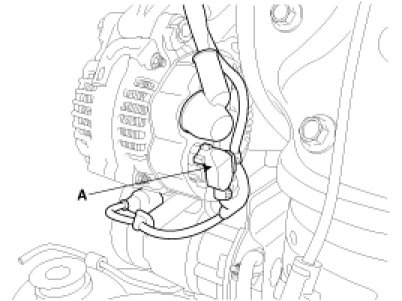
(6) Disconnect alternator connector(A).
(7) Disconnect LH ignition coil connector(A), injector connector(B), condenser connector(C) and ground(D), and remove wiring harness protector(E).

(8) Disconnect LH CMPS(A) and oil pressure switch connector(B).

(9) Disconnect PCSV connector(A) and MAP sensor connector(B).

(10) Disconnect RH CMPS(A) and OTS connector(B).
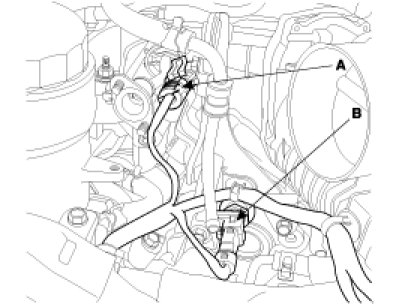
(11) Disconnect ETC connector(A) and knock sensor connector(B).

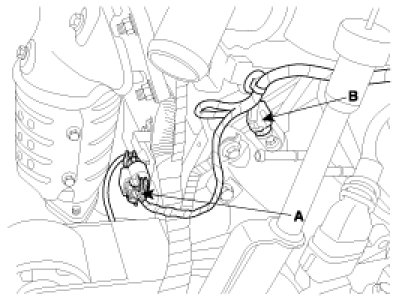
(12) Disconnect WTS connector(A).

(13) Disconnect LH rear oxygen sensor connector(A) and CPS connector(B).
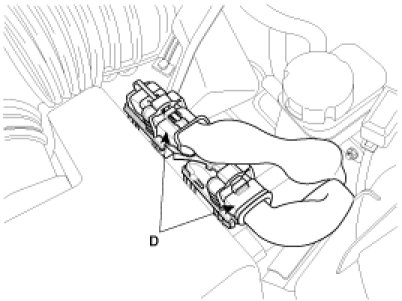
8. Disconnect the transaxle wire harness connector and remove the transaxle control cable.
9. Disconnect the fuel hose tube(A).

10. Remove the under cover(A).

11. Drain engine oil.
12. Drain coolant by loosening the plug(A).

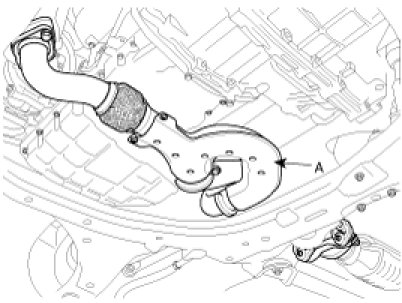
13. Remove the front exhaust muffler(A).
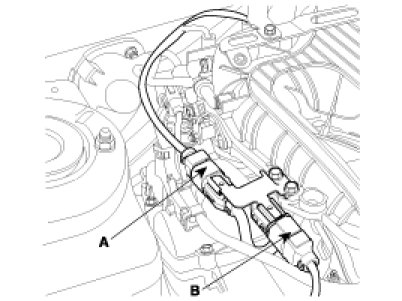
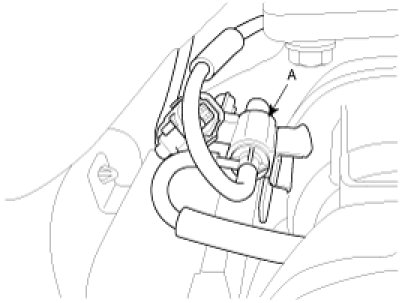
14. Disconnect the ECM(Electronic Controlled Mounting) solenoid connector(A).
15. Remove the steering column bolt. .
16. Remove the engine transaxle assembly under mounting bolts. .
17. Remove the front wheels and tires. .
18. Remove the stabilizer bar link nuts, the lower arm mounting bolts and tie rod end mounting nuts. .
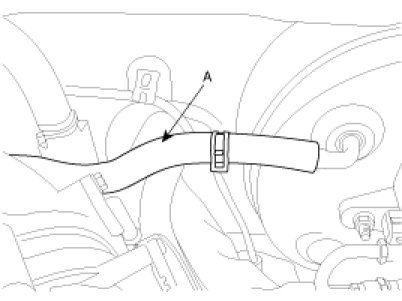
19. Remove heater hose(A).
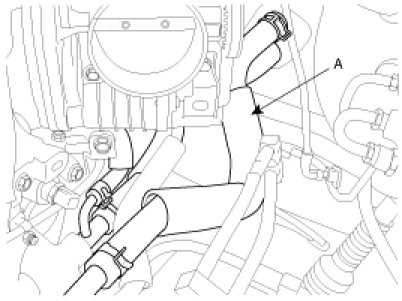
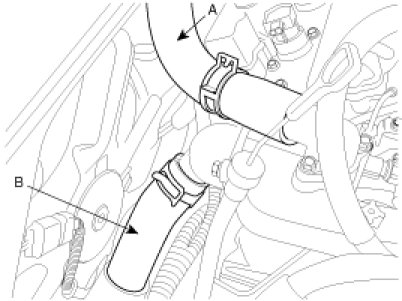
20. Remove the upper radiator hose(A) and the lower radiator hoses(B).
21. Disconnect the brake vacuum hose(A).
22. Disconnect the automatic transaxle fluid cooler hoses. .
23. After draining or gathering power steering fluid, disconnect the power steering feeding and return hoses. .
24. Remove the subframe mounting bolts.

25. Install a jack for supporting the engine and transaxle assembly with the subframe.
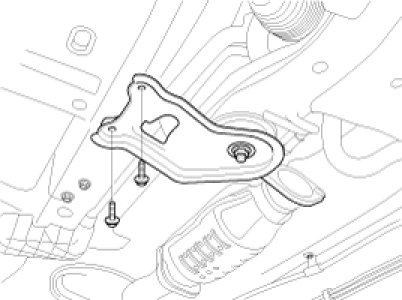
26. Remove the engine mounting bracket(A).

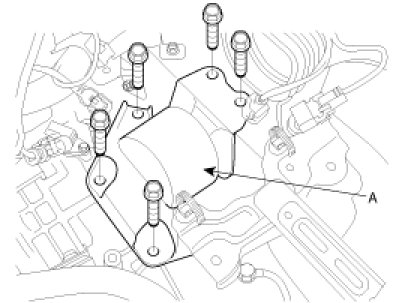
27. Remove the transaxle mounting bracket(A).
NOTE:
When the transaxle mounting bracket is removed, the two mounting nuts should be removed from the front left wheel housing.
28. Jack up the vehicle body in order to remove the engine and transaxle assembly.
Installation
Installation is in the reverse order of removal.
Perform the following :
- Adjust the shift cable.
- Refill the engine with engine oil.
- Refill the transaxle with fluid.
- Refill the radiator with engine coolant.
- Bleed air from the cooling system with the heater valve open.
- Clean the battery posts and cable terminals with sandpaper assemble them, then apply grease to prevent corrosion.
- Inspect for fuel leakage.
After assembling the fuel line, turn on the ignition switch (do not operate the starter) so that the fuel pump runs for approximately two seconds and fuel line pressurizes.
Repeat this operation two or three times, then check for fuel leakage at any point in the fuel line.